iSalvor provides a safe and solid way to bypass activation lock and turn off “Find My Device”. But the technology is based on Jailbreak. If your device is not jailbroken, follow this tutorial and use Unc0ver to easily jailbreak your device, so that you can proceed in the iSalvor software.

The whole process can be broken down into 3 parts: Install Unc0ver, start jailbreaking, and install OpenSSH. Usually it takes around 5 minutes and requires no additional device other than the one you want to jailbreak.
Step 1: Tips and Installing Unc0ver
Before starting to jailbreak with Unc0ver, there are a few things you need to know about:
1. Unc0ver needs to be installed on your iOS device, so your Apple ID might be required during the installation process.
2. After jailbreaking, the device will be restored to its normal status once you reboot it.
To jailbreak your device with Unc0ver, the first step is to download and install the tool. It’s pretty simple and straight forward. Here is how:
Install Unco0ver
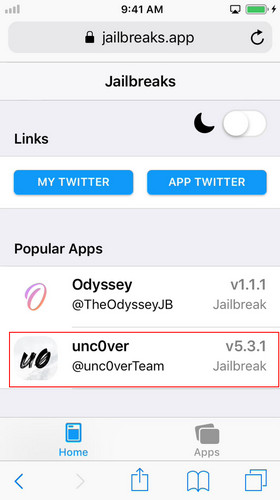
visit jailbreaks.app with the device that you want to jailbreak, then find “Unc0ver”. Tap it and install. If there’s a pop-up asking you whether you allow the site to install an app, tap “Install”.
If There is an “Untrusted Enterprise Developer” Error
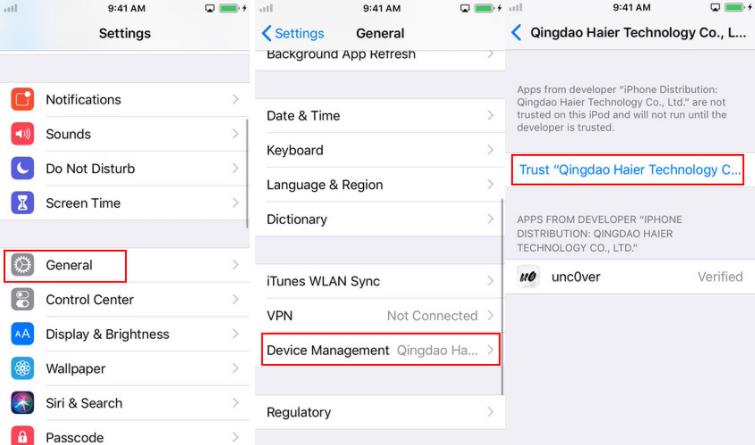
If you see an “Untrusted Enterprise Developer” error during the downloading and installing process, just go to “Settings > General > Device Management” and trust the developer. After that, you should be able to download, install and launch the app successfully.
Step 2: Start Jailbreaking
Once the app is properly installed, launch it and make sure the settings are set as your own preference. If you don’t know how to tweak the settings, you can refer to the image below. Finally, tap “Jailbreak” to start.
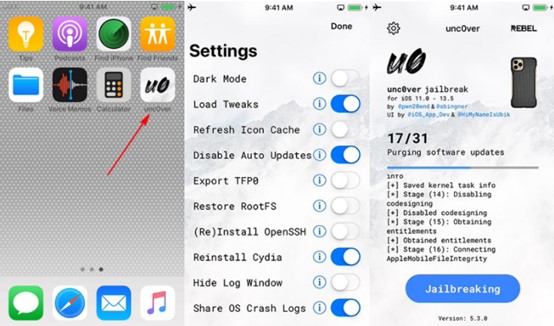
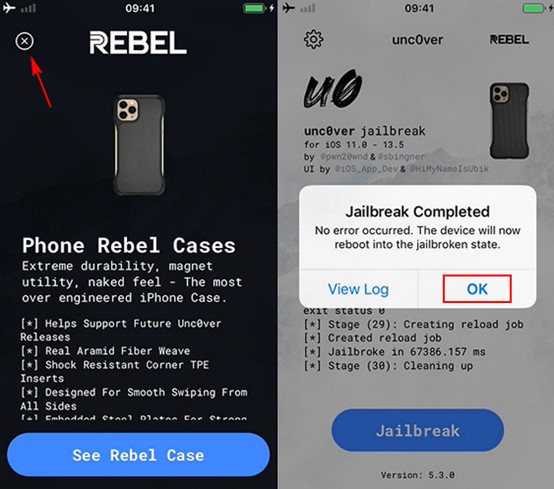
When the jailbreaking is done, close the rebel case ad, and tap “OK” on the “Jailbreak Completed” pop-up.
Step 3: Install OpenSSH
The final step is to install Open SSH from Cydia. Cydia will appear on your home screen automatically once you have done jailbreaking. To install OpenSSH, firstly open Cydia. Then search for “OpenSSH” and tap “Install”.
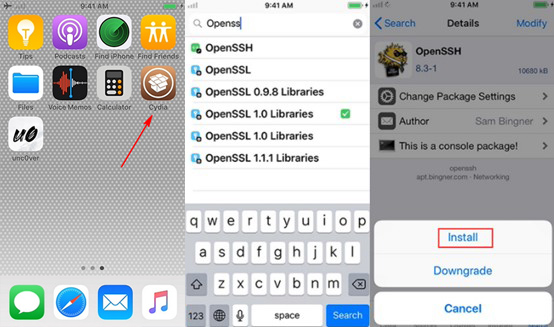
Then Cydia will start downloading and installing OpenSSH. You will see a running screen as below. Once it’s done, tap “Return to Cydia”.
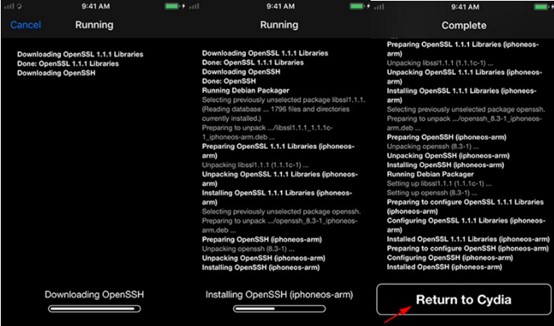
If everything goes well, when you return to Cydia, you should be able to see that OpenSSH is successfully installed on your device with a description of “secure remote access between machines.”
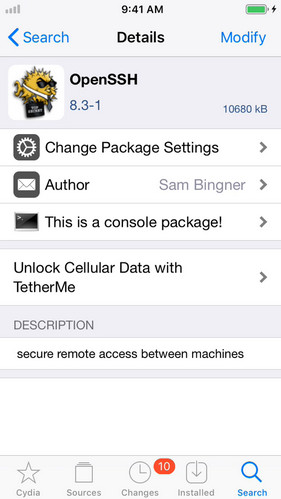
Note: If OpenSSH fails to download or install, check the network of your device or close Cydia and try again.
Now you are good to go back to iSalvor and proceed!


