It is common that after using your Android phone for a few months, you might witness slow performance with almost fully occupied storage space. The months of use have made your phone filled with a lot of apps and other data that are now causing storage or performance troubles. Once it happens, you might quickly look for the trash can to free up space just like you get with Windows or Mac.
However, emptying Android trash does not work like emptying Windows/Mac trash. You have to do some extra steps to delete all the unwanted data. Therefore, this article will talk deeply about how to empty trash on Android effectively.
- Part 1. Where Is the Trash Can on My Android
- Part 2. How to Empty Trash in Apps on Android
- Part 3. How to Empty Trash in Google on Android
- Part 4. Other Methods to Empty Trash Files on Android
- Bonus: How to Recover Deleted Files on Android (No Backup)
Part 1. Where Is the Trash Can on My Android
Unfortunately, there is no trash can on an Android device where all the deleted data from multiple apps is stored temporarily. Most of the Android apps come with their own trash cans. Apps like File Manager, Google Photos, Google Drive, Gallery, and similar others have their own dedicated trash cans. So, you have to empty the trash of different apps one by one. Let's now discuss how to delete trash on Android for different apps.
Part 2. How to Empty Trash in Apps on Android
The apps such as Gallery and Notes have a separate Trash folder where the recently deleted files are temporarily stored, usually for 30 days period. But you can easily empty those trash before the 30-day auto-deletion period.
Follow the below steps to empty trash from the Gallery app:
Open the Gallery app on your Android phone.
Go to the Albums tab.
Scroll down and tap Trash bin.
Tap the Empty button and then re-confirm your choice.
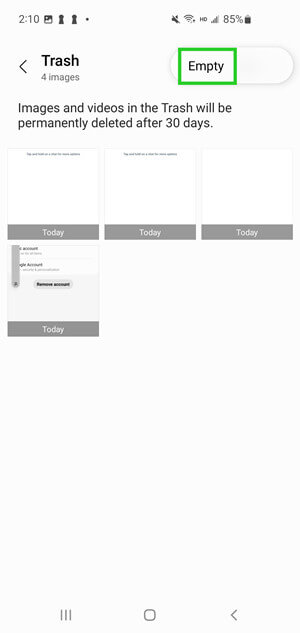
Once done, all the recently deleted photos and videos from Gallery will be deleted permanently.
Now follow the below steps to empty trash from the Notes app:
Open the Notes app on your Android phone.
Tap the 3-dots icon from the top right corner and then tap Trash.
Tap the Empty option and then re-confirm your choice.
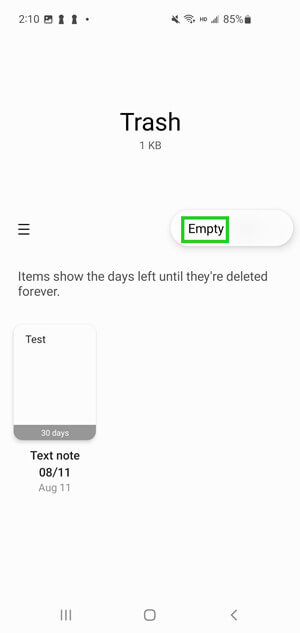
This way, the trash can of Notes will be emptied. The above steps might vary depending on your Android phone model, but should be following the above general steps pattern.
Part 3. How to Empty Trash in Google on Android
Google Photos and Google Drive both have a trash folder. So, you can empty their trash to free up storage in both of them.
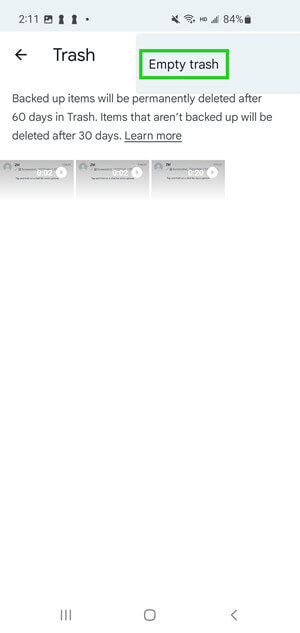
Follow the below steps to empty trash on Google Photos:
Open the Google Photos app on your Android phone.
Tap Library from the bottom menu bar and then tap Trash.
Tap the 3-dots icon located at the top right side and then tap Empty Trash.
Follow the below steps to empty trash on Google Drive:
Open the Google Drive app on your Android phone.
Tap the 3-verticle lines icon located at the top left side and then tap Trash.
Tap the 3-dots icon located at the top right side and then tap Empty Trash.
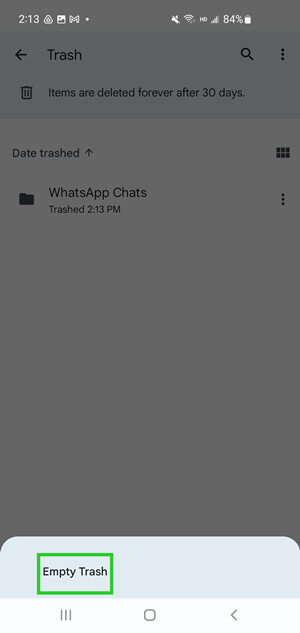
This way, you can easily empty trash on both Google Photos and Google Drive.
Part 4. Other Methods to Empty Trash Files on Android
Other than emptying the trash can of apps, there are also other methods to empty trash files on Android.
1. Clear Cache
You can clear the cache of a specific app or clear all cache on your Android phone. Follow the below steps to clear the cache of an app:
Open the Settings app on your Android phone and tap on the Apps option.
Select one of the apps from the list.
Tap Storage and then tap Clear Cache.
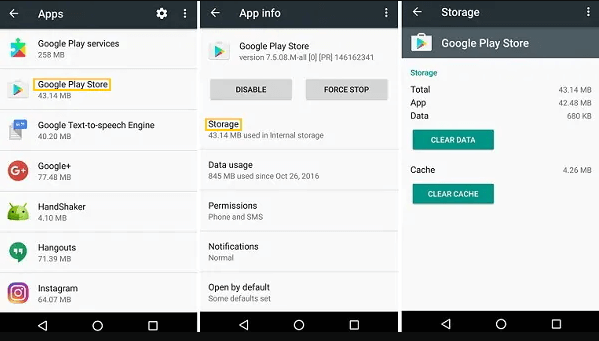
This way, the cache of the app will be deleted. However, if you want to clear all cache at once, then follow the below steps:
Open the Settings app on your Android phone and tap on the Storage option.
Tap Cache data and then clear all cached data.
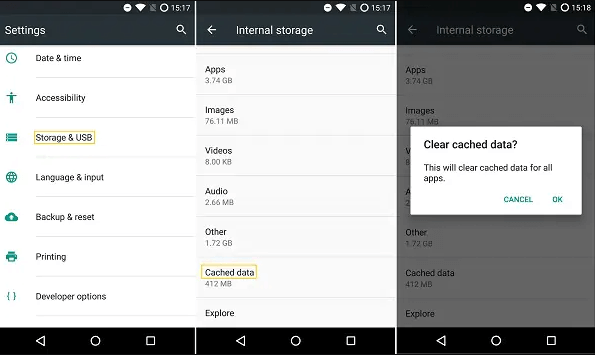
This way, all the cached data in your Android phone will be deleted.
2. Delete Downloaded Files
Most of the time we keep downloading files from the internet, but never delete the unwanted ones. So, this makes the size of the Downloads folder massive. Therefore, you should visit the Downloads folder on your Android phone and delete some files that you no longer need. Follow the below steps to learn how to empty trash on Samsung phone by deleting the downloaded files:
Go to the File Explorer app on your Android phone.
Tap the Downloads folder.
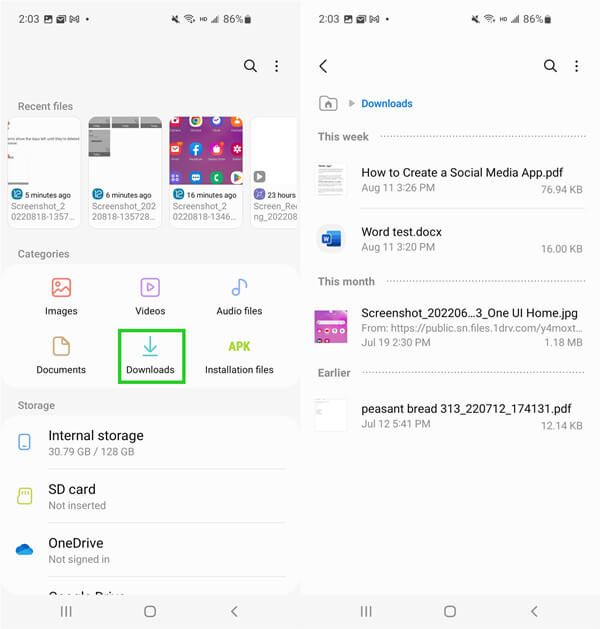
Select the files you no longer need and then tap the Delete button.
This way, all the selected files will be deleted.
3. Use Smart Storage Manager
Most Android phones have Smart Storage Manager to help you optimize your phone storage. So, follow the below steps to use Smart Storage Manager to empty trash:
Open the Settings app on your Android phone and tap on the Storage option.
From there, tap the Free up storage option or your phone's model-specific Smart Storage Manager.
Follow the on-screen instructions to clear duplicate or other trash data from your phone.
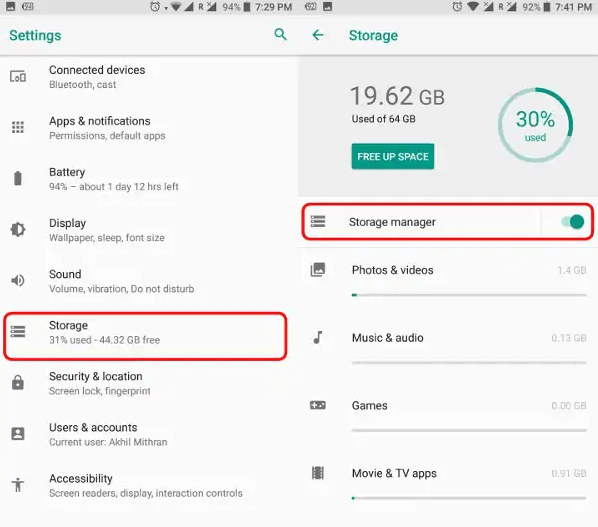
This way, you can delete unwanted and duplicate data within minutes.
Bonus: How to Recover Deleted Files on Android (No Backup)
Until now we have discussed how to empty recycle bin on Android phone and free up storage space, but what if you have deleted some files accidentally and now want to recover them? This is where WooTechy iSeeker for Android comes into action.
iSeeker for Android is an all-in-one Android data recovery tool that conducts a deep scan of your phone's storage and gets back all the lost/deleted data. It can recover photos, videos, audio, document, and many other data types. You can also recover selective data from Google backup. Moreover, it offers an intuitive user interface that makes it easy for anyone to use the tool.
Key Features of iSeeker for Android

100.000+
Downloads
- It can recover data from many data loss scenarios, such as factory reset, accidental deletion, system crash, virus attack, etc.
- It provides a free trial to all users.
- It supports 6000+ Android devices of different brands and all Android OS versions, including the Android 12.
- It does not require root or backup.
- It provides a free trial and you can scan and preview lost data for free.
Download Now
Secure Download
Download Now
Secure Download
Follow the below steps to use iSeeker for Android to recover lost data on Android:
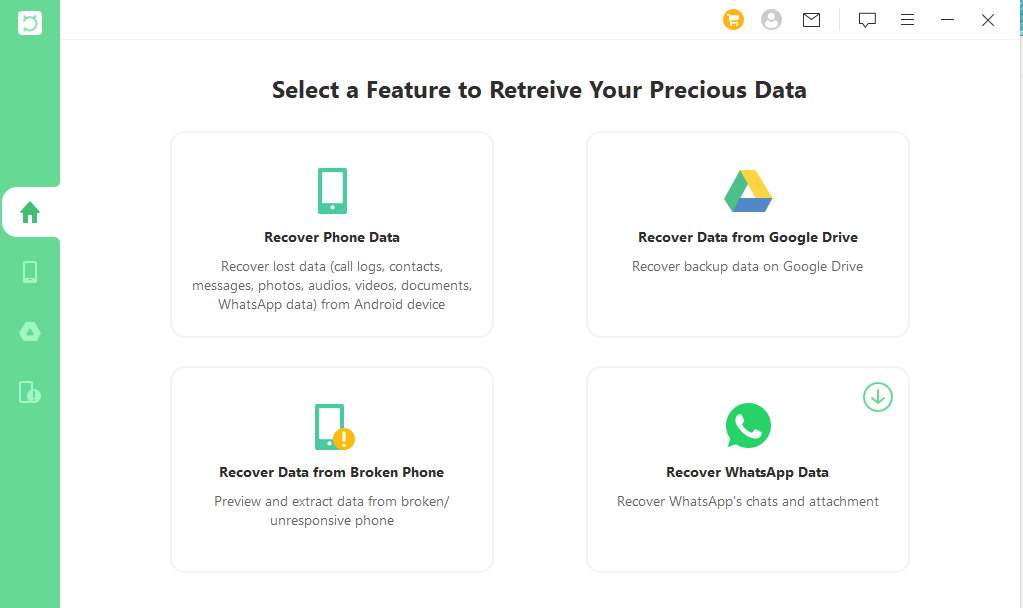
Step 1. Download and launch iSeeker Android on your computer and also connect your phone to the computer. Afterward, select Recover Phone Data.
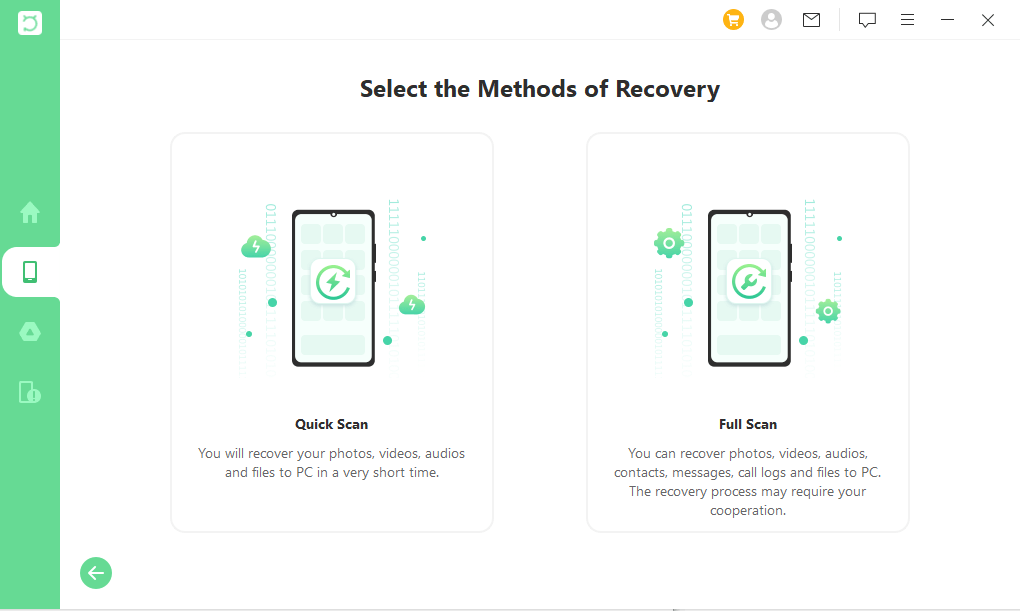
Step 2. Choose Quick Scan or Full Scan according to your need.
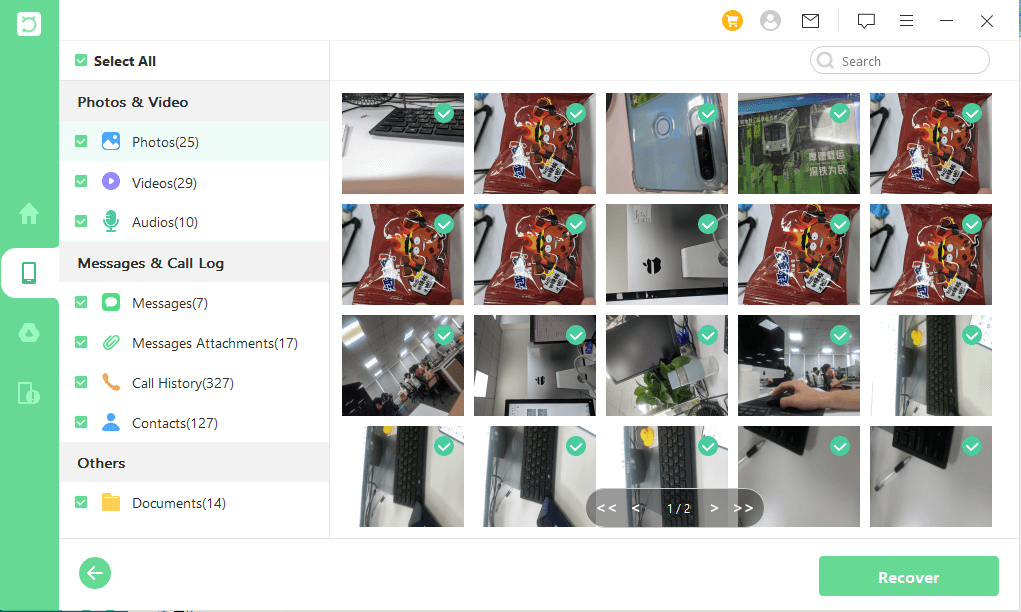
Step 3. Once the scan is completed, preview and select the data you want to recover and click Recover.
Conclusion
No matter how large your phone's storage space is, the growing size of apps and the continuous downloading of data from the internet, phone storage space always seems less. So, follow the instructions provided in this article on how to empty trash on Android effectively. It will take some time to empty trash because different apps have their own dedicated trash, but you will eventually restore a lot of storage space.
However, doing so might also result in the deletion of some important files. For that, the powerful, click-based iSeeker for Android data recovery tool can serve the job effectively.
Download Now
Secure Download
Download Now
Secure Download


