Smartphones have brought a lot of convenience into our lives. Today we see something, take out our phone, and capture that moment with just one click. We have tons of memorable photos in our smartphone's local storage that we never intend to lose. Owing to that, many users even backup their photos to Google Photos to access them anytime, anywhere.
So, if you have somehow lost photos from your smartphone due to accidental deletion, sudden factory reset, system crash, or other complications, then there are still strong chances you can restore them from Google Photos. This is exactly what this article is going to discuss. Here we will conduct a thorough discussion on how to restore photos from Google Photos to Gallery.
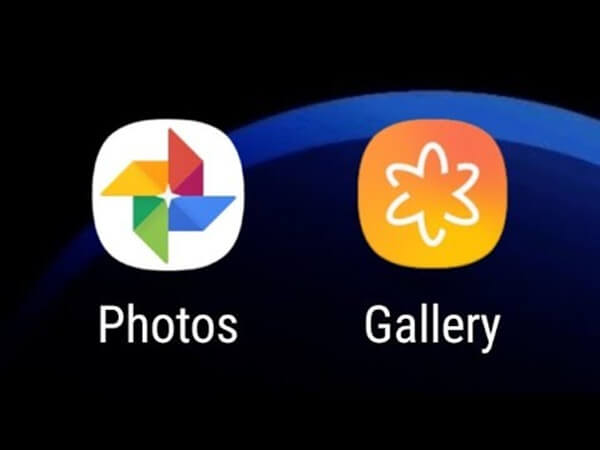
- Part 1. Can I Restore Pictures from Google Photos
- Part 2. How to Restore Photos from Google Photos to Gallery
- Part 3. How to Recover Permanently Deleted Photos Directly from Gallery
- Part 4. Google Photos Backup and Sync
Part 1. Can I Restore Pictures from Google Photos
Yes, even if you have deleted photos from your Gallery, you can still find the backed-up photos from Google Photos. Google Photos stores photos in the cloud, which is separate from your phone's local storage. So, you can restore photos from Google Photos provided that you have also made the photos backup in Google Photos recently.
Part 2. How to Restore Photos from Google Photos to Gallery
Google Photos allows you to view and save photos to your phone with just a few clicks. Follow the below steps to learn how to restore images from Google Photos to Gallery:
Open Google Photos app on your smartphone and sign in to your Google account (if required).
Tap Photos from the bottom menu bar.
Select the photos you want to restore.
Tap the 3-dots icon from the top right corner and then tap Save to device.
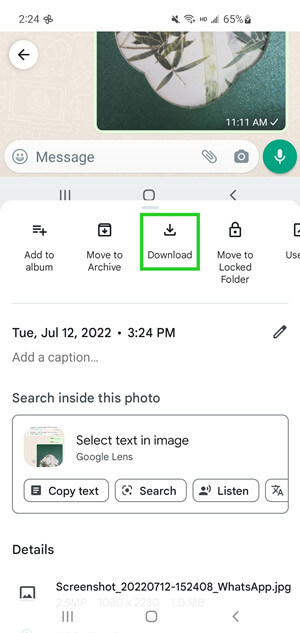
This way, the selected photos will restore back to your phone's Gallery.
If you can't find the photos in albums on Google Photos, then you might have deleted the photos or they are automatically sent to the Trash folder due to the "back up & sync" feature of Google Photos. So, you can look for the deleted photos in the Trash folder in Google Photos, restore them to the albums, and then download them to your device. Follow the below steps to restore deleted photos from the Trash folder on Google Photos:
Open Google Photos app on your smartphone.
Tap Library from the bottom menu bar and then tap Trash.
Select the photos you want to restore and then tap Restore.
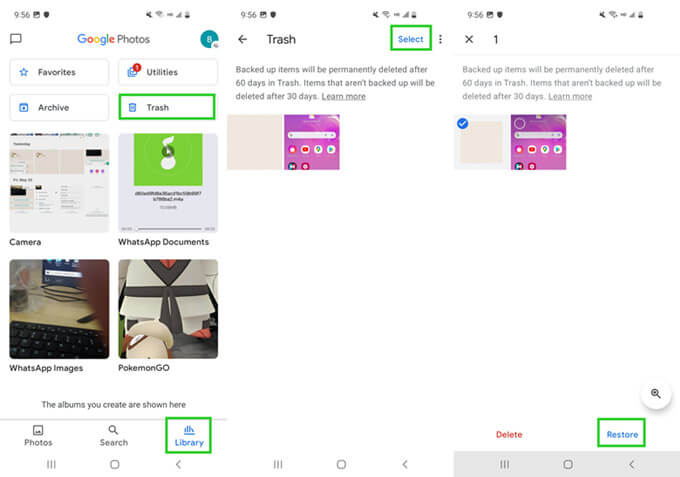
Now tap Photos from the bottom menu bar.
Select the photos you want to restore.
Tap the 3-dots icon from the top right corner and then tap Save to device.
This way, you can easily restore photos from Trash back to your phone's Gallery.
Part 3. How to Recover Permanently Deleted Photos Directly from Gallery
The above method to restore photos from Google Photos only works if you have made the backup beforehand. However, if you haven't saved photos to Google Photos or you are unable to find deleted photos in Google Photos, then stay strong because you can still recover photos directly from Gallery using WooTechy iSeeker for Android.
WooTechy iSeeker for Android is a powerful Android data recovery tool that can recover permanently deleted photos directly from Gallery without rooting or the need for a backup file. It starts with a deep scan of the phone's internal storage and then presents all the recoverable photos for preview and selective recovery. Overall, it is a complete and intelligent Android data recovery tool that offers the highest data recovery success rate in the industry.
What Makes iSeeker Stand Out

100.000+
Downloads
- Other than recovering photos, it can also recover videos, audio, messages, call logs, documents, WhatsApp data, and many other data types.
- It conducts deep scans to recover hardest-to-find photos from your internal storage.
- It supports 6000+ Android phones/tablets.
- It allows a preview of photos before restoring them.
- It can also recover selective data from Google Drive.
Download Now
Secure Download
Download Now
Secure Download
Follow the below steps to use WooTechy iSeeker for Android to recover permanently deleted photos directly from the internal storage of your Android phone:
Step 1. Download and launch iSeeker for Android on your PC and click Recover Phone Data from the home screen. Connect your phone/tablet with the computer through a USB cable and click Start.
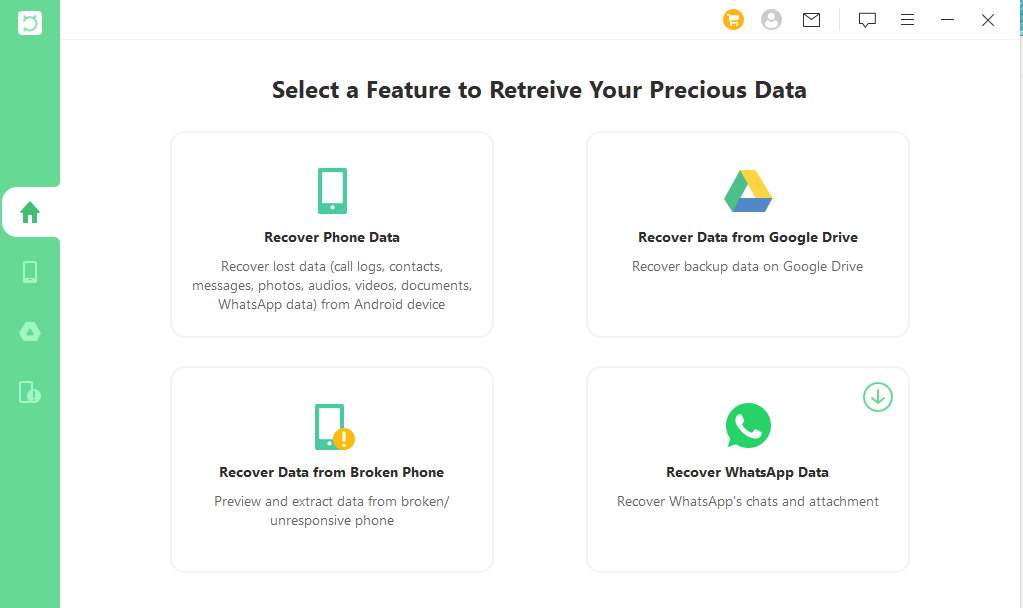
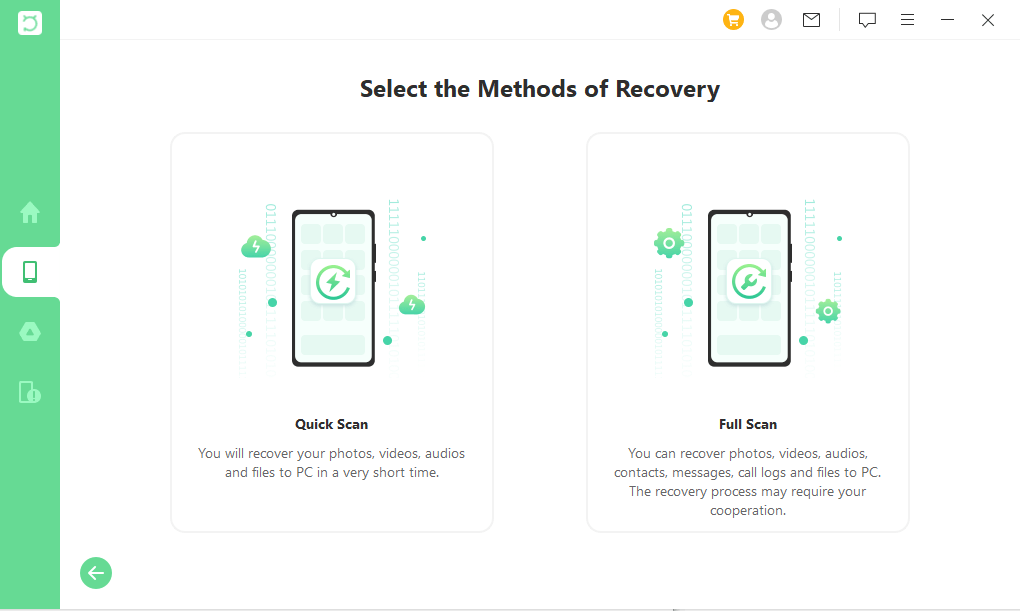
Step 2. Select between Quick Scan and Full Scan. Since you are intending to recover permanently deleted photos, so it's recommended that you choose the Full Scan option.
Step 3. Wait till the tool conducts a deep scan of your phone's internal storage. Afterward, preview all the recoverable photos and select the ones you want to restore. Once done, click Recover.
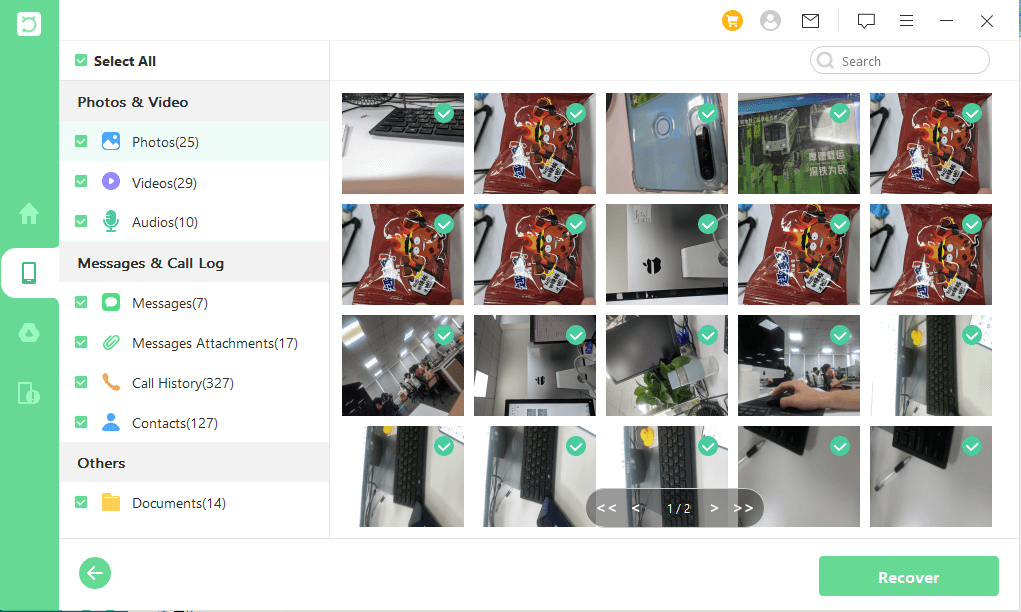
That's it! So, just the 4 simple steps of iSeeker for Android and you can access the permanently deleted photos back in no time.
Part 4. Google Photos Backup and Sync
You can turn on the "Back up & sync" feature of Google Photos to automatically back up your photos to Google Photos. This way, you can ensure that a backup is made continuously and you can even access those photos from other devices as well. Follow the below steps to turn on back up & sync feature:
Open Google Photos app on your smartphone and sign in to your Google account (if required).
Tap on your profile photo from the top right corner.
Tap Photos settings and then tap Back up & sync.
Toggle the button to ON.
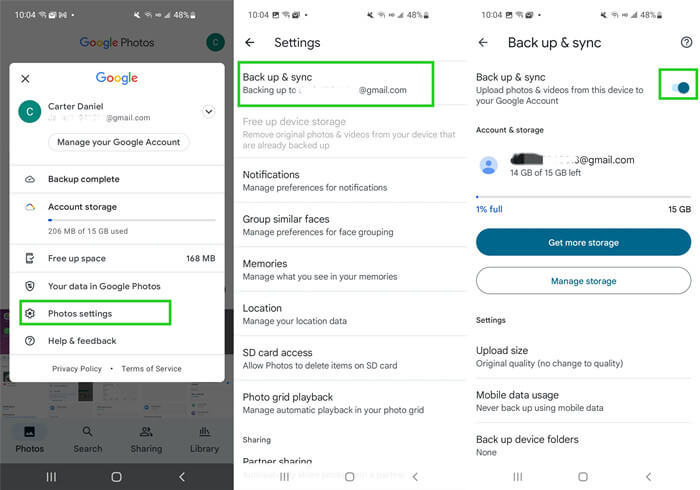
This way, the backup and sync feature is enabled now and your photos will automatically get
Conclusion
Photos are one of the most vital data assets in our smartphones. Therefore, making a backup of photos is highly recommended. Above we have discussed how you can restore photos from Google Photos to Gallery.
However, if you haven't made a backup of photos in Google Photos or you want a direct recovery solution, then WooTechy iSeeker for Android is the perfect tool for you. Its click-based interface, powerful scanning, and instant recovery make it a reliable tool to restore photos.
Download Now
Secure Download
Download Now
Secure Download


