If you are an iPhone user, then there are chances that you have been through certain limitations because of your Country, Region, or location. These limitations vary from iOS features to application availability and other features. You will no longer need to live with these restrictions as you can learn how to change Region, Country, or location on iPhone using these 5 ways.
- Part 1. How to Change Region on iPhone from Apple ID Settings
- Part 2. How to Change Country Region on iPhone from Country/Region Settings
- Part 3. How to Change Country on iPhone via iTunes on Computer
- Part 4. How to Change Region on iPhone by Creating New Apple ID
- Part 5. How to Change Country/Region on iPhone When Using Location-based Apps
Part 1. How to Change Region on iPhone from Apple ID Settings
The first method you may try is going into the Apple ID settings inside the Appstore menu. If you have subscribed to any services from Apple, like Apple Music or iTunes March, it is better to unsubscribe. Once unsubscribed, you may proceed with the steps below:
Step 1. Open Settings on your iPhone and tap on your Apple ID.
Step 2. Now go to Media & Purchases > View Account.
Step 3. Now the settings on your Apple ID will appear in front of you, and you need to go for Country/Region.
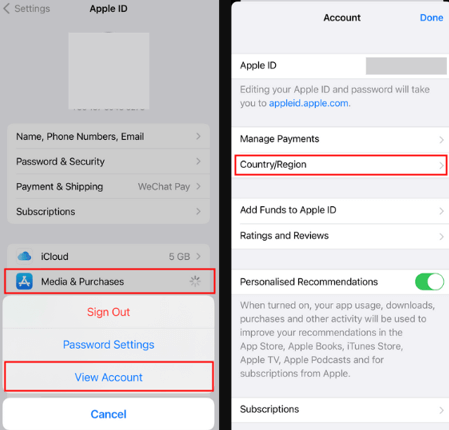
Step 4. Select any country or region from the list available. You can scroll or search.
Step 5. Confirm your selection by agreeing to the terms.
Step 6. Finish things by adding your payment information, and you will complete the process.
Part 2. How to Change Country Region on iPhone from Country/Region Settings
The next way to change the country region on your iPhone is by going into the iPhone settings. It is the official way to change the Region and Country on your iOS device. This method changes time and date settings, monetary format, and other settings according to the selected Country and location standards.
It is also the easiest one of all, with no complex steps. Below are the steps that you will follow to change country/region settings:
Step 1. Open Settings on your iPhone and scroll down to the General section.
Step 2. In the general section, you will see Language & Region option. You need to tap on that.
Step 3. In the second section of the next screen, you will find all the settings regarding your country region. Tap on Region.
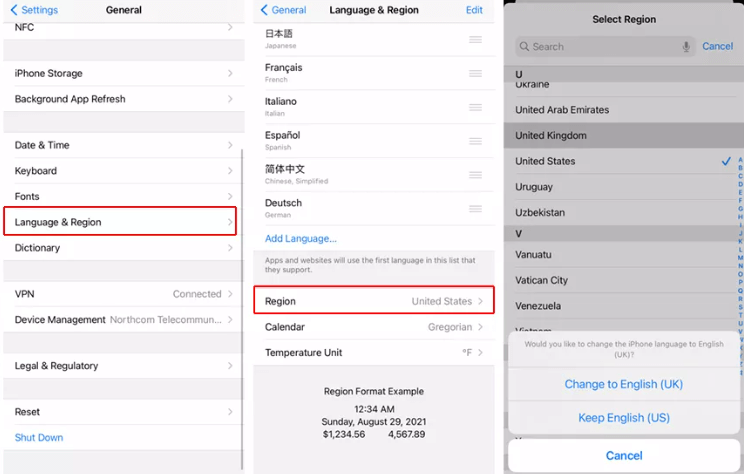
Step 4. You will see the list of all available countries/regions. You also have the search option. So, go for the one that you want and save.
Part 3. How to Change Country on iPhone via iTunes on Computer
Another ingenious way to change Country on iPhone is using a computer for help. You can use any macOS or windows PC for the job, and the only requirement is having iTunes installed. Once you download and install iTunes on your PC for free, you can follow the steps below to change the Country on the iPhone:
Step 1. Open iTunes and go to the Account settings in the software.
Step 2. Authenticate with your Apple ID credentials.
Step 3. Now you will go to the account information where you need to click on Change Country or Region.
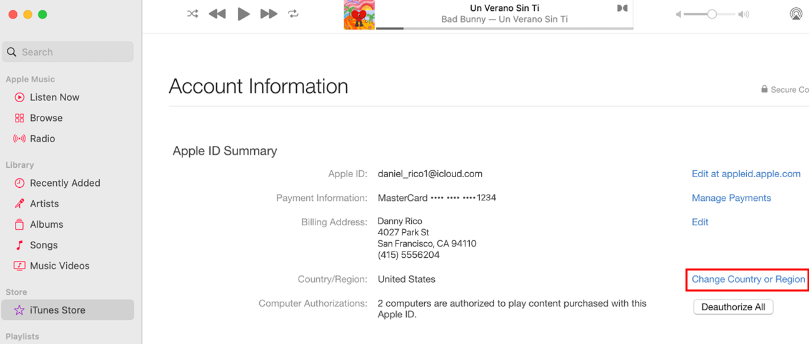
Step 4. Select the new Country of your choice and agree to the terms and conditions.
You will need to enter your new payment information and the new billing address for that location, and you will be all set.
Part 4. How to Change Region on iPhone by Creating New Apple ID
Another way that may not be that smart, but it can be easy and effective if you want to keep things the same with your older accounts. Creating a new Apple ID can solve most problems, and you may not need a computer.
As you create a new ID, all the information on this ID will be different, so you can easily set the desired location. Here are different ways to create your Apple ID:
Creating Apple ID on iPhone
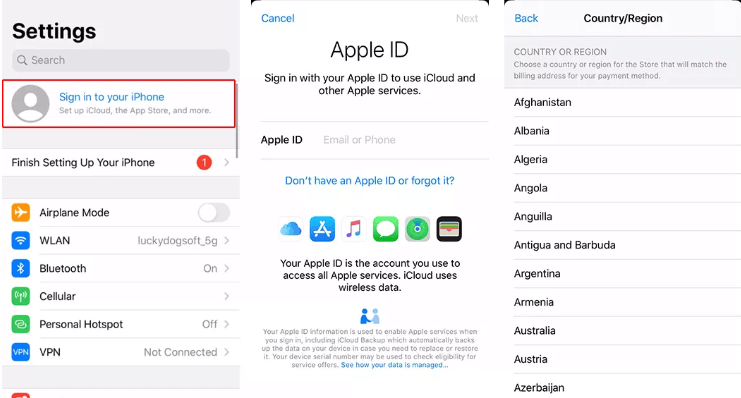
Step 1. Open the Appstore on your iPhone and click on the Sign-in button. Make sure you have signed out of the previous account on your device through the settings.
Step 2. Go through the on-screen steps, including your email address and password.
Step 3. Select the device Region and provide all the payment information accordingly.
Step 4. Lastly, you need to confirm the phone number and verify your identity over your email.
With those steps, you will receive a confirmation email that you have successfully created your new Apple ID.
Creating Apple ID on a PC
You can also use your Windows PC or mac to create a new Apple ID. The best way is to go to the browser and open Apple ID Website. From there, you can follow these steps:
Step 1. Click on sign-in and then on create a new ID.
Step 2. Now you must go through the on-screen instructions and provide all the required information.
Step 3. Select the desired Region and add payment information with the billing address.
Step 4. Check the verification email from Apple, and you will be done with the process.
Part 5. How to Change Country/Region on iPhone When Using Location-based Apps
If you are using some location-based application, then changing the Apple ID location or Region may not help. In that case, your device will use the precise location feature that gets information from real-time user data. In this scenario, you will need a location spoofer tool, and the best choice is WooTechy iMoveGo.
Key Features of iMoveGo

75.000.000+
Downloads
- It supports various iOS and Android tablets and smartphones.
- Available for all popular computer operating systems.
- You can work with location-based applications without jailbreaking your device.
- Secure and private experience from online tracking.
-
Download Now
Secure Download
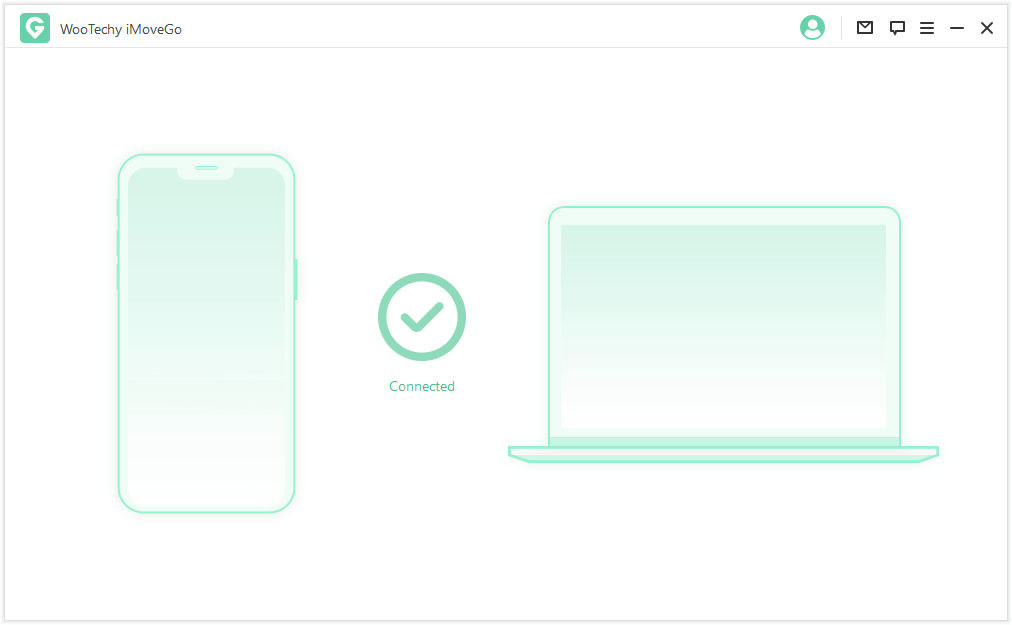
Step 1. Open iMoveGo on your PC and then connect your smartphone to the computer. Allow access by clicking on Trust if asked.
Step 2. Now the map will load, and you need to go for the Teleport Mode from the available modes.
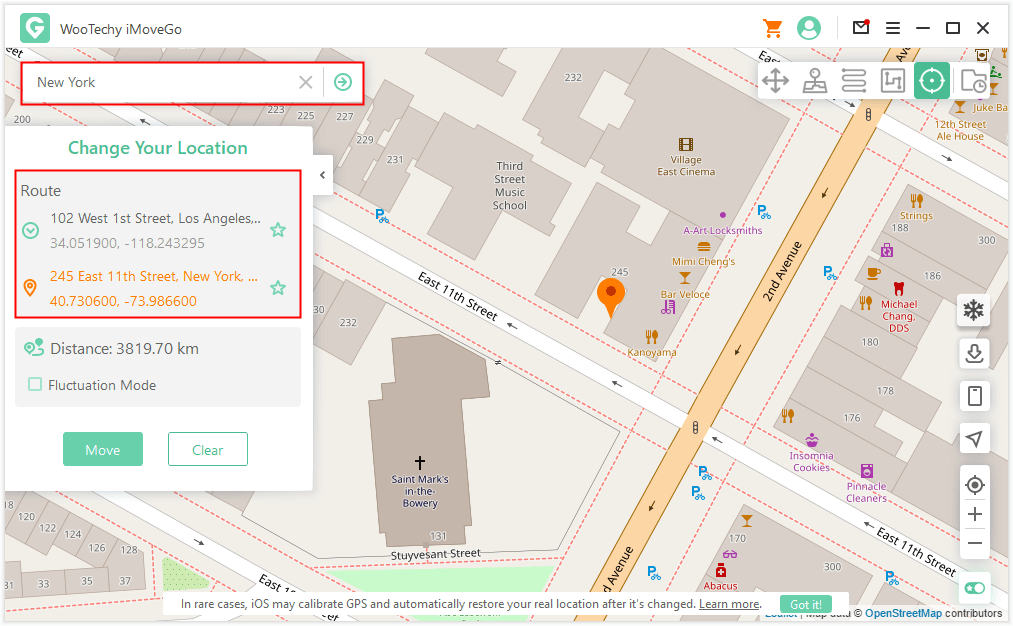
Step 3. Search for your desired location or manually add a pin on the map. Once click Move, you can easily change region and country on your iPhone.
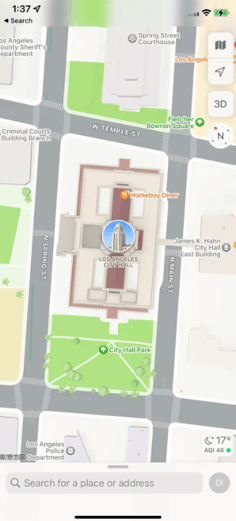
Now the location on your phone will change, and whatever location-based app or service you use will show that spoofed fake location..
Conclusion
With all these methods on how to change Region on iPhone, you can unlock your iPhone's Region and location-specific features. It helps a lot when you get an application to work on your iPhone when it is restricted from the Country or Region, and the same goes true with the restricted features. Wootechy iMoveGo will always make location change easy and safe.
Download Now
Secure Download


