There are many reasons Apple iPad users fancy the device. Its effortless combination with iTunes is one of its irresistible features. With their combination, you can backup your iPad or access your other backups. iTunes can also be used to transfer a playlist to your iPad. Being able to connect iPad to iTunes can grant you access to the Apple recovery mode that can be used to update or restore your iPadOS. But if the iPad won't connect to iTunes, these exceptional features are unfeasible. To rectify this mishap, this article will take you through the causes and eight detailed methods to apply whenever the iPad will not connect to iTunes.
- Part 1. Why Is Your iPad Not Connecting to iTunes?
- Part 2. 8 Solutions to Fix iPad That Won't Connect to iTunes
- 1. Try These Basic Steps
- 2. Check iTunes System Status
- 3. Make Sure iPad Is Connected to the Internet
- 4. Restart Your iPad
- 5. Check iTunes Software Update
- 6. Check Date & Time on Both iPad and Computer
- 7. Update Apple Mobile Device USB Driver
- 8. Fix iPad Issues Leading to Connection Failure Without Data Loss
Part 1. Why Is Your iPad Not Connecting to iTunes?
Since two devices are used when connecting iPad with iTunes, one of the two devices can be responsible for why iPad will not connect to iTunes. (And if there is a third device for the network, then it can also be checked.) The common errors found on the iPad that prevents it from connecting to iTunes are its network connectivity or an outdated iPadOS.
The second device that may be responsible for why iPad will not connect to iTunes is the computer iTunes is running on. Whether it is a Mac or Windows PC, its system may be faulty, or its iTunes may also be out of date.
Apart from these two devices being responsible for why iPad will not connect to iTunes, the cable used to connect these two devices is another reason iPad won't connect to iTunes. Above all, if the iPad does not have an internet connection iPad will not connect to iTunes.
Part 2. 8 Solutions to Fix iPad That Won't Connect to iTunes
After identifying the possible causes, the next thing to do is crosscheck which device is faulty. Or is it the cable? After identifying the cause, below are eight solutions that can help you fix the issue of an iPad that will not connect to iTunes.
1. Try These Basic Steps
It is always best to start with the easier steps to check for the faulty device and fix the issue. Hence try the basic steps like unlocking your iPad, trying other Apple USB Cable, or putting on Trust for your iPad on the computer. The first two suggestions are simplistic. If your iPad has a passcode, input the passcode and unlock it. For the second suggestion, you can check the connection between your iPad and the computer by using the lightning connection cable of your friends. Lastly, the step to put on Trust for your iPad is shown below.
Connect your iPad to your computer or another device.
If your iPad has a passcode, input the passcode to unlock your iPad.
If you are using iTunes, click Continue or select your device in Finder, then click Trust.
This process will allow your computer to access information on your iPad.
2. Check iTunes System Status
Regardless of the issue you are facing while using your iOS devices and services; you can monitor it via the system status. You can check via the Apple's System Status website if iTunes, iCloud, or Apple store is working properly.
3. Make Sure iPad Is Connected to the Internet
One of the causes of the iPad not connecting to iTunes is the lack of internet connection on the iPad. To rectify this issue, check with your internet provider. If you are using a Wi-Fi connection, ensure your router is well configured, and you are well within the Wi-Fi range. But if you are using your mobile data, you can turn it off and on again to ensure that it is appropriately set.
4. Restart Your iPad
If you have identified that your computer and its iTunes functions well, then you can rectify a possible software glitch on your iPad. To do so, you can restart your iPad. By restarting it, the RAM storage is cleared and your iPad is refreshed. It also terminates intruding apps that may be causing iPad not to connect with iTunes.
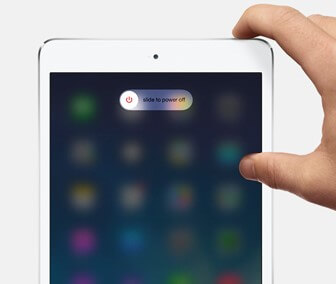
For iPad with Home button: Hold down the Top button until the power off slider is shown, then drag the slider to power your iPad off. After 30 seconds, press the same button to power it on.
For iPads with no Home button: Hold down either volume button and the Top button until the power off slider is presented, then drag the slider to turn your iPad off. After 30 seconds, press the top button to turn it on.
5. Check iTunes Software Update
Another reason iPad will not connect with iTunes is that the iTunes app is out of date. In such a case, the steps below will show you how to update your iTunes software.
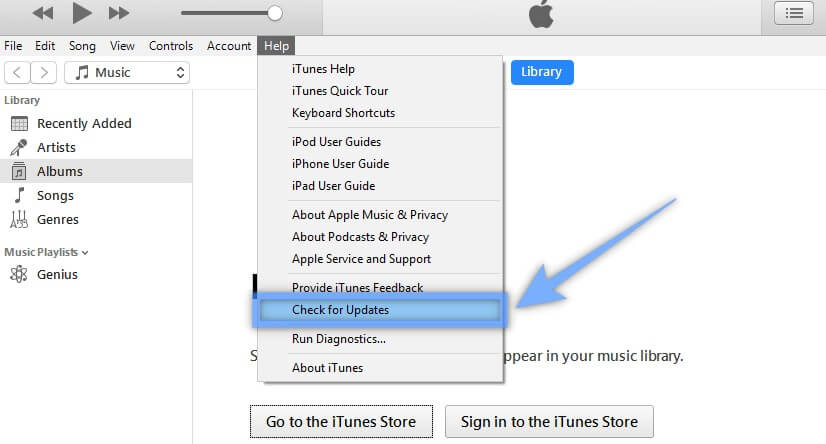
Open the iTunes app on your computer.
Tap on the Help button on the top toolbar.
Tap Check for Updates to check for the available iTunes update.
6. Check Date & Time on Both iPad and Computer
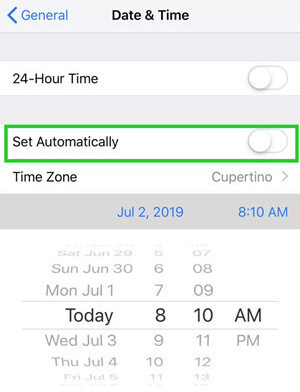
If the date and time on your iPad and computer do not correlate, they might not connect. Below is the step for checking if your iPad date and time setting are customized to automatic.
Head to the deafult Settings app on your iPad.
In your settings, click on General.
Choose the Date & Time option.
Toggle on Set Automatically.
7. Update Apple Mobile Device USB Driver
The tool used to connect your iPad with the computer running the iTunes app is the USB cable. But if the computer does not recognize any cable, it will be impossible for a connection to take place. A major reason your computer may not be recognizing cables is that its USB driver is outdated. Below are the steps to update your computer's USB driver.
Connect your iPad to the computer with a cable.
Go to the Start menu and search for Device Manager in the search bar.
Once the Device Manager option is loaded, click on it to launch the app.
In the Device Manager screen, locate Apple Mobile Device USB Driver under the Universal Serial Bus Controllers option.
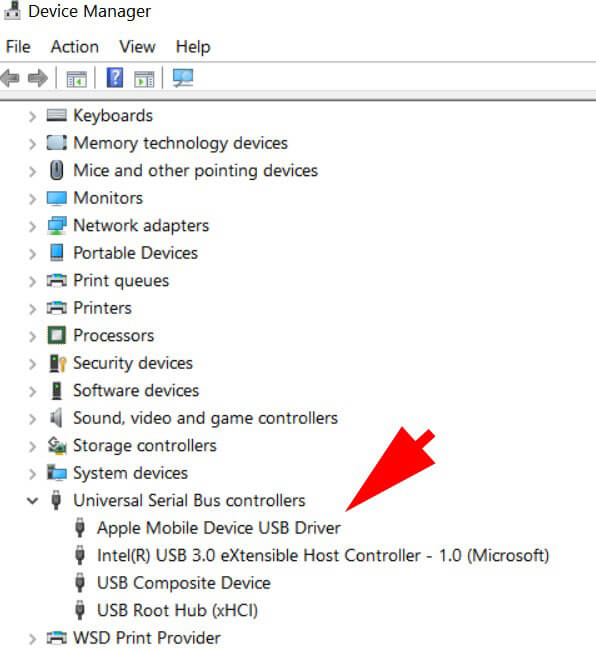
Right-click on it and pick the Update Driver Software… option.
Now, choose Search automatically for updated driver software.
8. Fix iPad Issues Leading to Connection Failure Without Data Loss
If the above ways fail to make your iPad connected to iTunes, then the iPad system glitches is probably the culprit. WooTechy iPhixer is a software tool for fixing Apple products like iPhone, iPad, or iPod touch. Suppose your iPad or iPadOS device is broken and it will not connect to iTunes; you can repair its OS with WooTechy iPhixer. It is an easy-to-use tool that does not require the help of an expert. You can download it on your computer and use it from the comfort of your home. It is also a free tool that allows you to download and install its app without stress. It has a high success rate with protecting the data of its users.
iPhixer iPad Repair Software from WooTechy:

75.000.000+
Downloads
- Repair all bugs that result in your iPad won't connect to iTunes and more other iPad issues like iPad disabled, stuck on Apple logo and boot loop.
- With this powerful tool, any data will not be lost during removing the troubles.
- Better than iTunes, iPhixer is compatible with all iPhones and it can be used to update/restore/reset iPad without any other errors.
- All iOS/iPadOS versions are supported.
Free Download
Secure Download
launch iPhixer. Connect your iPad to the computer with the appropriate lightning connection cable. Click on the Standard Mode option.

After picking the repair mode, select the Next button on the screen.

Once your iPad has been recognized, click Download to get the firmware and repair kit for fixing your iPad.
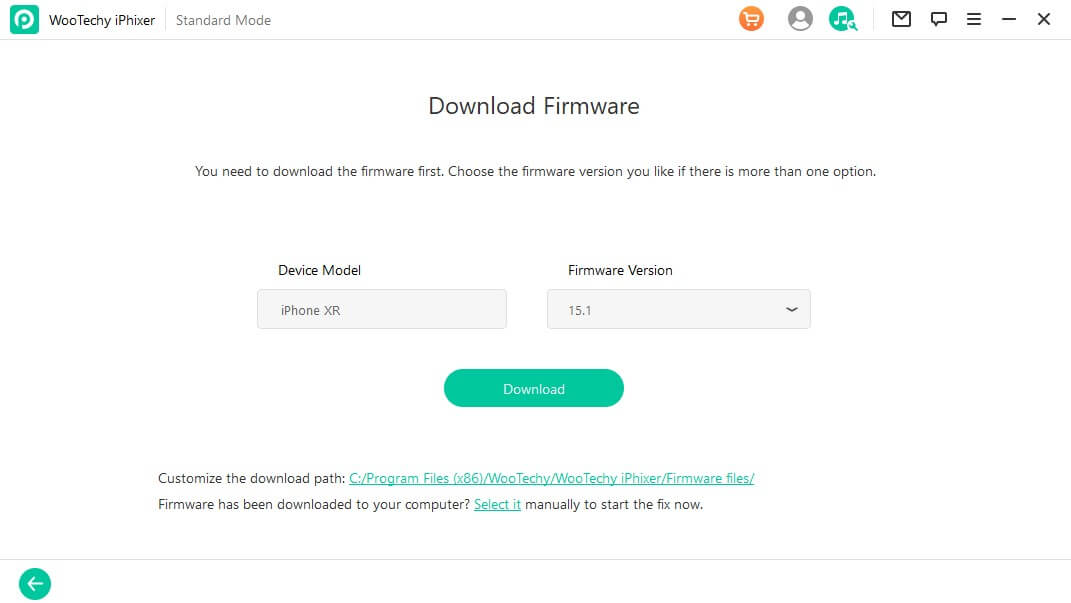
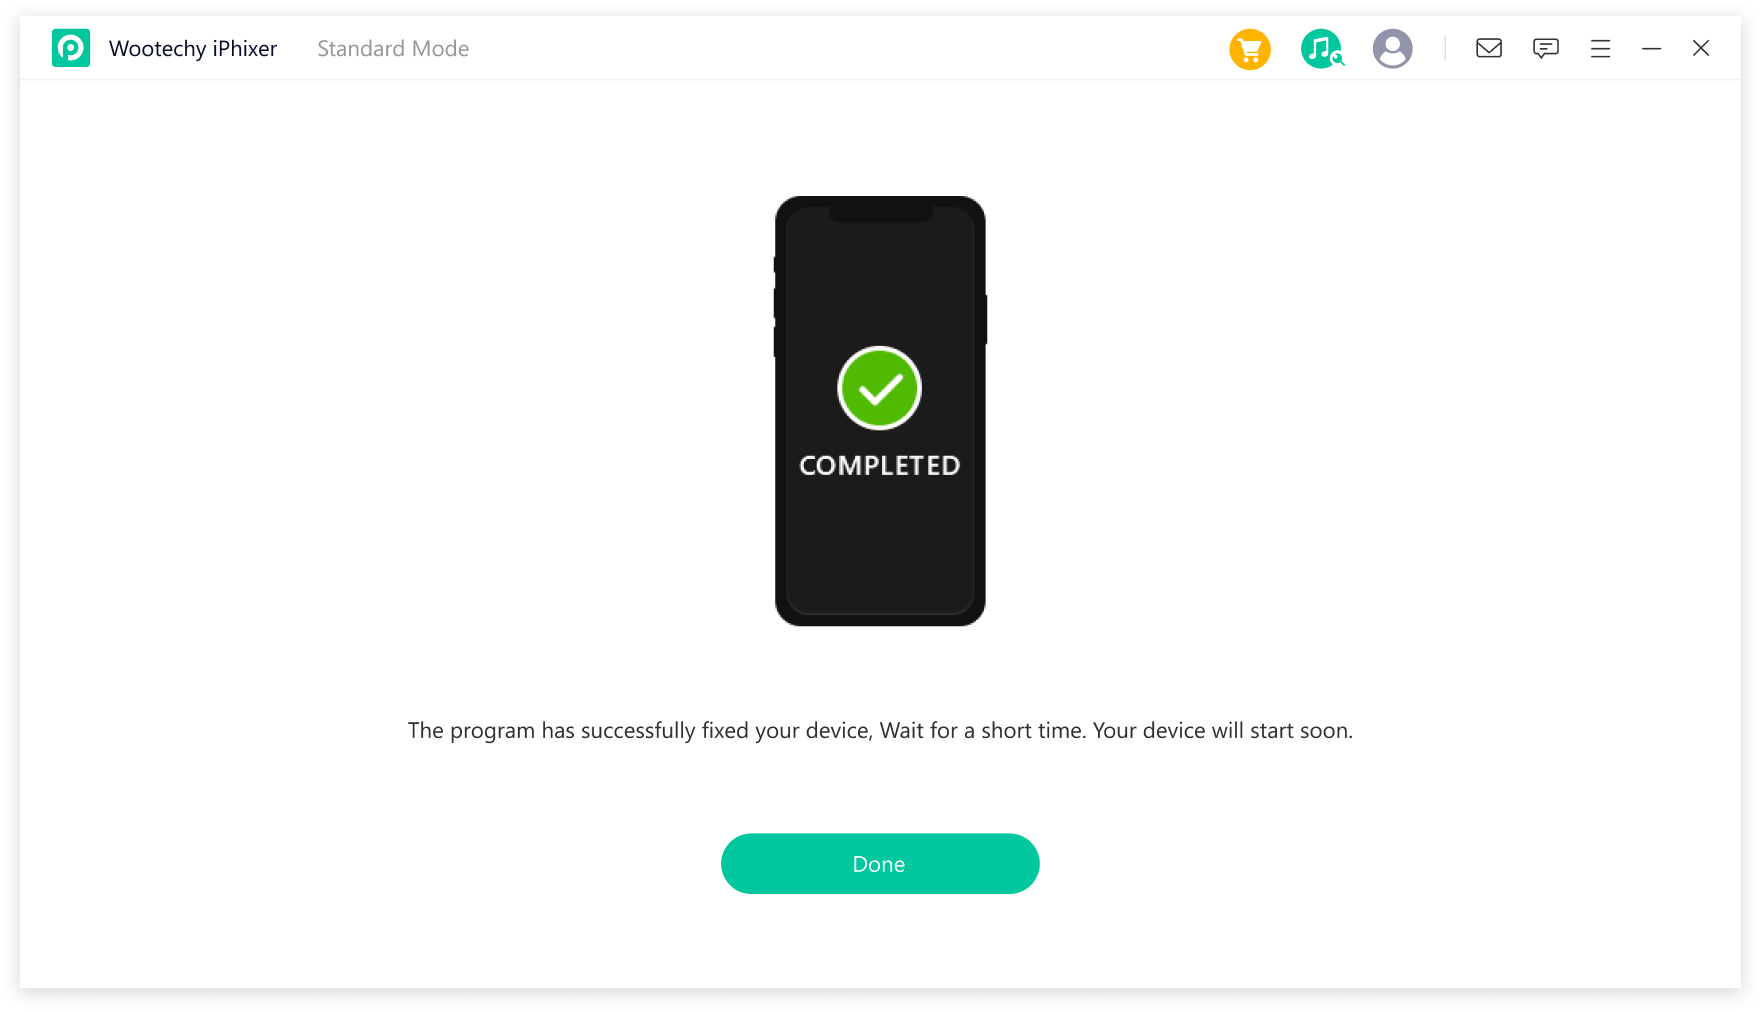
After downloading it, tap the Start button to repair your iPad.
Conclusion
If your iPad won't connect to iTunes, then you canl look to resolve the issue by checking your two devices one after the other. And to correct the issue when you find it, you can apply the solutions provided above. Lastly, if none of the solutions worked, you are suggested to use the WooTechy iPhixer to repair your iPad.
Free Download
Secure Download


