
Hey, I have an iPhone 7 Plus, and for some reason, my microphone has stopped working. I've been taking care of my phone, never dropping it or anything. The other day the microphone stopped working. What's weird is that I was filming videos outdoors, and upon looking back at the videos, the microphone stopped working in the middle of filming- I can tell the mic stopped working because the volume option when watching the video is grayed out. I tried everything I could find through YouTube videos and these forums. Even when people call me, I can't even hear them, and there's no option for speakerphone. Please let me know what I can do.
Microphones are essential parts of audio recording systems. And the audio system of an iPhone is very important for using the device and its third-party applications. That is why any sign of a faulty microphone can be devastating to the iPhone user. The iPhone microphone not working could mean that speaking over the phone with another person may be impossible. It could also mean that you cannot record audio or a video on your iPhone with sound. If you are faced with this issue, this post will show you the probable solutions to iPhone microphone not working problem.
- Part 1. Why Is Your iPhone Microphone Not Working?
- Part 2. How Do You Fix the Microphone on Your iPhone Not Working?
Part 1. Why Is Your iPhone Microphone Not Working?
Your iPhone microphone is not working because your microphone hardware is broken or your iPhone's software microphone system has developed a glitch. Physical damages, especially liquid ones, cause iPhone hardware microphone faults. If there is debris or liquid around the microphone, it will hinder its right functioning. And the microphone can also be broken because you dropped the phone or its microphones were punctured. This can also be a software glitch caused by an app using the microphone. In other cases, the iPhone microphone not working can be due to a bug in the device's OS.
Part 2. How Do You Fix the Microphone on Your iPhone Not Working?
You do not necessarily have to change a microphone not working. The right approach to check and correct iPhone microphones not working on calls, apps, and others is discussed below.
1Check Covering and Dirt Around Mic
A lot of people make use of screen protectors, films, and cases. It is not wrong to use iPhone cases, films, and screen protectors but most of them are more detrimental than beneficial to your device. For instance, some of these added gadgets are why you will find debris around your iPhone microphone. Hence, you can remove them to check if they have been harboring debris around your microphone. You can use a clean, soft toothbrush or an air compressor to remove the debris.
When using compressed air, be careful to regulate the airflow so that it does not damage the internal components of your device. Please avoid using any sharp object to clean your microphone because it can damage the phone. And before you buy another screen protector or case, ensure that they are fit well with your iPhone. You will know the ones that fit if the holes align with your device's and are not covering its microphone.
2Test Your iPhone's Microphone
iPhone has an average of three microphones. And checking for which of the three is broken is a good approach to fixing your iPhone microphone not working. It will help you focus your solution on the mic that may not be working. Below is how to check each microphone.
Primary Microphone
Launch Voice Memos.
Click on the app's red record icon to record audio.
After recording, tap the play icon to listen to the recording.
If you can hear your recording, the primary microphone is working.
Back Microphone
Launch your iPhone's Camera app.
Record a video using the back camera.
After recording, open your Photos app to check the video.
If you can hear the sound of the recording, then the back microphone is working.
Front Microphone
Launch your iPhone's Camera app.
Record a video using the selfie camera.
After recording, open your Photos app to check the video.
If you can hear the sound of the recording, then the front microphone is working.
3Enable Microphone for Third-Party Apps
Before a third-party app can use your iPhone microphone, it will ask for your permission to use it. Hence, if the microphone is not working in the app, you may have been denied access to use the microphone. Here is how to enable the request.
Open your iPhone Settings app.
Select Privacy from the settings options.
Pick the Microphone option to see the list of apps that are enabled and those that are not.
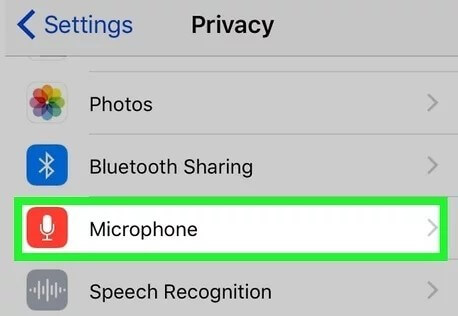
Enable the mic for the specific app.
4Turn AirDrop/Bluetooth off
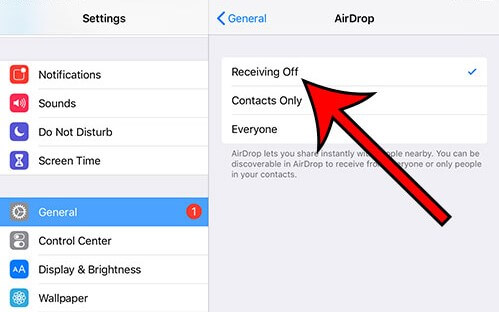
Disable the Bluetooth on the control center and disconnect other Bluetooth devices to fix your iPhone microphone not working during calls. Also, turn off the AirDrop as the steps below.
Open the Settings app from your home screen or app library.
Navigate to General and open it. Click on AirDrop.
Choose Receiving Off, which turns AirDrop off.
5Hard Reboot iPhone
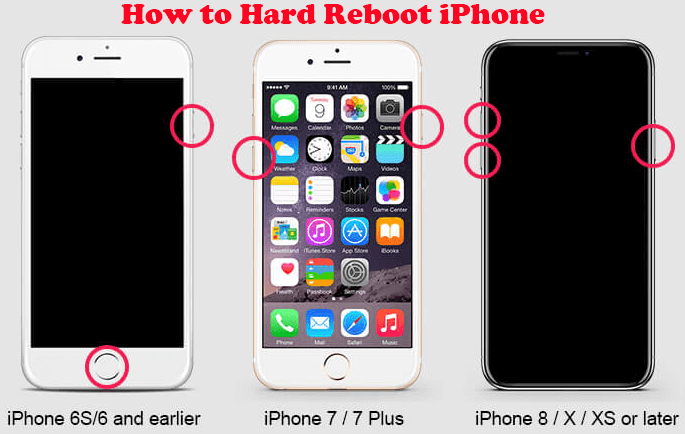
An iPhone hard reboot is a probable solution to software glitches on iPhone. But the solution varies with the model you are using.
For models after iPhone 7
Quickly press the increase volume button and release it.
Quickly press the decrease volume button and release it.
Press down the side button until the Apple logo shows on your screen.
For iPhone 7 and 7 Plus
Press down the volume down, and Sleep/Wake buttons simultaneously until the Apple logo appears.
For models before iPhone 7
Press down the Home and Sleep/Wake buttons simultaneously until the Apple logo appears.
6Fix iPhone Microphone Not Working with Wootechy iPhixer
If your microphone is not working, and its fault has been recognized as a software bug, then you need to fix its OS. A recommendable solution to fix iPhone's OS is Wootechy iPhixer. It is a simple tool that you can use from home without the help of an expert. Unlike the traditional iOS update or restoring software to the factory setting, which will erase all the data on your device, iPhixer will not allow you to suffer any data loss when you repair your OS.
What Wootechy iPhixer Can Bring to You:
- Resolve all iPhone/iPad problems including iPhone microphone not working, iPhone caller ID not working, etc.
- You can have it on both Windows and Mac computers, and it supports all iPhones and iOS versions.
- Provide more features other than repairing iOS, such as reset iDevices with/without password and enter/exit Recovery mode for free.
- The best alternative to iTunes, it upgrades/downgrades, restores your iPhone without causing any iTunes errors.
Free Download
Secure Download
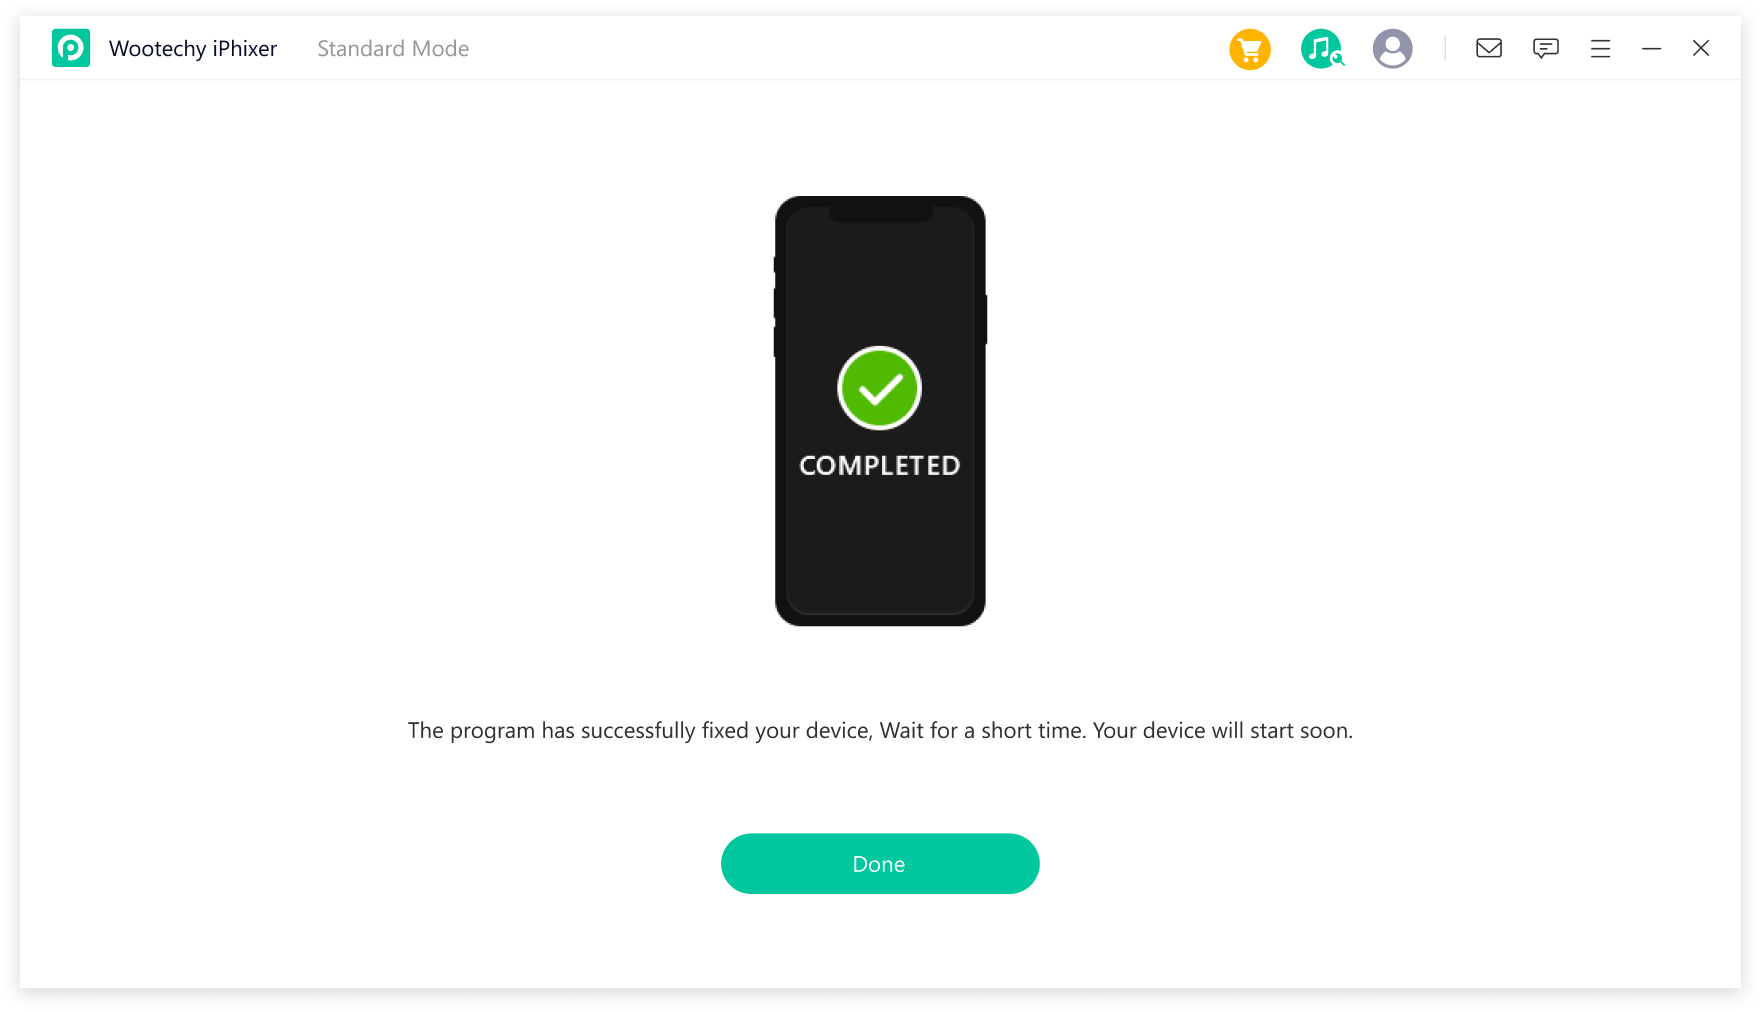
Launch the app and connect your iPhone using the lightning connection cable. Choose Standard Mode out of the available repair modes.

After your iPhone has been recognized, choose a suitable firmware option from the available list. Click Download button to get the firmware.
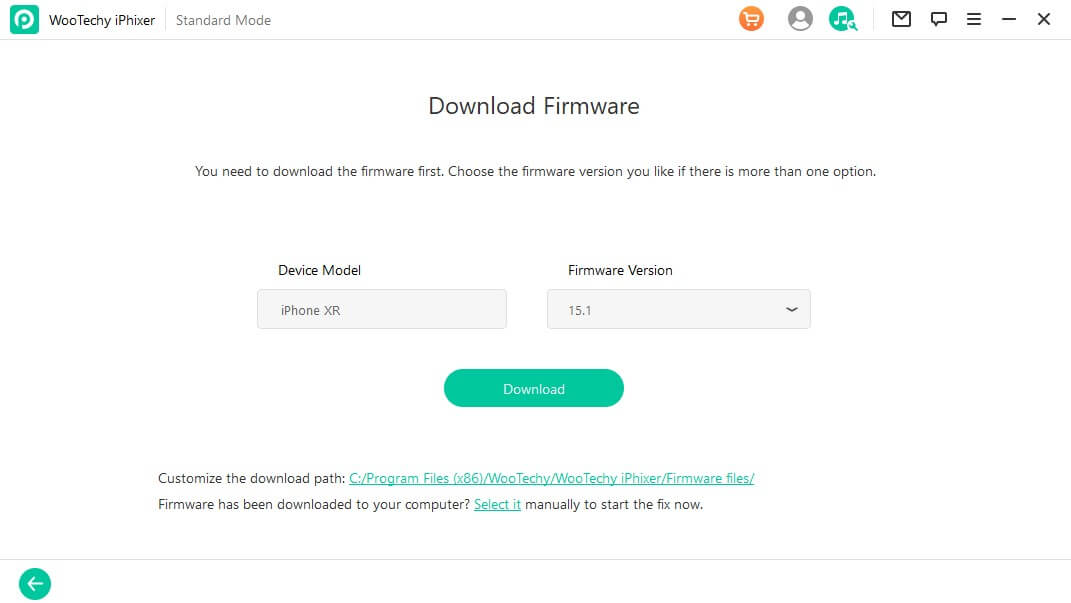
Tap on Start and once the process is done, your iPhone microphone will start working.
Free Download
Secure Download
7Update iPhone
Updating your iPhone could mean changing it, but only a hardware update. You can update it without changing your iPhone by downloading and installing the latest iOS version. And with an updated iOS version, any fault developed by your iPhone's OS can be rectified by you.
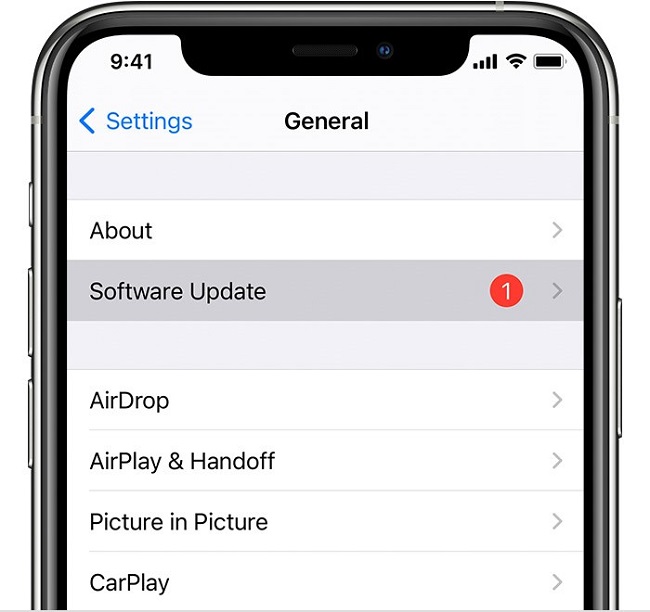
Launch your iPhone Settings app.
Open the General setting.
Select Software Update to check if there is a new iOS version available.
On the update menu, click on Download and Install.
8Reset All Settings
Making the wrong changes to your device setting can lead to the iPhone microphone not working. The fault here is that you may not know which setting affects the microphone. Similarly, you may have installed and permitted a third-party application distorting your iPhone microphone.
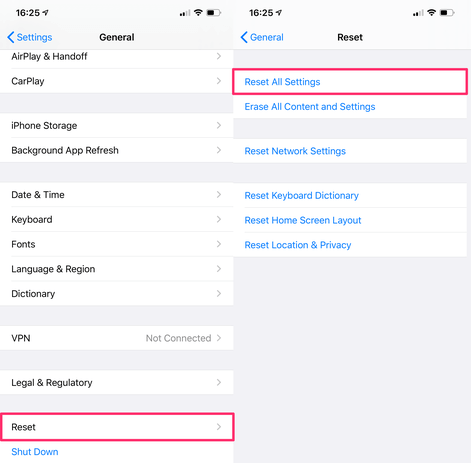
Open the Settings application on your device.
Navigate to General, then open it.
In the General screen, pick the Reset option.
From the next tab, select Reset All Settings.
Conclusion
iPhone microphone not working is a common issue in the Apple community. But against popular advice to change your hardware and get a new device, you can fix the issue yourself. Whether a hardware issue or a software bug, the eight solutions examined above will help you resolve the challenge.


