
I want record a iPhone screen video, but only to find there is no sound in the screen record? My deivce is iPhone 13 Pro. This is the first time that my iPhone screen recording no sound happens. I wonder why and how to fix this done. Anyone can help me、
Recently, there are many users complaining that their iPhone screen record has no sound suddenly, just like the user decribed above. iPhone screen record should has the certain sounds. It is an annoying problem. Don't worry too much, this article will show you 7 useful methods to fix your iPhone screen recording no sound error.
- Part 1. Why My Screen Recording Has No Sound?
- Part 2. How to Recover Sound from Screen Recording iPhone?
- 1. Check if You Have Turned on the Microphone Audio
- 2. Force Restart Your iPhone
- 3. Reset All Settings
- 4. Update Your iPhone to the Latest iOS Versions
- 5. Restore iPhone with iTunes (Data Loss Risks)
- 6. Use WooTechy iPhixer to Fix Your iPhone Issues (Zero Data Loss)
- 7. Send iPhone to Apple Support Center
Part 1. Why My Screen Recording Has No Sound?
It is likely your iPhone screen recording has no sound because your volume is too low. Sometimes you have accidentally muted your volume and this is why screen recording no sound iPhone.
Alternatively, there may be a software glitch that is causing iPhone screen recording no sound. This is easily fixed by restarting your iPhone or resetting your settings.
Finally, your iPhone screen recording no sound may be caused by your iPhone running on a later version of iOS. You will need to update to the latest version of iOS to fix this problem.
Part 2. How to Recover Sound from Screen Recording iPhone?
It’s pretty annoying if the iPhone screen recording had no sound suddenly. Take it easy, now the following will introduce 7 practical alternatives to recover sound from screen recording on an iPhone.
1 Check if You Have Turned on the Microphone Audio
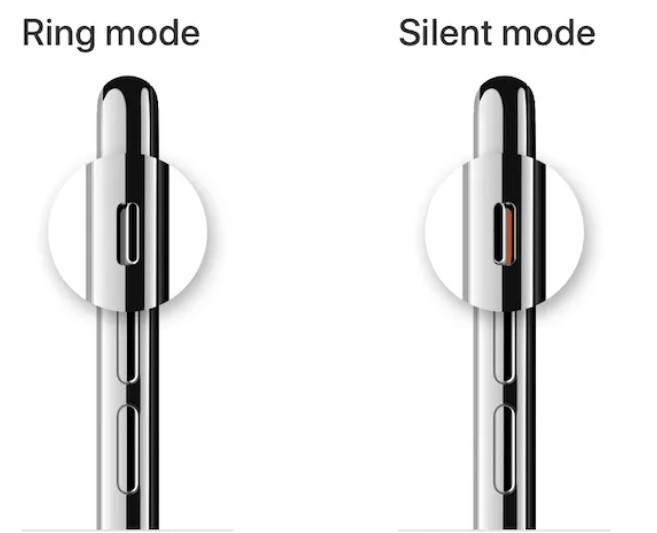
This is the easiest solution to fix iPhone screen recording no sound. Sometimes, you may forget to turn off your iPhone microphone or your just mute your iPhone accidently. Thus, you should check the iPhone Silent button setting:
Click the Silent button on the left side of the iPhone, a volume bar should appear on the iPhone screen.
If the color of Silent button is orange, it means you has muted your microphone audio, then you can just put it to another side.
2 Force Restart Your iPhone
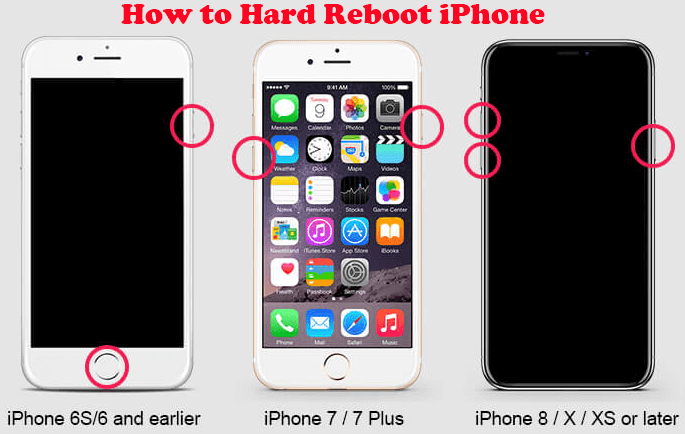
Your iPhone screen recording no sound could be fixed by a force restart. A force restart is used to fully turn off your iPhone and restart it. A force restart should clear any bugs that are interfering with your iPhone.
-
For iPhone 8 and later: Press and quickly release the Volume up button
Press and quickly release the Volume down button
Press and hold the Side button until the Apple logo appears.
For iPhone 7: Press and hold both the Sleep button and the Home button at the same time Release both buttons when the Apple logo appears on the screen.
On an iPhone 6 and earlier: Hold the Power and the Home buttons.
3 Reset All Settings
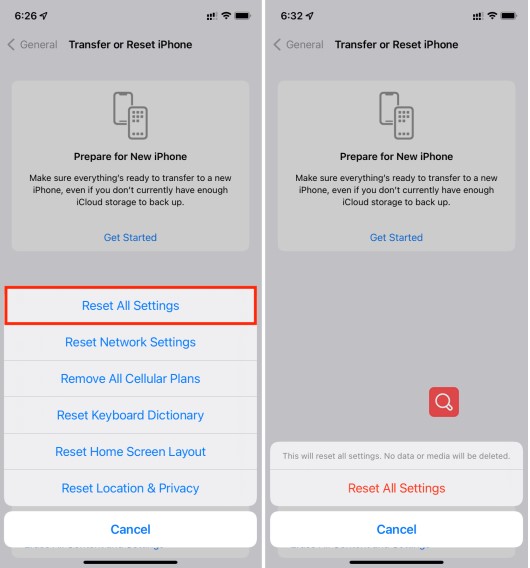
If your iPhone has some system bugs, then you try resetting all settings on the device to fix your iPhone screen recording no sound problems. Resetting all of your iPhone settings will also recover the sound on your screen recording.
Click on the Settings app > select General > Transfer or Reset iPhone.
Then you will be promoted to tap Reset > Reset All Setting icon, just follow the instructions.
Now try recording the iPhone screen again, to check if the video has sound. If not try next method.
4 Update Your iPhone to the Latest iOS Versions
If your iPhone are still running on olde iOS versions such as iOS 13/14/15, then it’s possible that your iPhone screen record will has no sound, since the iPhone system cannot work well. The quick fix is to upgrade your iPhone to the latest iOS version iOS 16. This is how to upgrade your iPhone device to iOS 16:
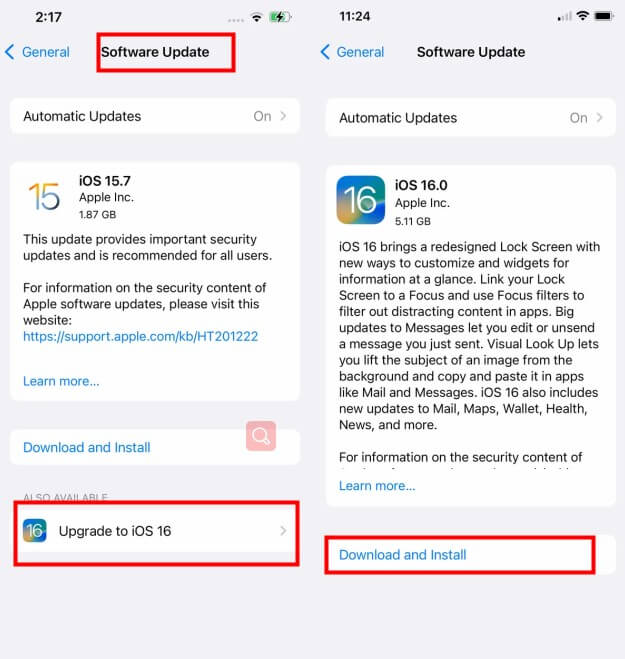
Click on the Settings app > General > Software Update, now the screen will show up which iOS version your iPhone runs.
Tap Upgrade iPhone to iOS 16 option and click Download and Install button to start the process. Then be patient to wait it to complete.
Note
The whole upgrading process may cost half past hour, so you had better charge your iPhone device and connect your device with a strong and stable WiFi network, so that you can success in updating your iPhone.
5 Restore iPhone with iTunes (Data Loss Risks)
You can also use iTunes to get rid of your iPhone screen has no sound problem. Please note that iTunes restoration erases all of your iPhone's data and settings.
Yet, the software backs up your iPhone before resetting it. Therefore, you can use its backup to get all the data lost during restoration. Follow the instructions below to fix your screen recording iPhone no sound issue.
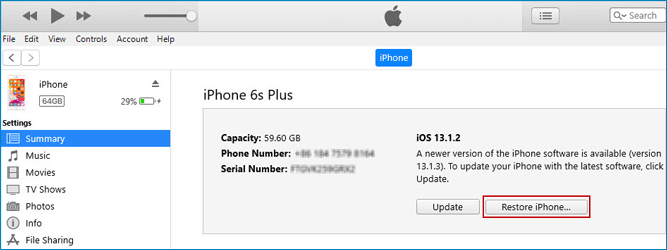
Open iTunes app on your PC. If you are using a Mac, launch Finder with macOS Catalina. After that, connect your iPhone to the computer.
Once iTunes has recognized your device, tap its icon displayed on the iTunes window towards the top left. Next, select Summary. Then choose Restore iPhone.
After the software restores your device, remember to select Restore Backups to recover all the backed-up information to that device if you backed them up earlier.
6 Use WooTechy iPhixer to Fix Your iPhone Issues (Zero Data Loss)
Well, if you have used all the 5 methods above, but your iPhone screen recording no sound problems still exists, then you must try this final but certainly useful method – using WooTechy iPhixer , which is the smartest iPhone system recovery tool in the world with an increasing popularity.
If you use iTunes to restore your iPhone device, you will find it will cause some data loss on your iPhone device. iPhixer, on the contrary, promises to protect all your iPhone data without cause any data loss or any other kinds of new errors.
Most importantly, WooTechy iPhixer is able to fix various types of iPhone software tool with much faster speed than any other tools.

Excellent Advantages of WooTechy iPhixer You Should Know

75.000.000+
Downloads
- Work to fix many common iPhone software problems without 100% success rate, like iPhone screen record no sound, iPhone keeps scrolling up and iPhone blinking Apple logo etc..
- Available with all iPhone models and iOS versions with the latest iPhone 14 device iOS 16 system included.
- A best alternative to iTunes app , iPhixer can be better to restore your iPhone device without causing some new errors, such as 4010, 4013, 4005.
- Easy to use this tool to fix your iPhone problems by yourself at home, with ease and convenience.
- Besides that, you are supported to enter/exit recovery mode for 100% free, which is the biggest benefit for all iPhone users.
Free Download
Secure Download
Fix your iPhone screen recording no sound problem with iPhixer:
Step 1 Launch the iPhixer program and connect your device to the computer. Select the Standard Mode to the problem.

Step 2 The next step is to download the firmware. For this, let the software detects your device and click Download. It won't cost much time to download it.
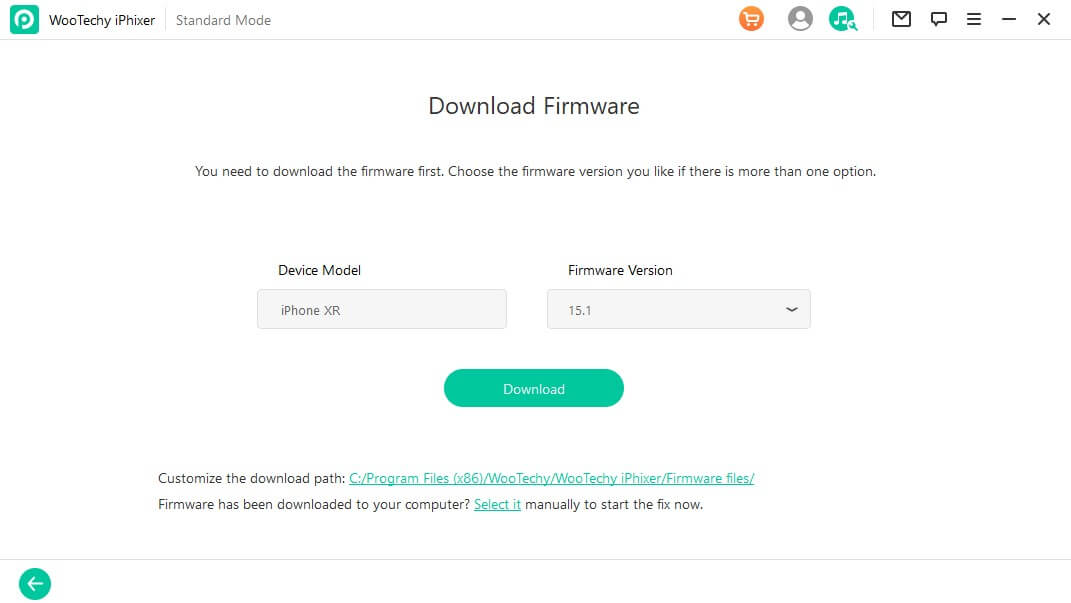
Step 3 Once the firmware has been downloaded, you can commence the repairing process by clicking Start.
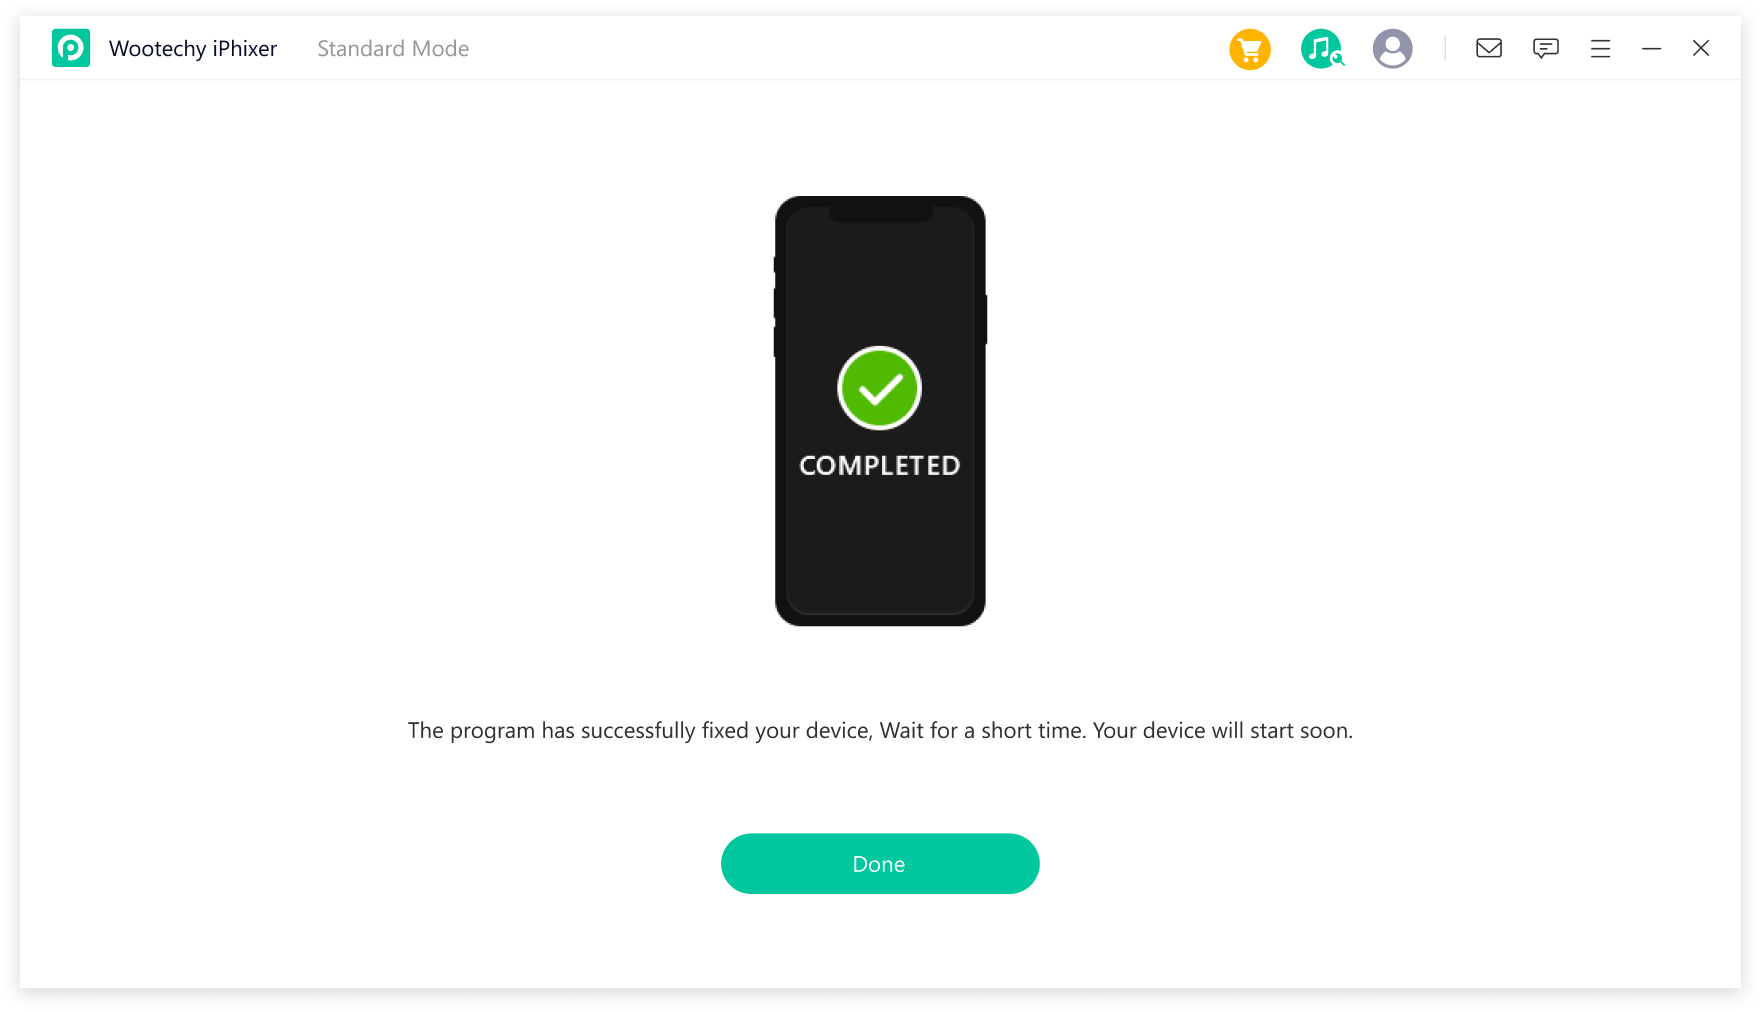
Step 4 During the repairing process, make sure your device is connect with the computer and you cannot use it; otherwise, it will mess up your device and further complicate things.
7 Send iPhone to Apple Support Center
If WooTechy iPhixer also fails to fix the iPhone screen recording no sound issue, then your iPhone device probably has encountered physical damages which cause some hardware damages on your iPhone.
In this case, you had better go to the Apple Support Center or local iPhone repair store to fully test your iPhone devices.

Conclusion
Actually, it’s most possible iPhone system bugs that cause your iPhone screen recording no sound problem. If that’s true, you definitely can use WooTechy iPhixer to fix the problem, so that you don’t need to waste time or money to the Apple support center, since you can fix the error at home.
Hope all these 7 solutions referred above can help you out. If you have any other questions, you can list the messages one the column area, and the next article is right for you!


