
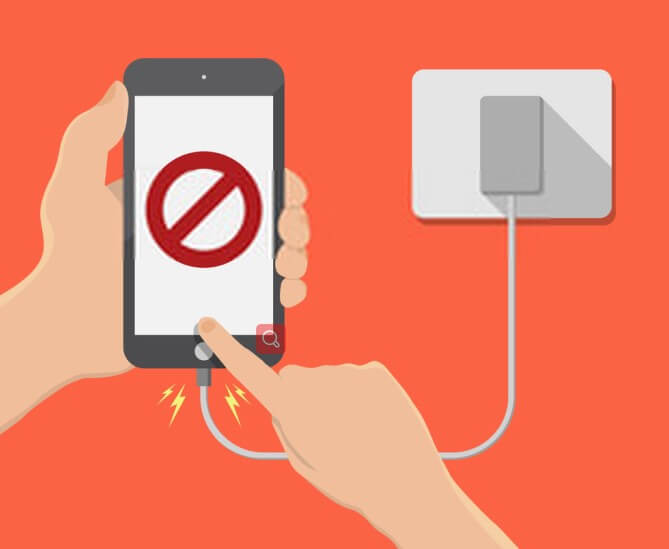
iPhone won't charge suddenly? If you are meeting this kind of situation, maybe you will be annoyed a lot. Thus this article is right here to help you out with useful solutions.
An iPhone not charging is unfortunately a very common problem. Thankfully, it can be easy to fix at home. Your iPhone may not be charging due to a damaged USB cable, debris in the charging port, structural problems, or due to your face I.D not working.
Today, we’ll help you troubleshoot the problem with 9 practical methods and get your iPhone charging again.
- Part 1. Why Is My iPhone Not Charging When I Plug It in?
- Part 2. What Should I Do If My Phone Charger Is Plugged In But Not Charged?
- 1. Check Charging Cable and USB Adapter
- 2. Try a Different Power Source
- 3. Force Restart Your iPhone
- 4. Force Restart Your iPhone
- 5. Erase All Data from Your iPhone
- 6. DFU Restore Your iPhone (Date Loss)
- 7. Use An Professionall iPhone Repair Tool (No Date Loss)
- 8. Cool Your iPhone Down
- 9. Still Not Working? Head to the Apple Store
Part 1. Why Is My iPhone Not Charging When I Plug It in?
Your iPhone should automatically start charging when it is plugged in. An iPhone not charging is a sign there is a problem with your phone or your cables. It is important you determine why your iPhone is not charging.
Your iPhone won’t charge if it is plugged into a broken cable, USB adapter, or electrical socket. This is the easiest solution to fix an iPhone not charging.
Alternatively, your iPhone not charging could be due to a dirty lightning port that is affecting a proper connection. The worst scenario is that your iPhone has software issues that are preventing it from charging effectively.
Part 2. What Should I Do If My Phone Charger Is Plugged In But Not Charged?
Here are some things you can do when your iPhone is not charging. You can try the following solution one by one. If you want to solve your iPhone not charging issues right now, you can direcly locate to the 7th methods -- using iPhone repair tool, which can help you fix this error with 100% success rate.
1 Check Charging Cable and USB Adapter
First and foremost, check your charging cables and USB adapter. More often than not, your iPhone 11/12/13/14 not charging (or any other iPhone) will be due to a broken cable. Check if the cable is twisted or damaged. If there are loose wires or the cord is fraying, the cable is likely broken.
Use the cable with a couple of other devices to see if it works with them. If not, the cable is definitely broken and needs to be thrown away. Apply this same process with a USB adapter.
2 Try a Different Power Source
Your iPhone not charging could also be from a damaged electrical socket. The power source is where you plug in the charger. If your power source has short circuited or has a loose connection, your iPhone won’t change.
This can be fixed by transferring your charger to a different power source. Just make sure your charging cable is also in good working order!
3 Clean the Lightning Port
A dirty lightning port will interfere with successful charging. Lightning ports can easily become clogged with dust, dirt, lint, and tiny flecks of fabric. Overtime, debris builds up in the lightning port. The iPhone cable is unable to connect to the phone if there is lots of foreign material in the port. You will need to clean the port for the iPhone to charge.
We recommend using a can of compressed air or a toothpick. Compressed air works like a vacuum. It sucks out all the debris from the port. You can also clean the port with cotton wool wrapped around a small toothpick. Gently work the toothpick around the walls of the lightning port.
This should dislodge all the debris. However, it probably won’t be as effective as compressed air. Once your lightning port is thoroughly cleaned, your iPhone should be back to charging as normal.
4 Force Restart Your iPhone
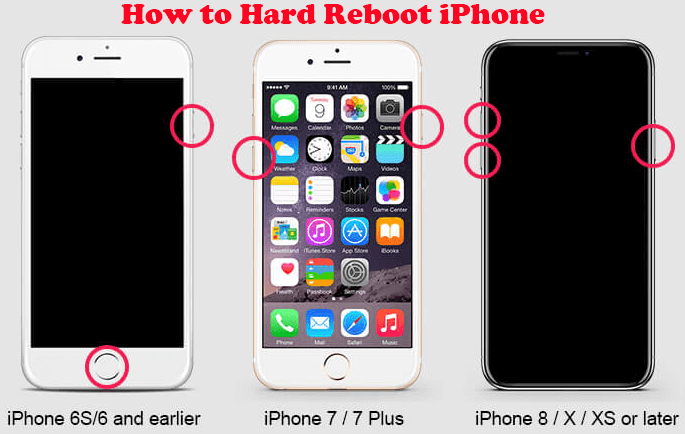
Your iPhone not charging could be fixed by a force restart. A force restart is used to fully turn off your iPhone and restart it. Your iPhone may need a little boost of energy if it is unresponsive, charges slowly, or isn’t charging at all.
To do this on your iPhone 6: Long activate the Home button together with the Sleep button at the same time. Release your hands on the button once the Apple logo is displayed. Anticipate a little while for the device to restart.
On iPhone 7 : Simultaneously press the Volume Down together with the Sleep/ wake button for a while. Once the Apple logo Pop-up, release the buttons. After a while, the device will start.
On iPhone 8 to iPhone 14. Hold the Volume Up button for a while.Then, immediately press and also release the Volume Down button. Afterward, press the Side button until the Apple logo is displayed. Release the button, and then allow the device to restart.
5 Erase All Data from Your iPhone
In case there is something seriously wrong with your iPhone, you should erase all data from the phone. Back up your messages, photos, and files on a hard drive or on your computer. This ensures your personal data is safe and secure. It is possible your iPhone will need a software replacement.
In which case, it’s better to remove all data so it’s a clean slate when it’s repaired. Better to be safe than sorry with your treasured memories!
6 DFU Restore Your iPhone
DFU is another method to restore your iPhone. It works in a similar way to the aforementioned restoration. However, DFU is a deeper, more intensive method. DFU stands for Device Firmware Update. DFU restores and erases all data on the iPhone. If there is a bug or a problem with your iPhone that is causing it to not charge, a DFU reset will fix it.
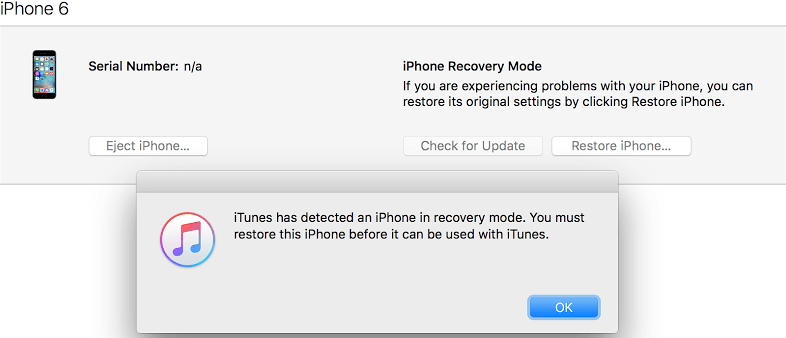
To DFU reset your phone follow these steps: Plug your iPhone into your computer and open iTunes first.
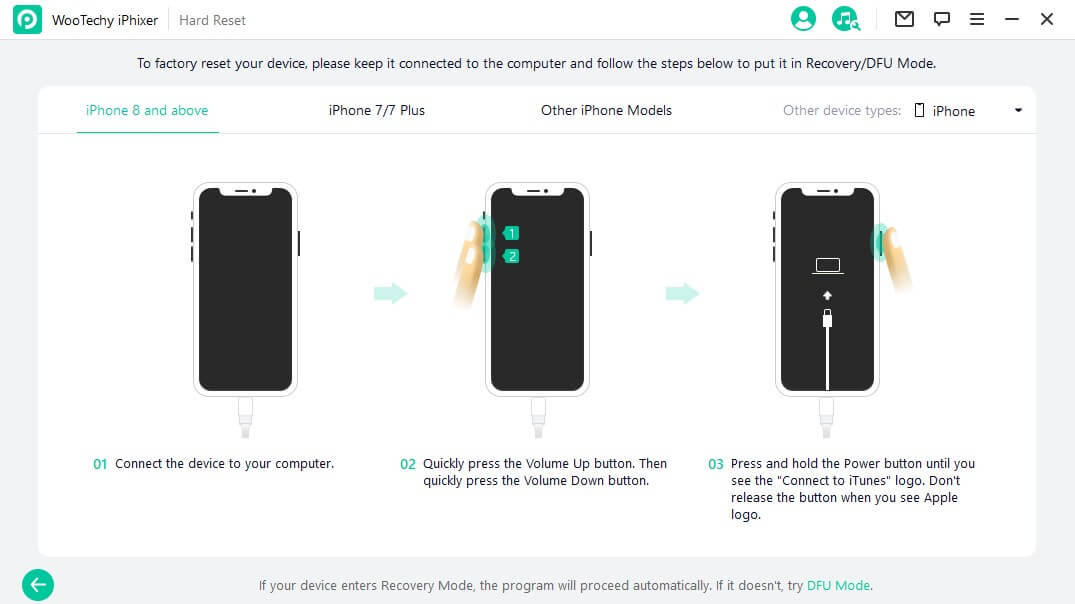
- iPhone 8 and later: Press and release the Volume Up button. Press and release the Volume Down button. Press and hold the Power button until the screen turns black. Once the screen turns black, keep holding the Power button and the Volume Down button. Wait 5 seconds and release the Power button but keep holding the Volume Down button for 5 seconds.
- iPhone 6/7: Press and hold the Home (iPhone 6) or Volume Down (iPhone 7) button with the Power button for 10 seconds, then let go of the Power button but continue holding the other button for at least 5 seconds.
Click OK on the message shown on the iTunes screen and further select Restore iPhone option.
7 Use An Professionall iPhone Repair Tool
If now your iPhone still won't charge successfully, then an official and professional iPhone repair tool must be your next alternative -- using WooTechy iPhixer, which is a brilliant tool, created to fix any kinds of iPhone software issues, including iPhone not charging.
iPhixer is a successful iPhone repair tool, which can fix your iPhone software error with 100% certainty. What's more, this tool can protect all your iPhone data privacy to avoid any data loss during the whole repaire process.

WooTechy iPhixer -- The Most Excellent Gift For Everyone on Halloween

75.000.000+
Downloads
- Fix other kinds of iPhone software issues like unable to verify update iOS, iPhone storage full won't turn on, iPhone blinking Apple logo and more with several clicks.
- You can use iPhixer to directly and quickly upgrade to iOS 16 without any data loss.
- With a user-friendly interface and easy-to-use steps, iPhixer promise no privacy invaded to fix your device error with ease.
- iPhixer can be a great alternative to iTunes, since it can restore your iPhone back to normal without causing any other errors.
- Moreover, you are also able to to freely enter/exit recovery mode for with or without the password.
Free Download
Secure Download
Use WooTechy iPhixer to Fix iPhone Not Charging Issue:
Step 1 Connect your device to the PC and open iPhixer tool on your Windows or Mac computer. To continue, select Standard Mode.

Step 2 Follow the on-screen directions to enter Recovery or DFU Mode.
Step 3 Hit the Download option to get the firmware for your iOS device.
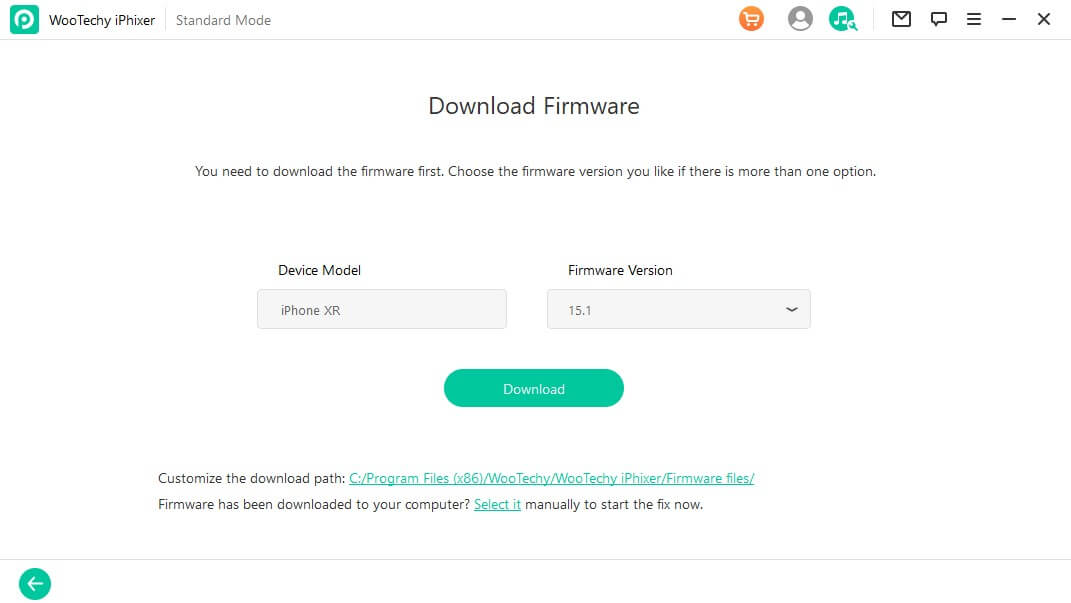
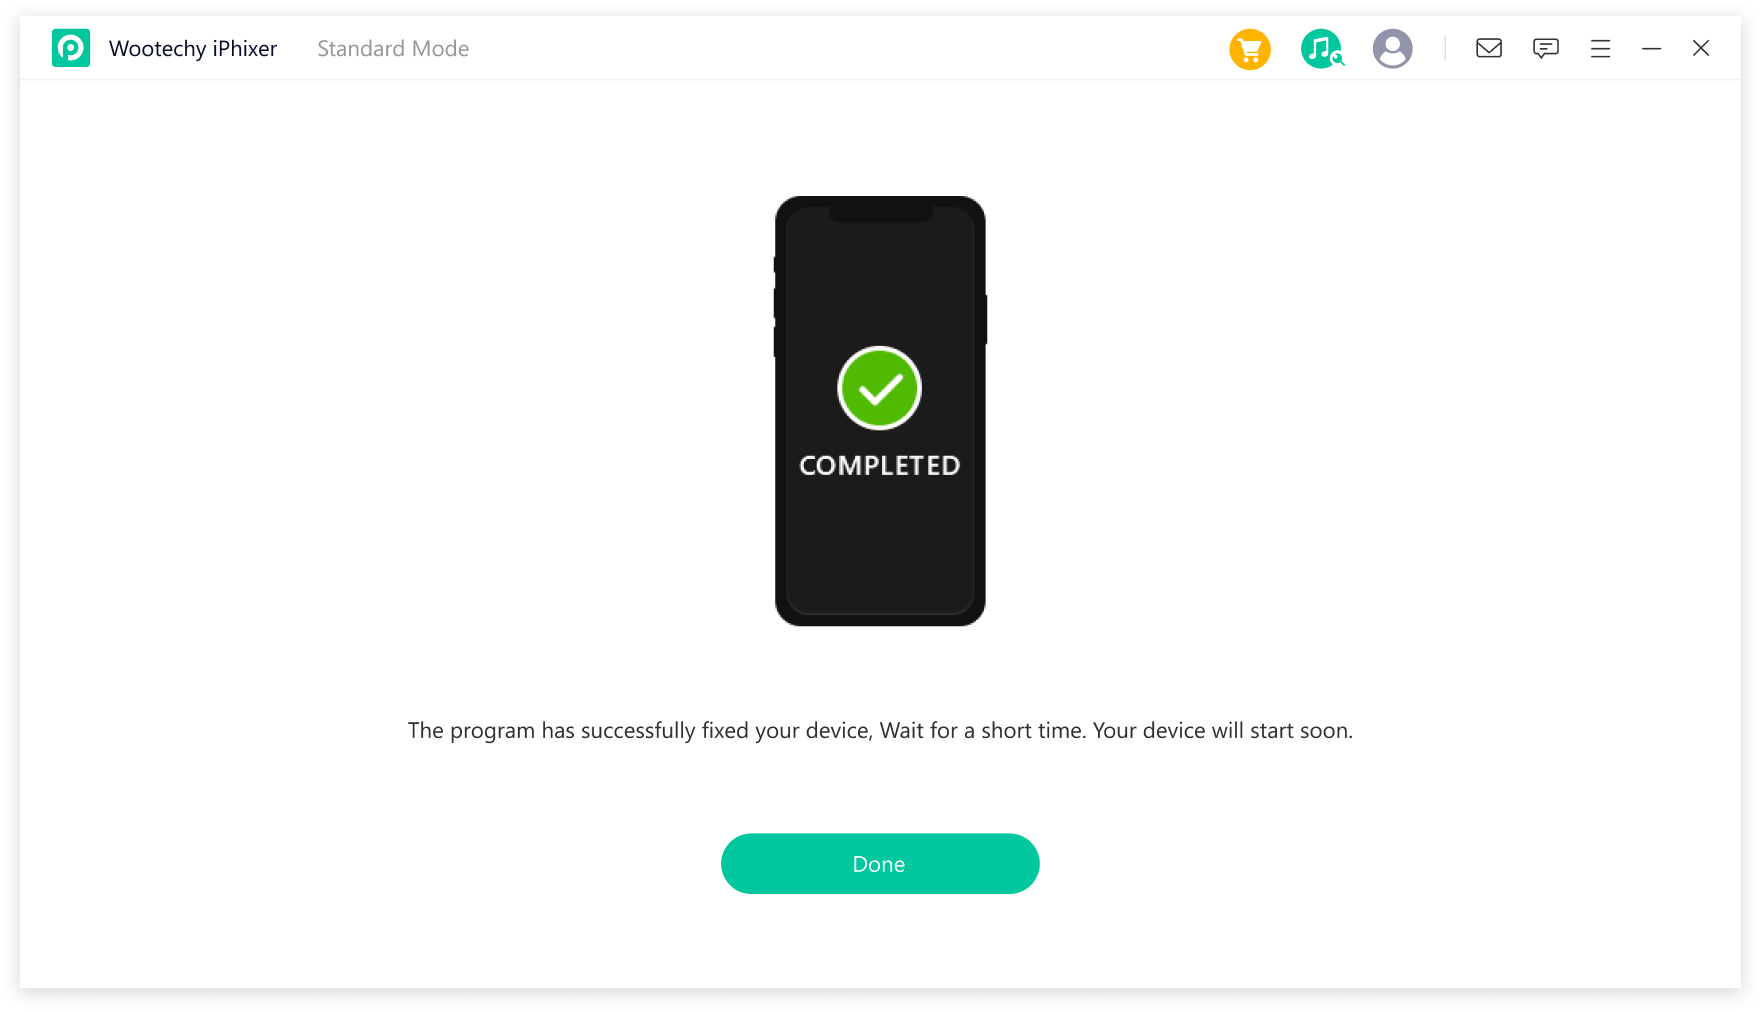
Step 4 After successfully downloading the firmware, click the Start button to initiate the device’s repair. When the process is complete, you can try using a working cable to charge your iPhone again.
Free Download
Secure Download
8 Cool Your iPhone Down
iPhones can overheat very easily. Your iPhone not charging could be related to its temperature. A hot iPhone won’t work correctly and won’t charge. In many cases, an iPhone will shut down completely. Make sure your iPhone is nice and cool before charging. It should take 5-15 minutes to cool down.
9 Still Not Working? Head to the Apple Store
Is your iPhone not charging even after all of these solutions? Well, it’s time to take your iPhone to the Apple store. Apple professionals will be able to properly diagnose and repair your iPhone.
Conclusion
This article outlined top 9 useful solution to fix iPhone not charging errors. Now you don't need to worry about this issues or spend much time and money sending your iPhone to Apple store for repair, WooTechy iPhixer definitely can help you troubleshoot any kinds of iPhone software issues.
Hope these 9 methods can help you. By the way, Halloween is coming, wish you can enjoy your Halloween and have a great holiday.
Free Download
Secure Download


