FaceTime Live Photos capture the fleeting moments of joy, laughter, and connection during your video calls. But what happens when those precious moments fail to be saved? Don't worry! This comprehensive guide equips you with a troubleshooting arsenal to tackle the issue of FaceTime Photos not saving on your iPhone or iPad.
Part 1. Where Are FaceTime Photos Stored?
The photos you take during FaceTime are stored directly in the Photos app on your iPhone or iPad. When you capture a Live Photo during a FaceTime call, it's automatically saved to your Photos library, just like any other photo you take with your device's camera.
To find your FaceTime photos:
Open the Photos app on your iPhone or iPad.

By default, your most recent photos will be displayed.
You can use the search bar at the top of the screen to search for photos by date, location, or keyword.
You can also browse your photos by year, month, or collection.
Tips
If you have iCloud Photos enabled, your FaceTime Live Photos will be uploaded to iCloud and accessible from all your Apple devices.
You can create a dedicated album in your Photos app specifically for FaceTime Live Photos to keep them organized.
Part 2. Why Are My FaceTime Photos Not Saved?
If you cannot find the photos taken during FaceTime, don’t rush yet. This is rather a common issue that many users would encounter after iOS updates. Let's see what’s the possible reasons behind your vanishing FaceTime photos:
Privacy Restrictions: There's a possibility that the Camera or FaceTime app permissions are restricted on your device. This would prevent capturing Live Photos altogether during a call.
Outdated Software: Using an outdated version of iOS can sometimes lead to compatibility issues with features like Live Photos.
Software Glitches: Occasionally, temporary glitches within the FaceTime app or the iOS system itself can hinder the saving process.
Part 3. How to Fix FaceTime Photos Not Saving?
1 Enable FaceTime Live Photos in Settings
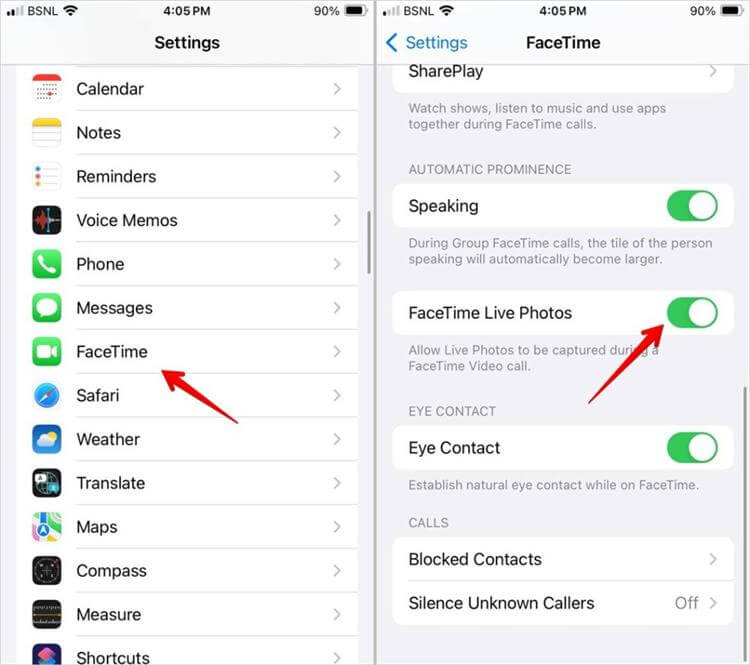
The disabled FaceTime Live Photos setting is a common culprit behind unsaved FaceTime photos. Here's how to check and enable it:
Open the Settings app on your iPhone or iPad.
Scroll down and tap on FaceTime.
Locate the FaceTime Live Photos option.
Ensure the toggle switch next to it is green. If it's gray, tap it to enable the feature.
2 Free Up Storage Space
Since FaceTime Live Photos require more storage space than regular images, a lack of available space might prevent them from saving. Here's how to check your storage and free up space if needed:
Open the Settings app on your iPhone or iPad.
Tap on General.
Tap on iPhone Storage (or iPad Storage).
You'll see a detailed breakdown of your storage usage by category (Apps, Photos, System, etc.).
Little tips to free up storage space:
Identify categories consuming significant space.
Offload apps you don't use frequently. This frees up storage space while keeping app data for later use. To offload an app, tap on the app in the storage list, then tap "Offload App."
Look for large videos or photos you can delete.
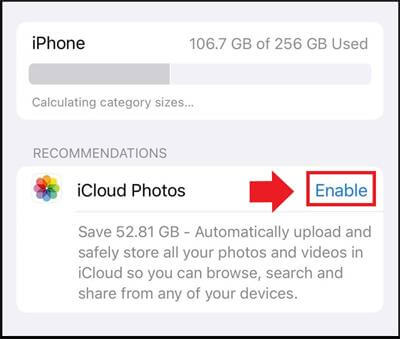
If you haven't already, consider enabling iCloud Photos. This uploads your photos and videos to iCloud, freeing up space on your device. However, keep in mind that iCloud storage has limitations as well. a
3 Restart Your iPhone or iPad
A simple restart can often resolve temporary glitches that might be the causes of FaceTime photos not saving error. Here's how to restart your device depending on the model you have:
For iPhone 8 and earlier:
Press and hold the power button until the "slide to power off" prompt appears on the screen.
Slide the red bar to turn off your device.
Wait for a few seconds, then press and hold the power button again to restart your iPhone.
For iPhone X and later:
Press and hold either volume button and the side button simultaneously until the "slide to power off" prompt appears on the screen.
Slide the red bar to turn off your device.
Wait for a few seconds, then press and hold the side button again to restart your iPhone.

For iPad:
Locate the power button (usually on the top of the device).
Press and hold the power button until the "slide to power off" prompt appears on the screen.
Slide the red bar to turn off your iPad.
Wait for a few seconds, then press and hold the power button again to restart your iPad.
After restarting your device, try taking a FaceTime Live Photo to see if the saving issue is resolved.
4 Update Your iOS Software
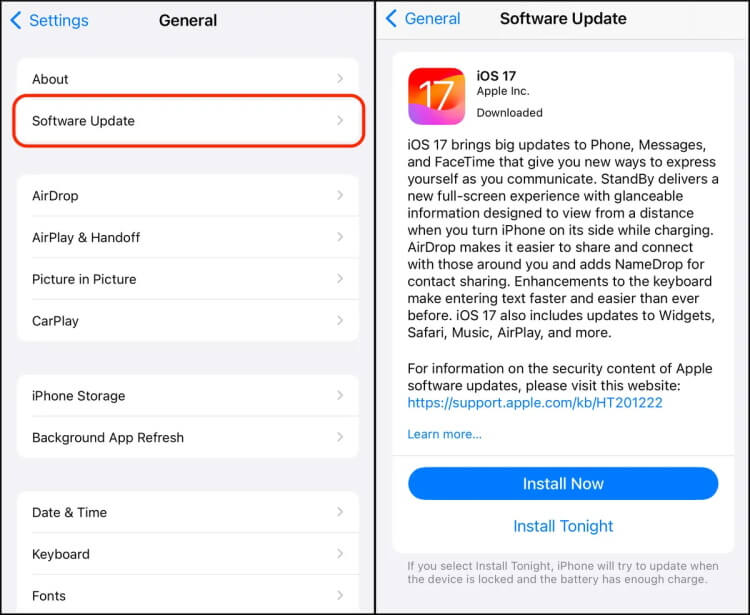
An outdated iOS version can sometimes lead to compatibility issues with features like FaceTime Live Photos. Updating to the latest version ensures optimal functionality and can potentially fix the problem. Here's how to update your iOS software:
Open the Settings > General > Software Update > Download and Install.
You might be prompted to enter your passcode or provide your Face ID for confirmation.
Your device will download and install the update.
Once the update is installed, your device will restart automatically.
After your device restarts, try taking a FaceTime Live Photo to see if the saving issue is resolved.
Note
It's always recommended to back up your iPhone or iPad before installing a major software update. You can back up to iCloud or your computer using iTunes.
5 Disable Restrictions on FaceTime
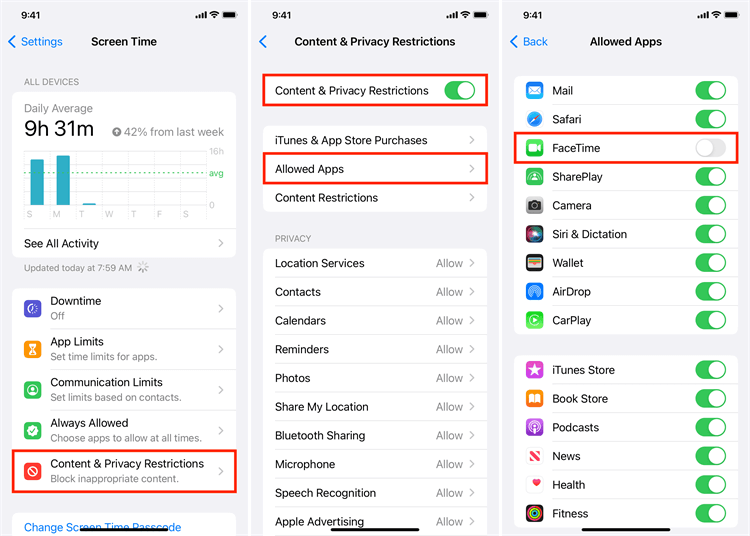
Limited Camera or FaceTime app permissions can prevent capturing and saving Live Photos during video calls. Here's how to check and ensure they have the necessary access:
Open the Settings app on your iPhone or iPad.
Tap on Screen Time (This option might be under Settings > General for users who haven't set up Screen Time).
Tap on Content & Privacy Restrictions.
If prompted, enter your Screen Time passcode.
Tap on Allowed Apps.
Scroll down and locate Camera and FaceTime.
Ensure the toggle switch next to both apps is green. If it's gray, tap it to enable access.
Note
If you're not using Screen Time, these permission settings might be located directly in the Settings app under Privacy.
Part 4. How to Recover Not Saved FaceTime Photos?
We've discussed several troubleshooting steps to prevent and fix FaceTime photos not saving issue in the first place. But what if you've already encountered this issue and some precious FaceTime photos haven't been saved? Don’t worry, WooTechy iSeeker can save you, from which you can recover the not saved FaceTime photos in no time.
What Can iSeeker Do

100.000+
Downloads
- Cover over 18 data types, including photos and messages, notes, calls, and WhatsApp data, in addition to other lost data.
- Retrieve lost data from iOS device storage, iCloud, and iTunes backups.
- Recover damaged or corrupt files including Excel, PowerPoint, and Word with a few clicks;
- Support various data repairs, such as iOS data repair, photo repair, file repair, and video repair.
- Offer a free trial for users to scan and preview all recoverable data.
- Support the latest iPhone 15 and iOS 17 system.
Free Download
Secure Download
How to Use iSeeker to Recover Not Saved FaceTime Photos?
Step 1: Connect Your Device
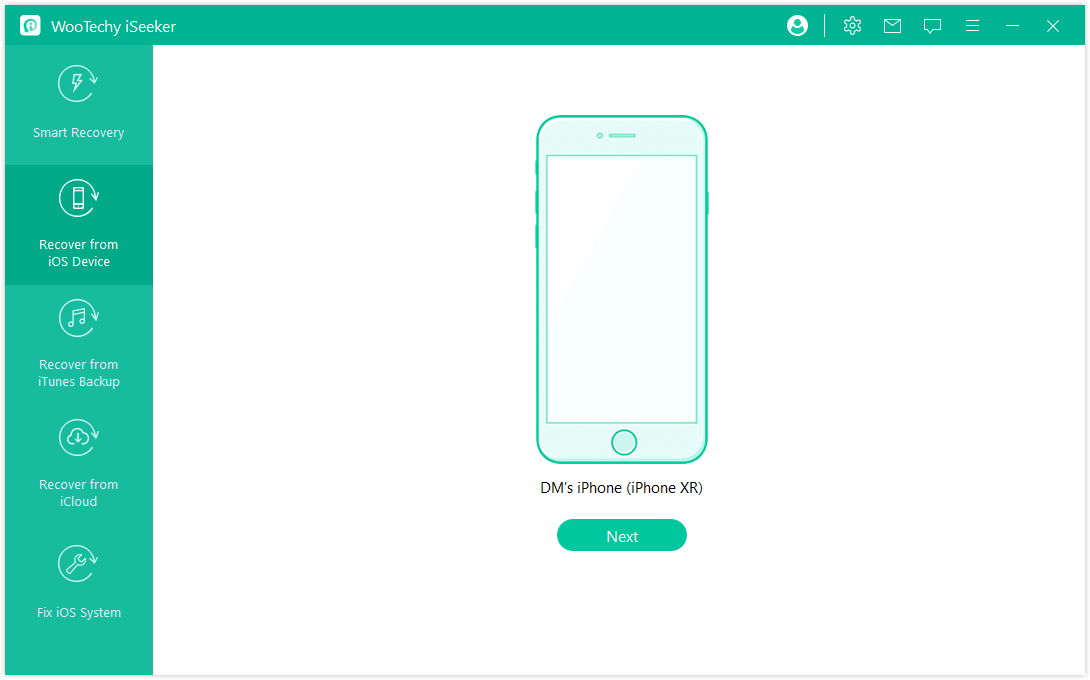
Start by downloading and launching iSeeker on your computer. Select the "Recover from iOS Device" option. Connect your iPhone to the computer, and proceed by clicking "Next" once your device is detected.
Step 2: Scan for Lost Snapchat Photos/Videos
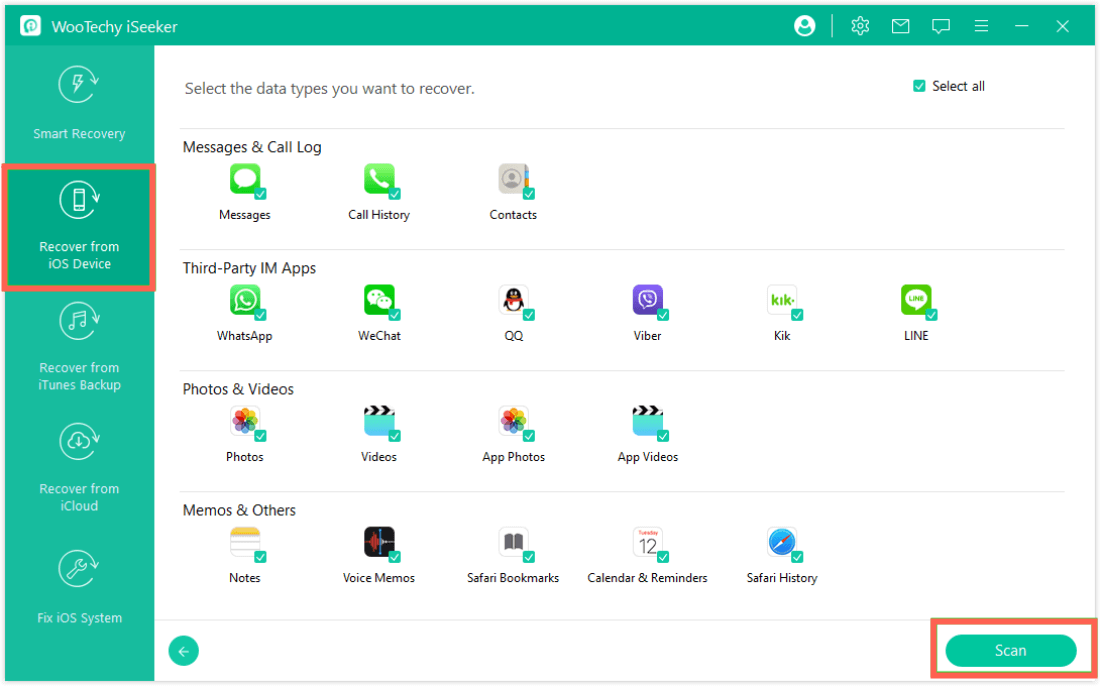
Once connected, all available data types will be displayed. Select "Snapchat" and initiate the scanning process by clicking "Scan."
Step 3: Preview and Recover Lost Snapchat Photos/Videos
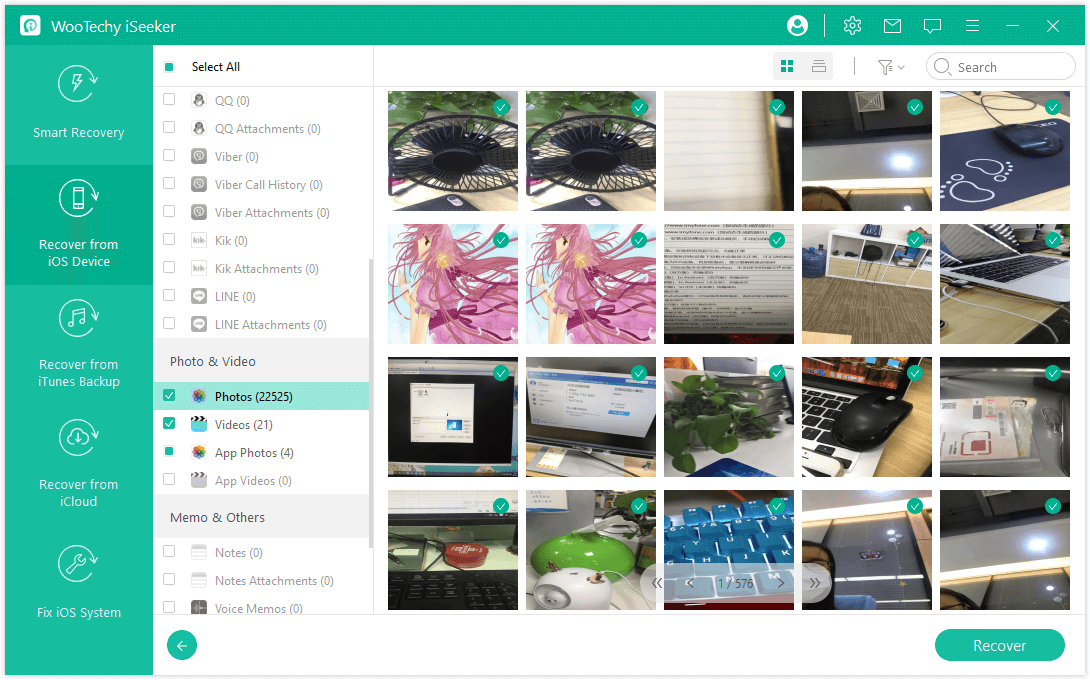
Upon completion of the scan, you'll be presented with a list of recovered files. Preview the photos and videos you wish to retrieve. After selection, click the "Recover" button to restore your data. Save the recovered files to your preferred location on your device.
Note
The steps mentioned above are for Mac users. For Windows users, check out the detailed guide here.
Conclusion
By meticulously following the troubleshooting solutions outlined in this guide, you've equipped yourself with the knowledge and tools to ensure your FaceTime photos are never lost again. So, fire up FaceTime, capture those connections, and rest assured - your memories are safe and sound.
Free Download
Secure Download


