A completely dead iPhone is a nightmare that no iPhone user wants to face. In fact, there are multiple situations that can cause it, such as broken screen, severe water damage, OS corruption, etc. When an iPhone is dead, it means that there is no access to all the memorable pictures you never want to lose. But does it mean the pictures are gone forever? Absolutely not!
There are multiple approaches you can try to recover photos from iPhone that won't turn on. All it depends on is how badly your iPhone is damaged. In this guide, we will address how to get pictures off iPhone that won't turn on through all the possible ways you can try on your own. So, let's get started!
- Part 1. Get Pictures off iPhone That Won’t Turn On Without Backup
- Part 2. Get Pictures off iPhone That Won’t Turn On With Backup
- 1. Recover Photos from iCloud/iTunes Backup if You Have a New Device
- 2. Recover Photos from iCloud/iTunes Backup if You Don't Have a New Device
- Part 3. Get Pictures off iPhone That Won't Turn On from iCloud.com
- Bonus Tips to Fix iPhone That Won’t Turn On
Part 1. Get Pictures off iPhone That Won’t Turn On Without Backup
If you unfortunately haven't made any backup before your iPhone got dead, then the best method to get pictures back is by using WooTechy iSeeker iOS data recovery tool. iSeeker is known for its powerful data recovery capabilities, supporting data recovery from a wide range of data types, such as photos, videos, messages, etc. Once you connect the tool with iPhone, it will conduct a thorough scan to let you instantly recover photos from iPhone that won't turn on.
In fact, accidental data deletion, system crash, factory reset, iOS upgrade issue, and any other scenario that result in data loss is very well handled by iSeeker. In short, iSeeker is a one-stop solution to all data loss scenarios.
What Makes iSeeker Stand Out

100.000+
Downloads
- It provides the highest recovery rate.
- It lets you preview the photos before restoring them.
- It supports almost all iPhone models and iOS versions (iOS 16 included).
- It just requires a few clicks to recover photos.
Download Now
Secure Download
Follow the below steps to use iSeeker to get pictures off iPhone that won't turn on:
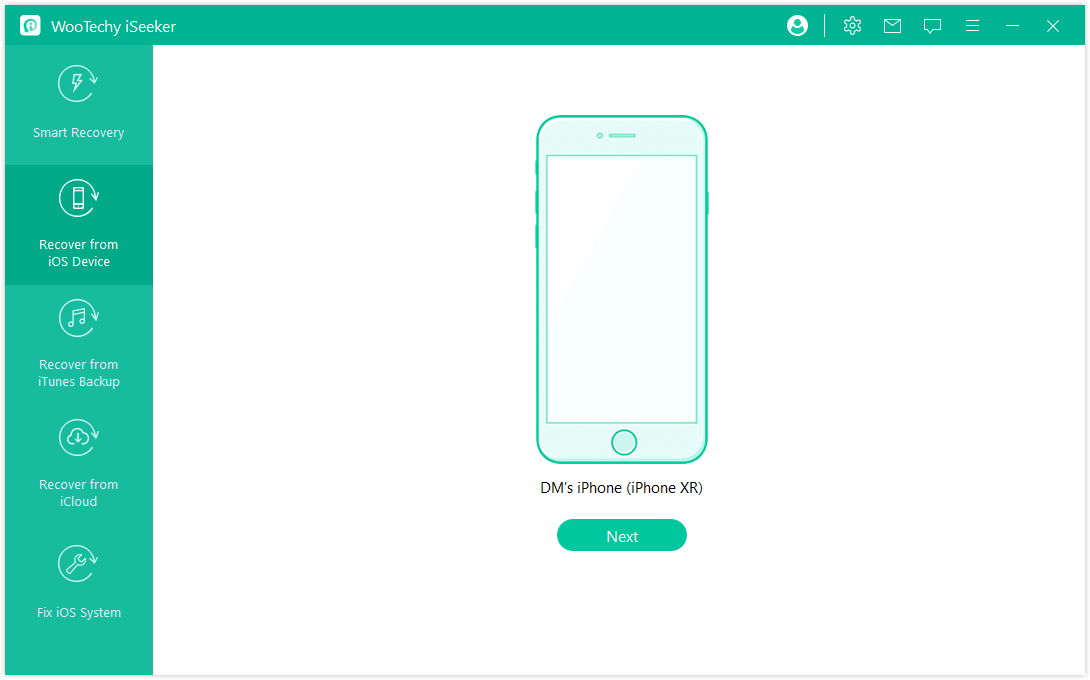
Step 1. Download and launch iSeeker on your computer. Select Recover from iOS Device from the left sidebar and then connect your iPhone with the computer. Once the phone is detected, click Next.
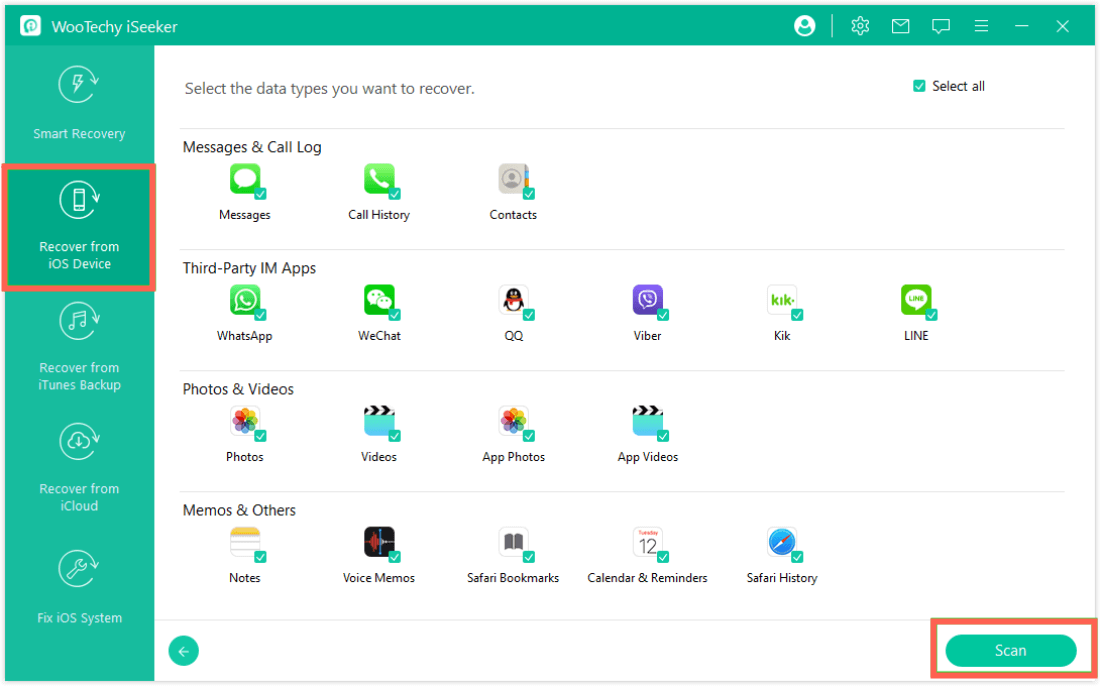
Step 2. Pick Photos as the data type you want to recover and then click Scan. Afterward, wait till the scanning process is completed.
Step 3. Preview all the recoverable photos, select the files you want to recover, and click Recover.
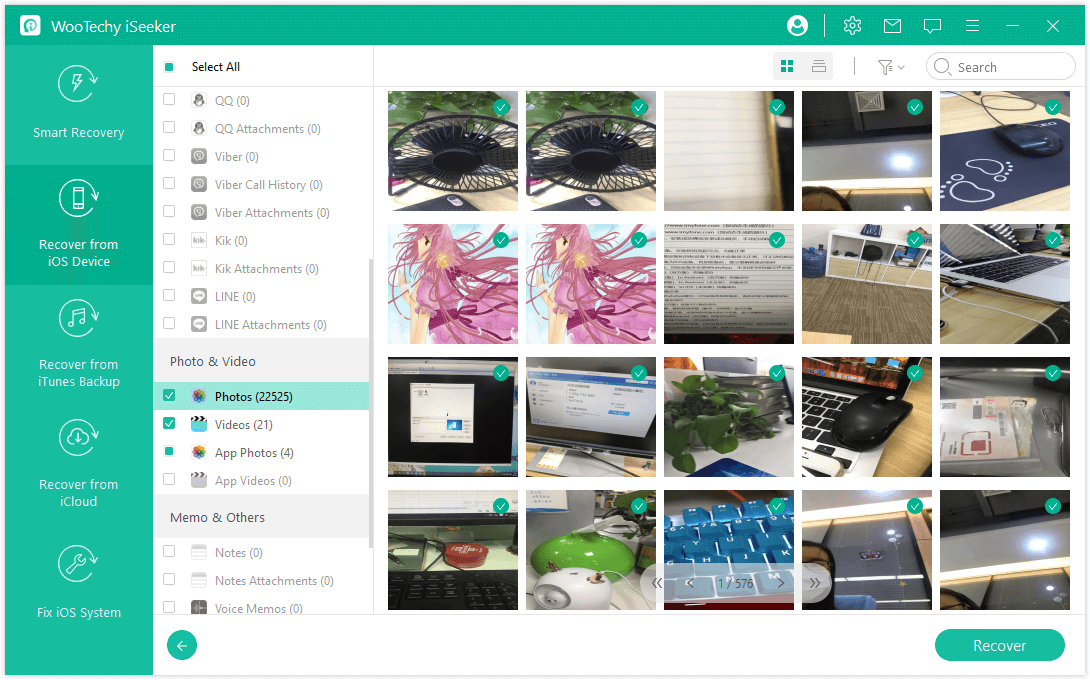
This way, all the selected photos present in your iPhone will be restored to your computer instantly.
Part 2. Get Pictures off iPhone That Won’t Turn On With Backup
1. Recover Photos from iCloud/iTunes Backup if You Have a New Device
If you have made an iPhone backup with iCloud or iTunes previously, then you can restore that backup to recover the photos. However, this method needs a new iPhone to complete the restore process. So, if you have access to a new iPhone, then follow the below steps depending on how you backed up the data.
Steps to Restore Backup from iCloud:
Turn on your new iPhone and start the setup process by following the on-screen instructions.
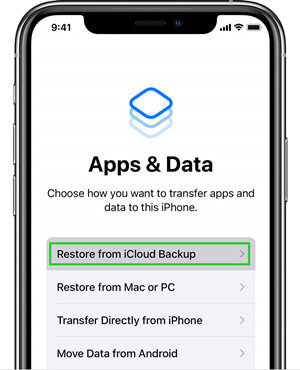
When you reach the Apps & Data stage, tap Restore from iCloud Backup.
Log in to your iCloud account using your Apple ID.
Select the most relevant backup you want to restore and then initiate the restore process by following the on-screen instructions. Ensure that you have access to the internet continuously throughout the process.
Once the restore process and the remaining setup are completed, you can access all the lost pictures from the Photos app.
Steps to Restore Backup from iTunes
Connect the new iPhone with the computer via USB cable and launch iTunes/Finder app on the computer.
Click on the iPhone name from the left sidebar and then click Summary. From the Backups section, choose Restore Backup.
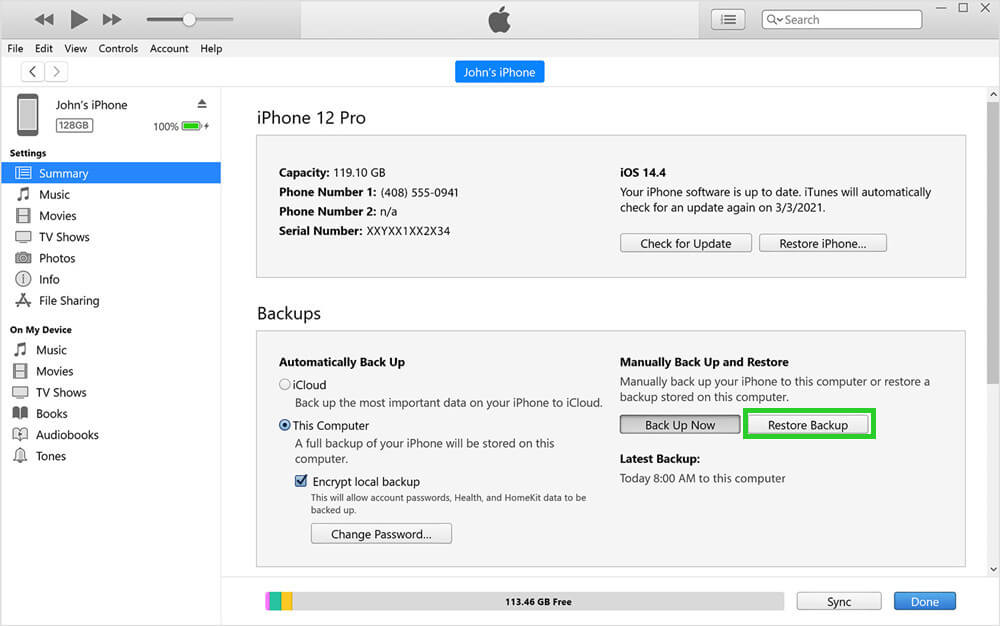
Select the most relevant backup you want to restore and then initiate the restore process by clicking the Restore button.
Once the process is completed, disconnect your iPhone from the computer and open the Photos app.
2. Recover Photos from iCloud/iTunes Backup if You Don't Have a New Device
In case you have made iCloud/iTunes backup, but you don't have access to a new device to restore the backup, then you can use WooTechy iSeeker to extract only photos from the backup and save the photos on your computer.
Follow the below steps to use iSeeker to recover photos from iCloud/iTunes backup:
Steps of using Recover from iCloud Backup Mode
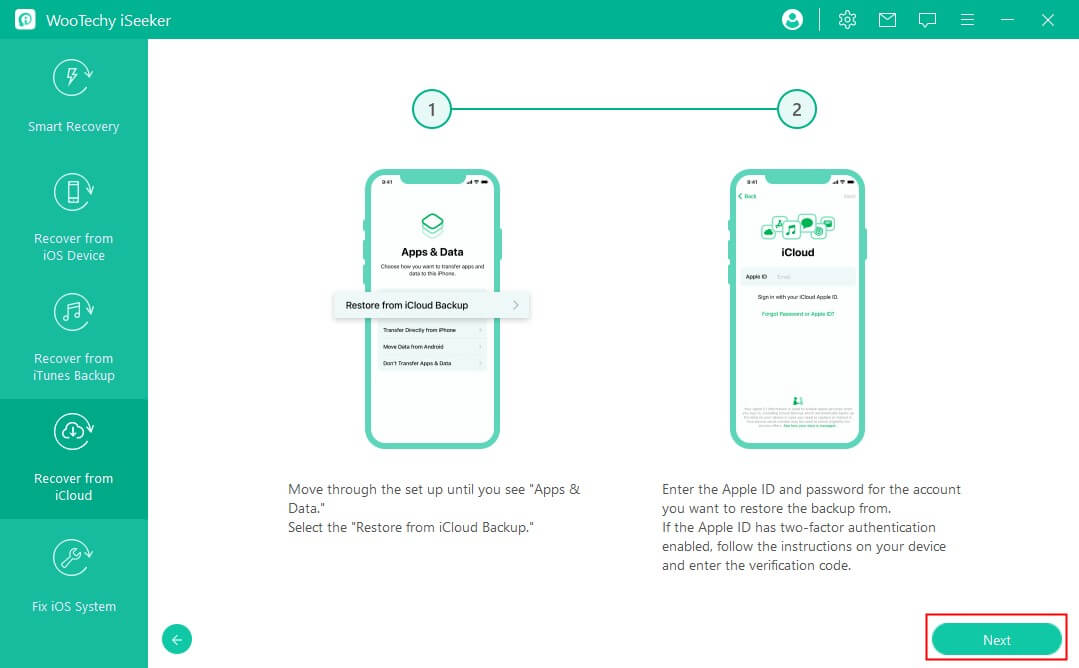
Step 1. Launch the iSeeker iPhone data recovery application and click Recover from iCloud from the left sidebar. Afterward, click the Recover data from iCloud backup option. Follow the instructions on the screen to prepare your iPhone.
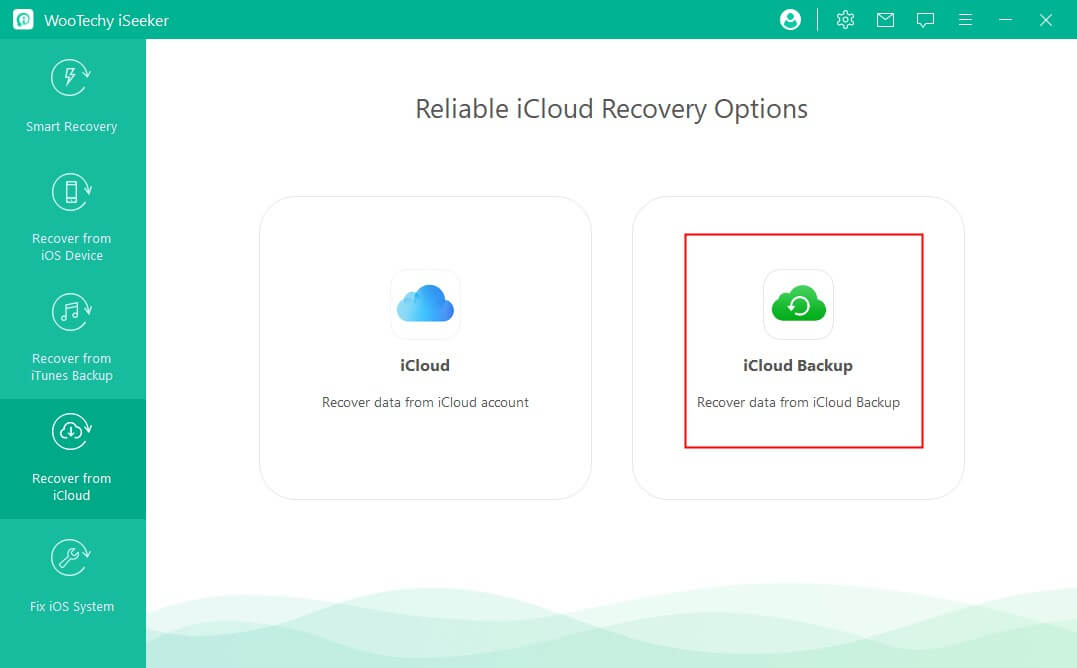
Step 2. Click on Restore from iCloud Backup from the Apps & Data screen and sign in to your iCloud account. Select a backup you want to recover.
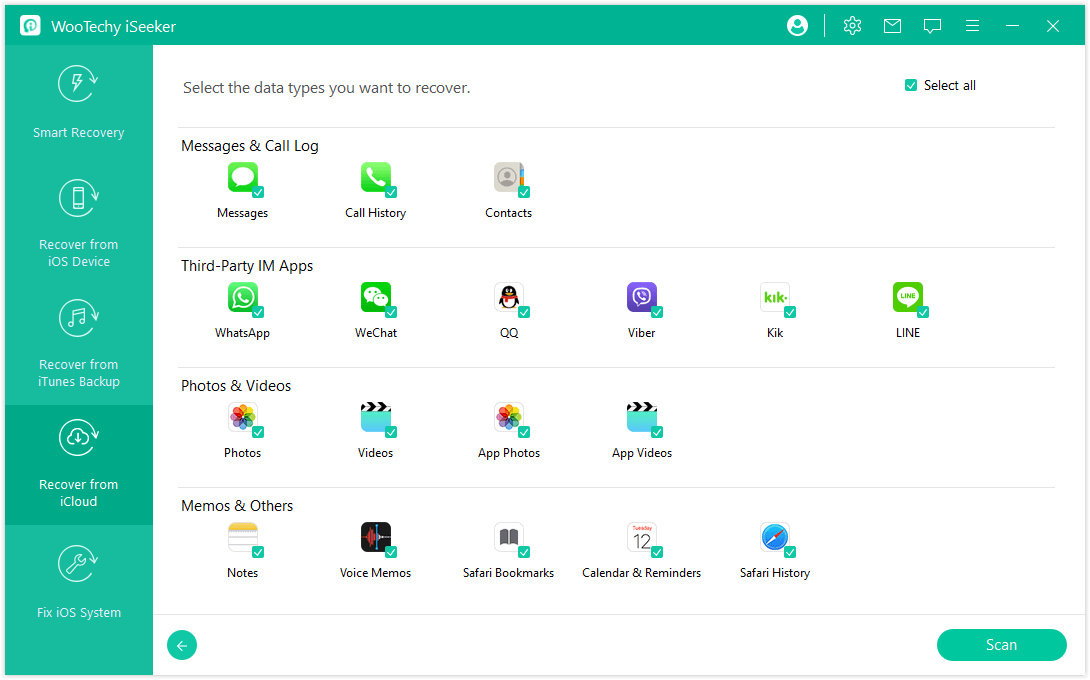
Step 3. All the data will be displayed accroding categories on the screen. Click on Photos and click Scan. Then you will be able to preview all photos. Choose the desired ones and click on Recover.
Steps of using Recover from iTunes Backup mode
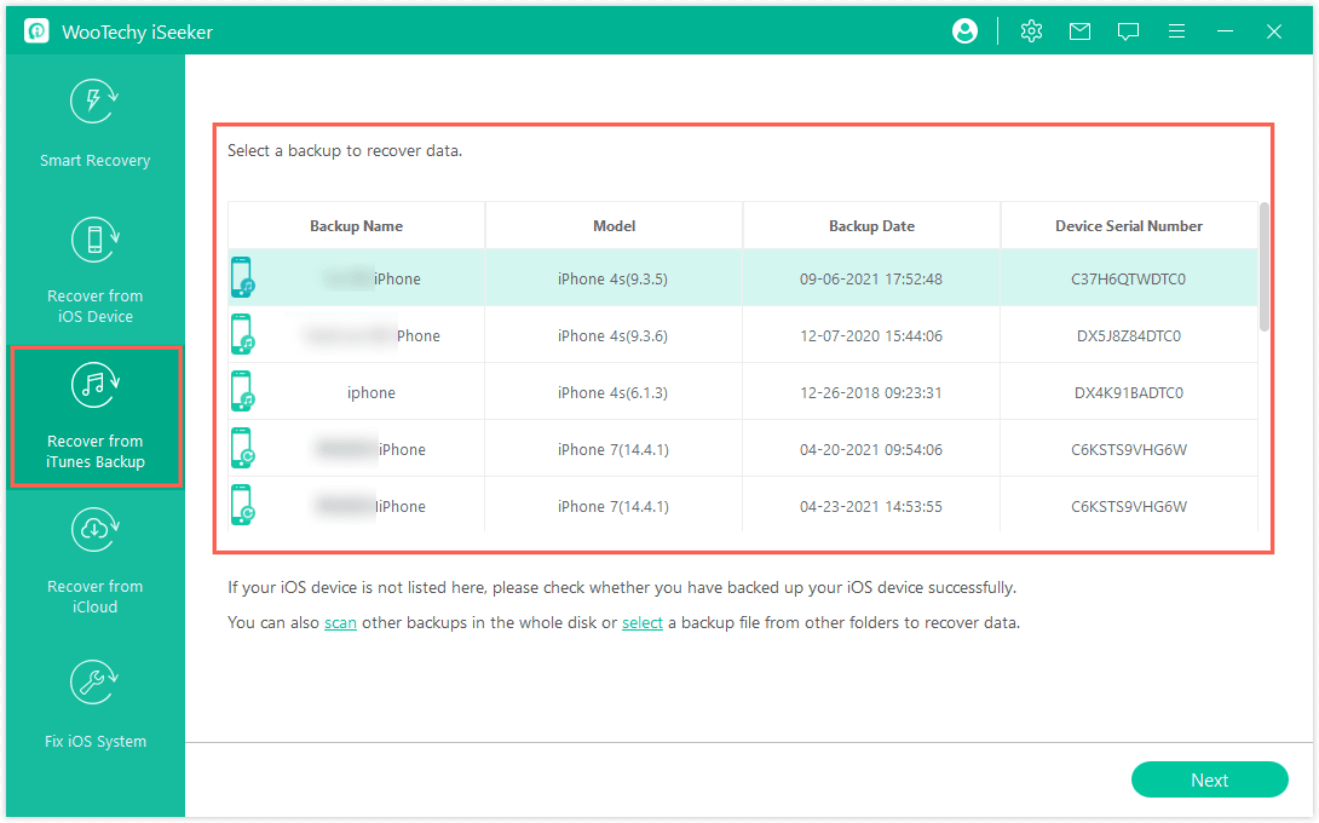
Step 1. Launch the iSeeker iPhone data recovery application and click Recover from iTunes Backup from the left sidebar. Pick the relevant iTunes backup that contains the photos you want to recover and then click Next.
Step 2. Select the type of data you want to restore. In your case, select the Photos and click Scan. Afterward, wait till the scanning process is completed.
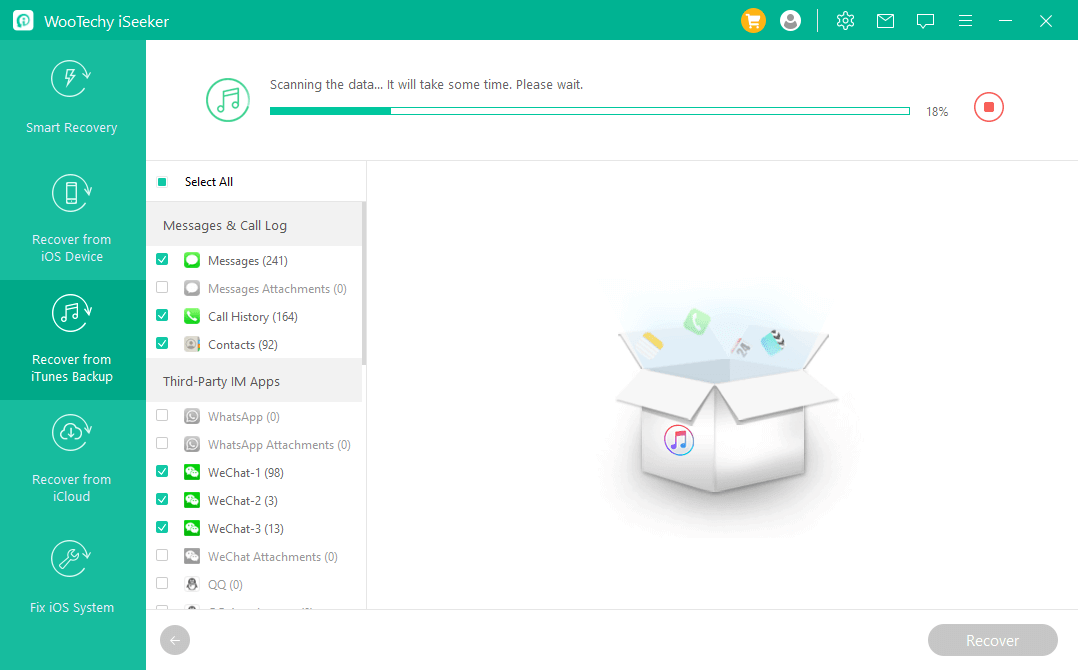
Step 3. Preview all the recoverable photos, select the files you want to recover, and click Recover.
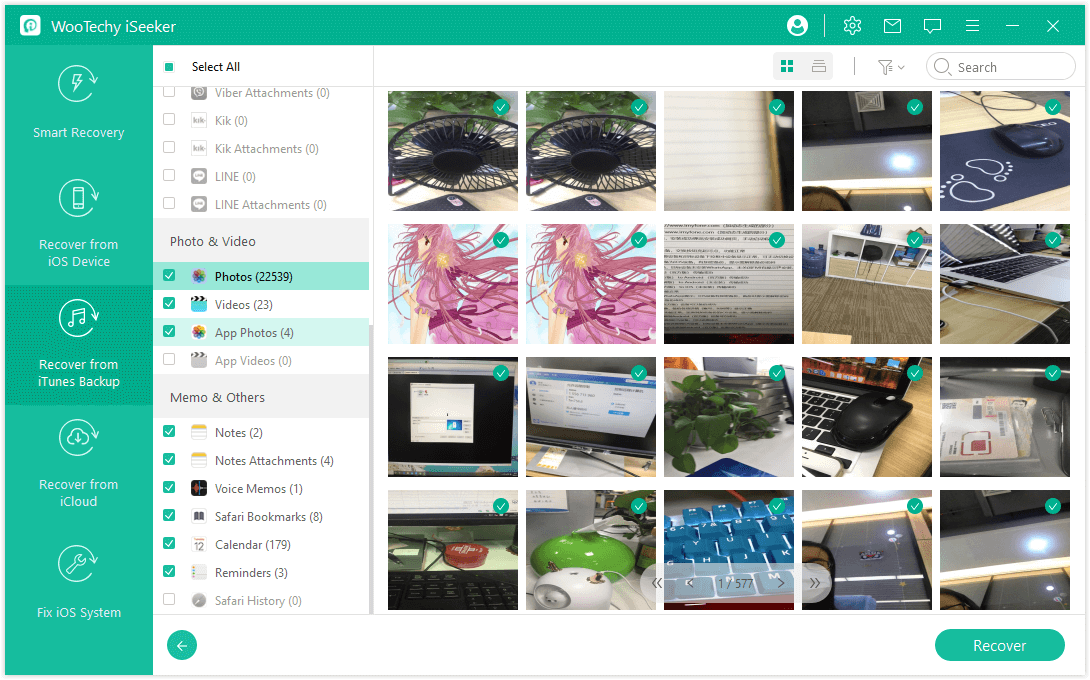
With iSeeker, you could easily restore all the photos from iCloud or iTunes backup to your computer.
Part 3. Get Pictures off iPhone That Won't Turn On from iCloud.com
If you have synced your photos to iCloud, then you can just go to iCloud.com and simply download the photos back to your computer.
Follow the below steps to learn how to get pictures off iPhone that won't turn on from iCloud.com:
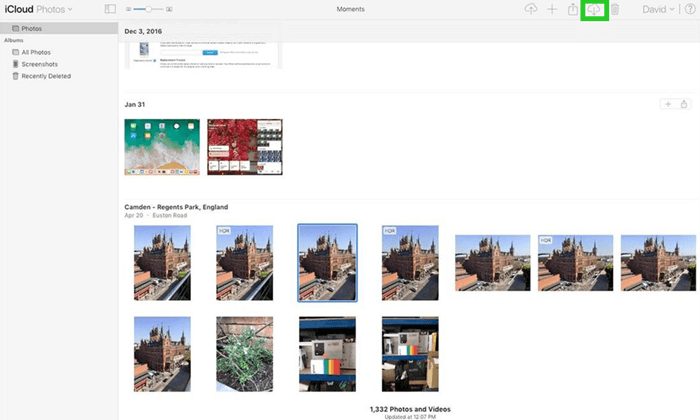
Open the web browser on your computer and go to iCloud.com. Log in to your iCloud account using your Apple login credentials.
Click Photos from the main dashboard, select all the photos you want to download to your computer, and then click the download icon.
Bonus Tips to Fix iPhone That Won’t Turn On
1. Charge iPhone With Apple Lightning USB Cable
It is likely that you have used the wrong cable that failed to charge your iPhone. If that's the case, then your iPhone is not turning on because of insufficient power. So, simply use an Apple lightning USB cable to charge the iPhone and see if it responds.
2. Force Restart Your iPhone
If there is some system glitch that is hindering iPhone to turn on, then a force restart might help fix the issue. Follow the below steps to learn how to force restart your iPhone depending on your iPhone model:
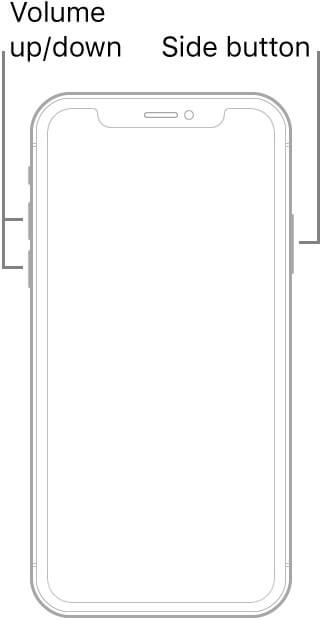
iPhone 8 and Onward: Press the Volume Up button and then quickly release it. Press the Volume Down button and then quickly release it. Lastly, press the Side button and keep it pressed until you see the Apple logo on the screen.
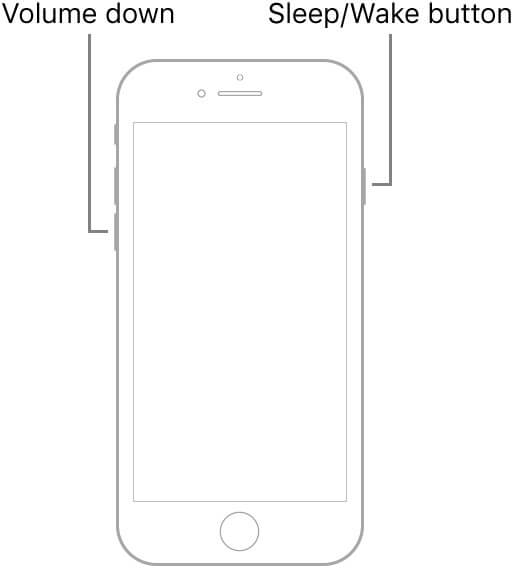
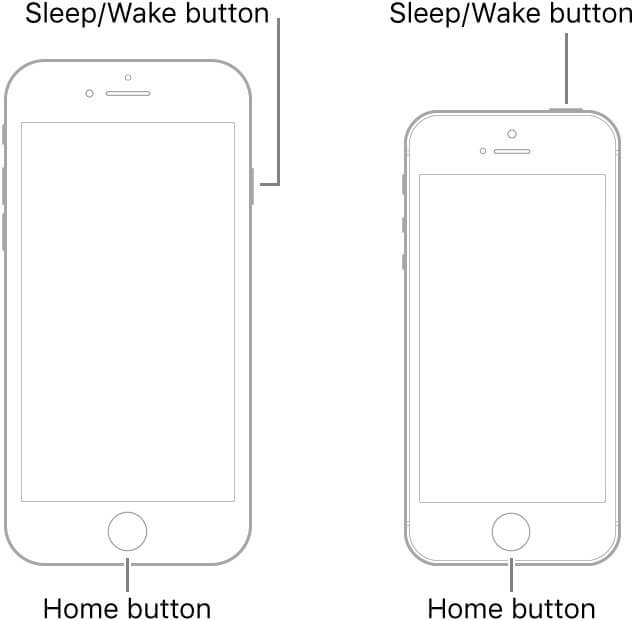
iPhone 7 and 7 Plus: Press the Volume Down button and Sleep/Wake button together and keep them pressed until you see the Apple logo on the screen.
iPhone 6s and Older: Press the Sleep/Wake button and Home button together and keep them pressed until you see the Apple logo on the screen.
3. Use iSeeker to Fix Your iPhone
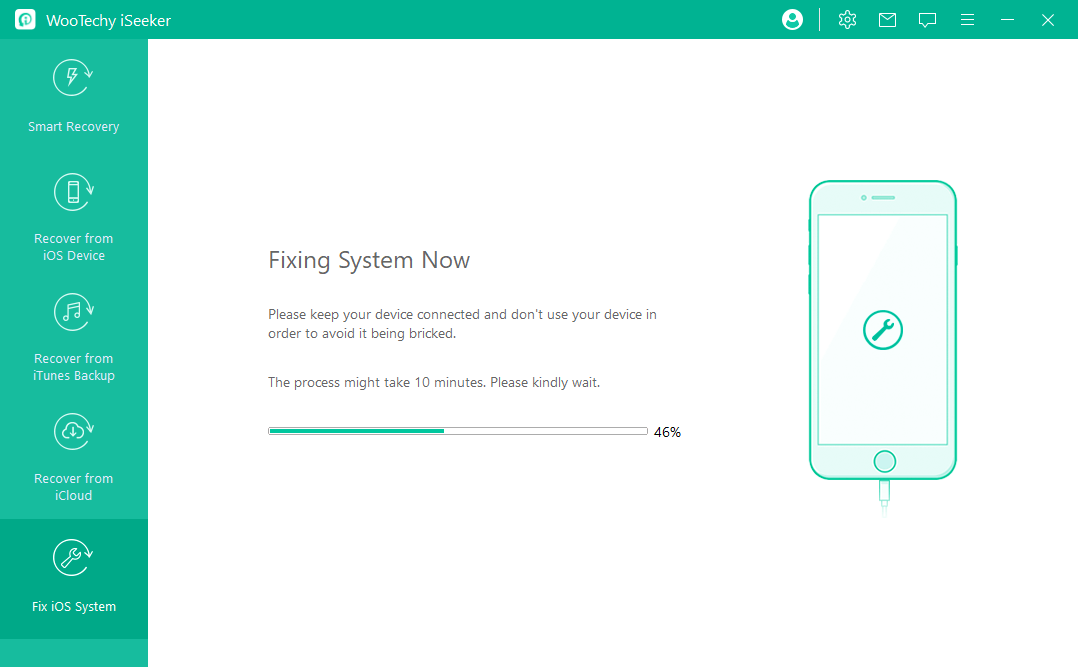
If you don't know what has caused your iPhone to become non-responsive, then you should use iSeeker Fix iOS System mode that can fix various iOS issues through its intelligent analysis and fixes.
Conclusion
An iPhone that won't turn on is a troublesome situation that no iPhone user wants to face. However, the unlucky ones tend to look for ways how to get pictures off iPhone that won't turn on. Here we have discussed the various possible methods that you can adopt to get the pictures out of your iPhone.
Overall, if you are looking for an instant solution either with or without backup, then WooTechy iSeeker is an all-in-one solution you should trust. Its intelligent scanning, intuitive interface, preview feature, and instant recovery make it the ideal tool for this type of situation.
Download Now
Secure Download


