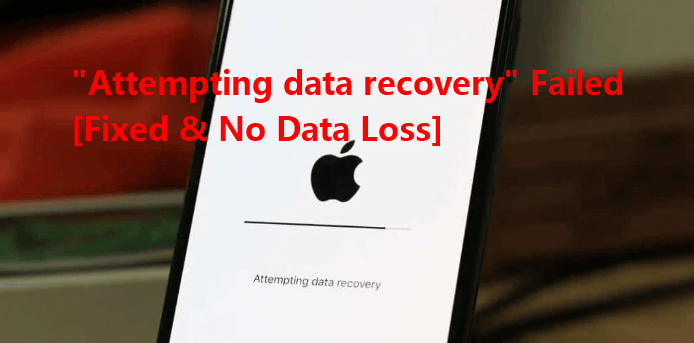
What does the term "attempt data recovery" on an iPhone mean?
The 'attempting data recovery' error is related to an update problem that often happens when new iOS versions are updated through iTunes.
Numerous users may run across this issue. When this happens, your messages may vanish, and the iPhone may eventually restart. Worse still, your critical data may not be recovered in the manner anticipated. That is why many users have claimed that they rebooted their iPhone yet their images were gone, or that their photos vanished from their camera roll following an upgrade, and so on.
- The Most Common Reasons for the iPhone's 'Attempting Data Recovery' Loop
- What to Do If iPhone Attempting Data Recovery Failed Issue Happens
- 1. Resolve the "Attempting Data Recovery" Error
- 2. Recover Data After "Attempting Data Recovery" Failed Using iTunes/iCloud
- 3. Recover Data After "Attempting Data Recovery" Failed Using iSeeker
The Most Common Reasons for the iPhone's 'Attempting Data Recovery' Loop
The 'attempting data recovery' screen is lengthy and often preceded by request to 'click the home button to restore.'
Several of these instances were documented in the following scenarios:
Users disconnected the iPhone from the PC or Mac during the upgrade
Users downgraded from iOS 14 to iOS 13 or below;
Users disconnected the iPhone from the PC or Mac during the upgrade
Users downgraded from iOS 14 to iOS 13 or below
What to Do If iPhone Attempting Data Recovery Failed Issue Happens
Certain iPhone owners have been locked in an endless cycle of attempting data recovery failed. Whatever the scenario, having the appropriate answers or tools can assist you in quickly resolving it. Here is a comprehensive instruction, which includes the all-in-one recovery tool iSeeker.
1. Resolve the "Attempting Data Recovery" Error
Users may get caught on the try data recovery page or in an unsuccessful recovery cycle.
Method 1: Make use of iSeeker
WooTechy iSeeker iPhone data recovery software recovers all common kinds of issues and data rapidly. Additionally, it restores needed data to your PC or Mac without messing with your device's current data. It makes no difference how the valuable data was lost; iSeeker's top-notch data recovery technology serves as a trustworthy solution in every iOS data loss situation. It's easy and quick.
Download Now
Secure Download
Utilize Standard Mode to Resolve iOS Issues Without Losing Data
Step 1: On the interface, choose Standard Mode, then connect the iDevice to a computer via a USB cord and click Next.
Proceed to Step 2 if your device is identified. If not, follow the on-screen steps to enter DFU or Recovery Mode on your device.
Step 2: The software will recognize your device's model and display the firmware versions that are currently available. Select the preferred version, click "Download" and wait for the download to finish.
Step 3: After downloading the firmware, select "Start to Fix" to validate and extract the firmware. Following that, the app will begin automatically repairing your iOS.
Once the repair procedure is complete, please verify that your device is again operating properly. If the fix fails, you may either be attempting data recovery iPhone failed in Standard Mode or switch to Advance Mode.
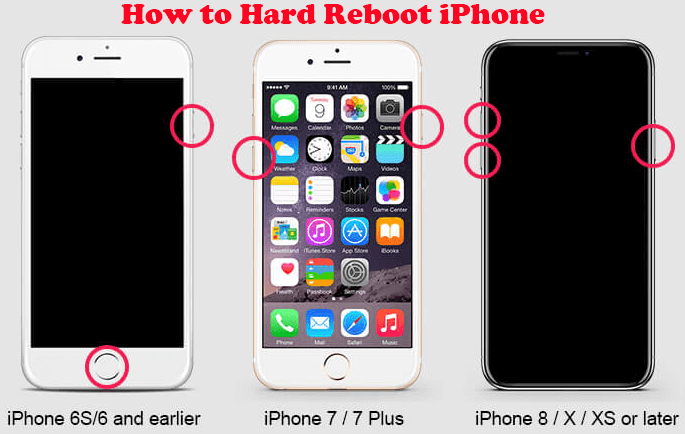
Method 2. Force Restart iPhone
If your iPhone is not responding and you cannot switch it off and back on, force it to restart. The procedures for forcing an iPhone restart vary by model. If your iPhone does not perform as anticipated after a restart, go to the Method 1 or visit the iPhone Support page.
For iPhone 6 and earlier models: Press down the Home and Power buttons at the same time. As soon as the Apple logo pops up, release the buttons.
Force restart iPhone 7 and 7Plus: Simultaneously press and hold the Volume Down and Sleep/Wake buttons. Release both buttons when the Apple logo displays.
Restart iPhone 8 and later models (iPhone X/XS/XR/11/12/13 model): Rapidly push and release the Volume Up button, then quickly press and release the Volume Down button. Finally, press and hold the Side button. Release the button when the Apple logo displays.
2. Recover Data After "Attempting Data Recovery" Failed Using iTunes/iCloud
Restoring your iPhone to recovery mode may resolve the "iPhone stuck at the Apple logo" problem, but you will lose all of your iPhone data in the process. You may be able to recover deleted data from an iPhone after iPhone data recovery failed loop using iTunes or iCloud backups.
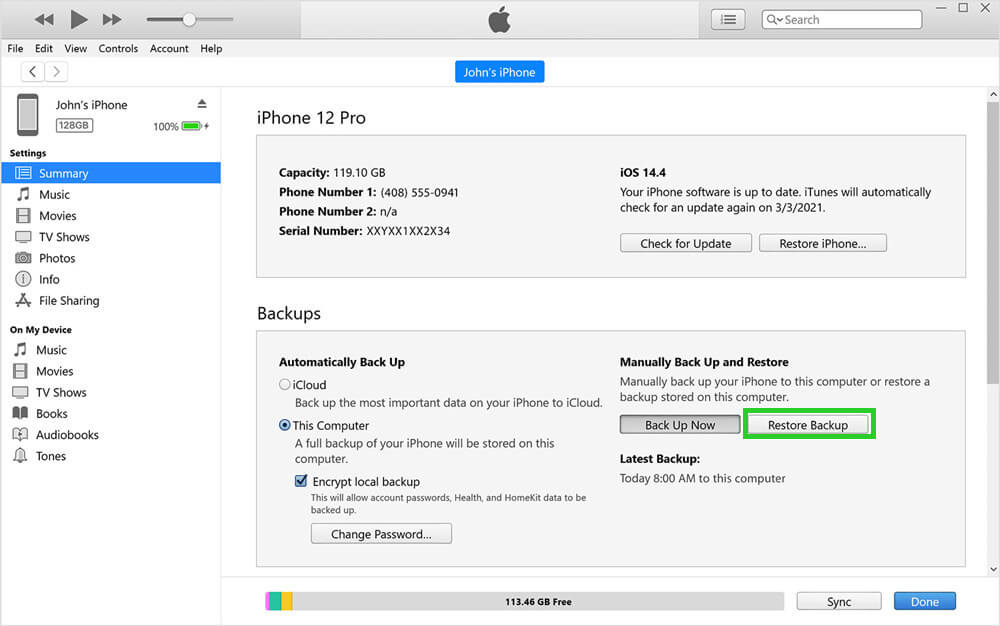
Steps to recover data from iTunes backup
Open iTunes and connect the iPhone to a computer where you previously created an iTunes backup.
Click your device's icon, and then on the summary menu, choose Restore Backup.
Click Restore to choose the most recent backup.
Steps to recover iPhone data via iCloud backup
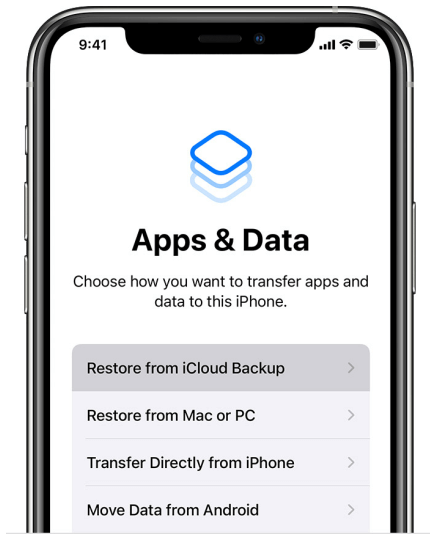
When you reset your iPhone after attempting data recovery failed iPhone, you may be able to retrieve iPhone data from an iCloud backup.
When the Apps & data screen appears, press Restore from iCloud Backup.
Log in to your Apple ID and choose the most recent backup from the list.
3. Recover Data After "Attempting Data Recovery" Failed Using iSeeker
If iTunes/iCloud backups cannot restore your iPhone or if you notice that some data remains missing after restoring the device, use iSeeker. iSeeker is the most advanced iPhone data recovery software available, allowing you to recover lost content straight from iOS devices, iCloud, and iTunes backups.
Professional data recovery software WooTechy iSeeker is able to scan and analyse all your data. After the scanning procedure is complete, the results will be shown in categories clearly. It doesn't require any tech knowledges. Within only 3 steps, you can retrieve your lost data.
What Makes iSeeker the Best Data Recovery Tool:

100.000+
Downloads
- Exceptional in recovering data of 18 different types, including videos, photos, WhatsApp data, messages, and many more.
- Allows you to extract the desired files directly from iOS devices, or iCloud/iTunes backup.
- Various features including fix all kind of iOS system issues effectively.
- Supports almost all iPhone/iPad models and iOS versions, including the newest iOS 16.
- Safely recover all the data within only 3 simple steps.
Download Now
Secure Download
Recover Data from iOS Device
Connect your gadget to the computer. Utilize a USB connection to connect your iOS device to your PC. The software will detect the iOS device automatically.
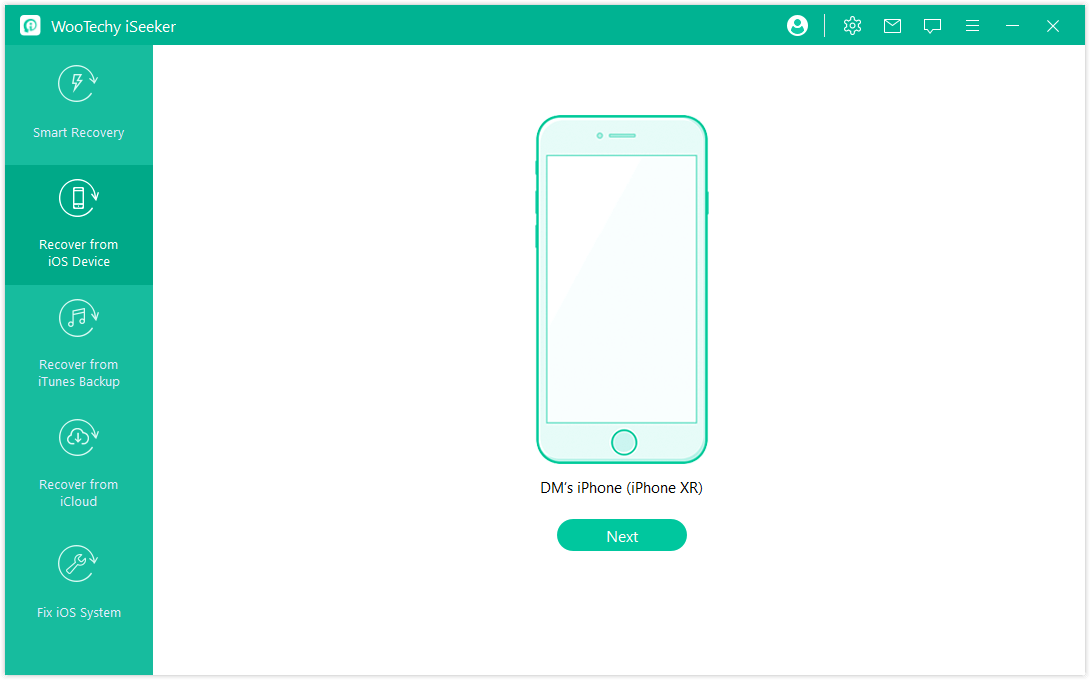
Scan the iOS device's data by clicking Scan, the application will perform a data recovery scan on your iOS device.
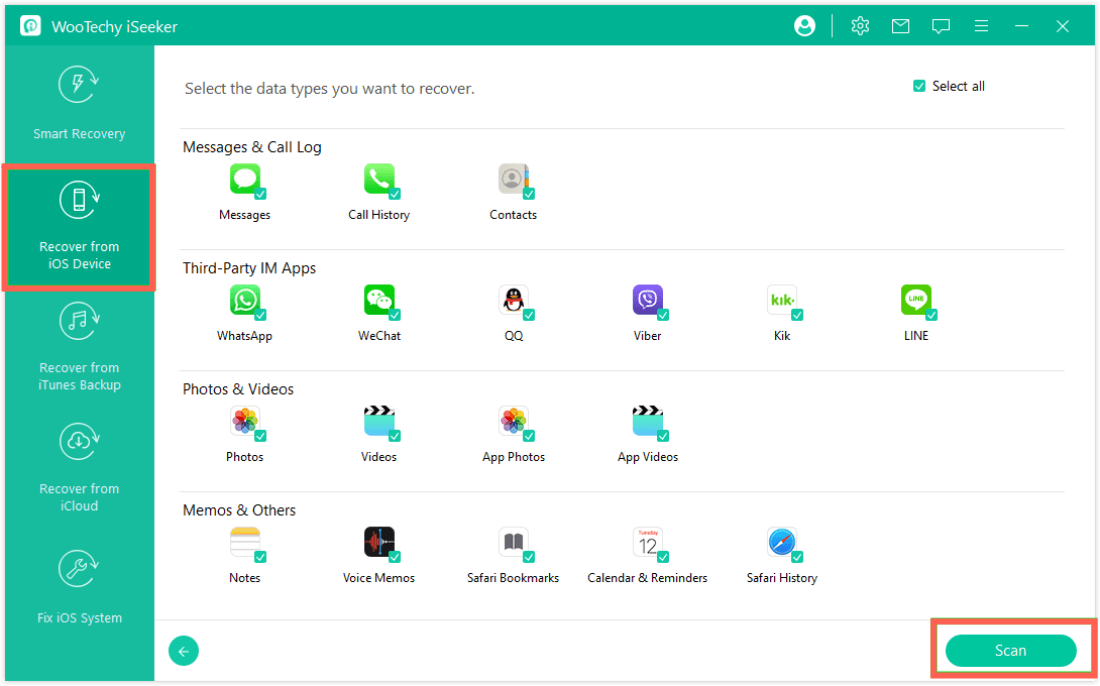
Once you've located the data you wish, click the Recover.
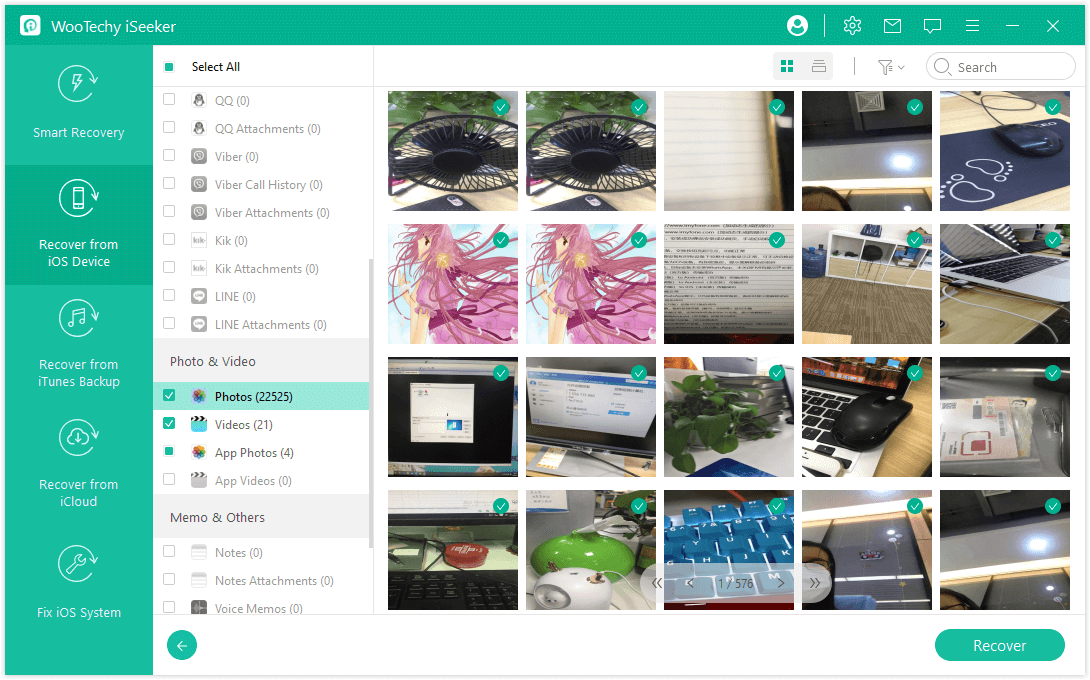
Additionally, you may input the products you're looking for in the search box located at the window's top right corner. After locating the data, you can also pick them and choose seleted files to restore.
Conclusion
That concludes the discussion for resolving the "Attempting data recovery" problem. As you can see, this is an update problem that may be resolved by using professional iOS System Recovery tool WooTechy iSeeker or executing a forced restart on your device.
However, If none of these techniques resolves the issue, you may easily recover the deleted data with iSeeker. Just download iSeeker and give it a try!
Download Now
Secure Download


