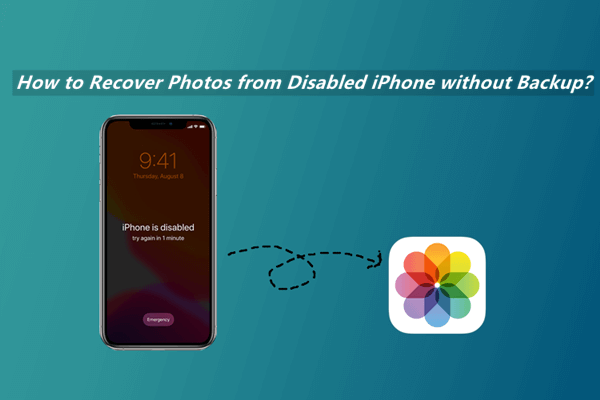
When you input incorrect screen unlock passcodes multiple times, your iPhone will automatically be disabled. Apple does this for security and privacy reasons; they assume the device doesn't belong to you if you can't input the correct passcode after ten attempts. This will deny you access to all files on the iPhone, including your precious photos.
However, it is possible to forget the passcode of your own iPhone, or probably your little child may enter ten incorrect passcodes unknowingly, so your iPhone gets disabled. So, how do you access your photos if you forgot your passcode?
If this ever happens to you, worry not because we've got a couple of solutions for you. This guide will take you through some of the most reliable ways to recover your photos from a disabled iPhone.
- Part 1. Can I Get Photos Off My Disabled iPhone without Backup?
- Part 2. How to Recover Photos from Disabled iPhone without Backup?
- Part 3. How to Unlock the Disabled iPhone Using iTunes?
- Bonus: How to Remove Your Screen Lock without Losing Data?
Part 1. Can I Get Photos Off My Disabled iPhone without Backup?
Yes, it is possible to get photos off your disabled iPhone even if you don't have a backup. When you input wrong unlock passcodes many times and make your iPhone disabled, everything is still stored on your iPhone. With the disabled iPhone, you just have no access to them. Maybe the most straightforward way is to extract the photos from a backup. But since your iPhone is disabled, you will need another iPhone or iPad. That sounds too troublesome for some people. However, with the help of a third-party recovery application, you could easily get photos off a disabled iPhone backup.
Part 2. How to Recover Photos from Disabled iPhone without Backup?
As we have said in the last part, using a third-party tool could help you recover photos from your disabled iPhone easily even without backup. The third-party tool we will introduce here is WooTechy iSeeker.
Recommended by users from all over the world, iSeeker is one of the most reliable iOS data recovery programs. You can use the software to recover any files from iPhone, iPad or iPod Touch. And whether you want to recover photos from a disabled iPhone or damaged iPhone, iSeeker will help you get back your photos or any other lost data for sure. Moreover, it's quite easy to use.
What Makes WooTechy iSeeker the Best Data Recovery Tool

100.000+
Downloads
- Other than photos, it can recover more than 18 types of deleted or lost data like videos, text messages, WhatsApp chat history.
- It recovers data directly from the iPad without the need for a backup file.
- It works well on almost all iOS devices and iOS versions, including iOS 16.
- It allows you to preview the photos before restoring them.
- It has the highest recovery rate among the data recovery applications and will bring everything you need back to your iPhone/iPad.
Download Now
Secure Download
Steps to recover photos from disabled iPhone with iSeeker:
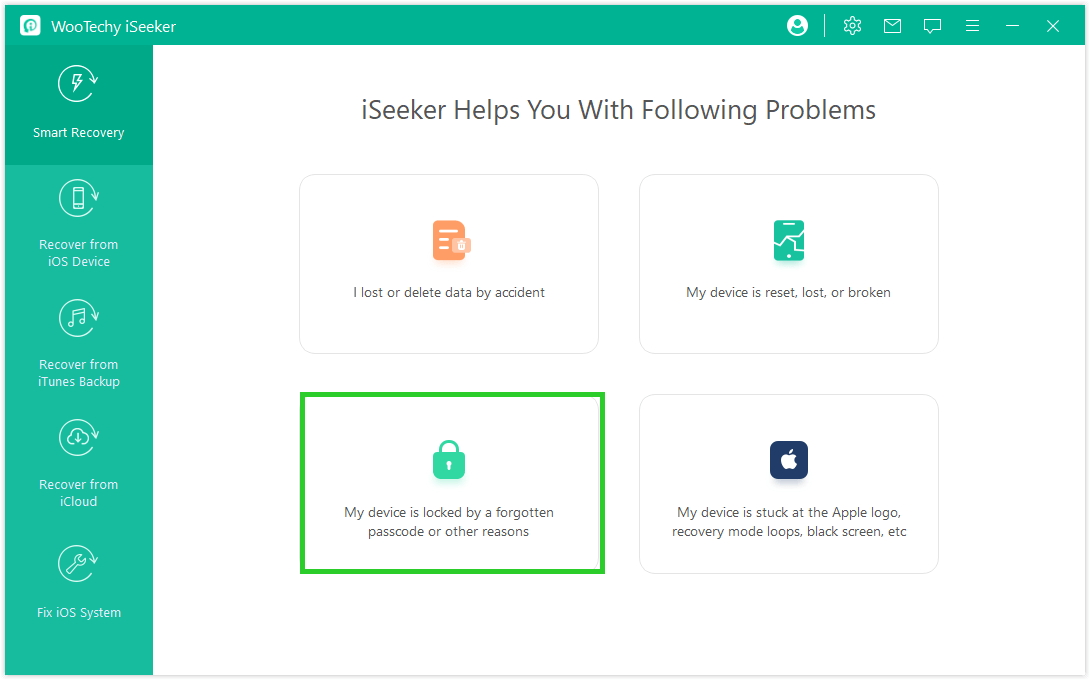
Step 1. Download and install iSeeker to your computer. When the installation is done, open the app and choose the Smart Recovery option from the app menu. Click My device is locked by a forgotten passcode or other reasons. Connect your disabled iPhone and click Next once it has been detected.
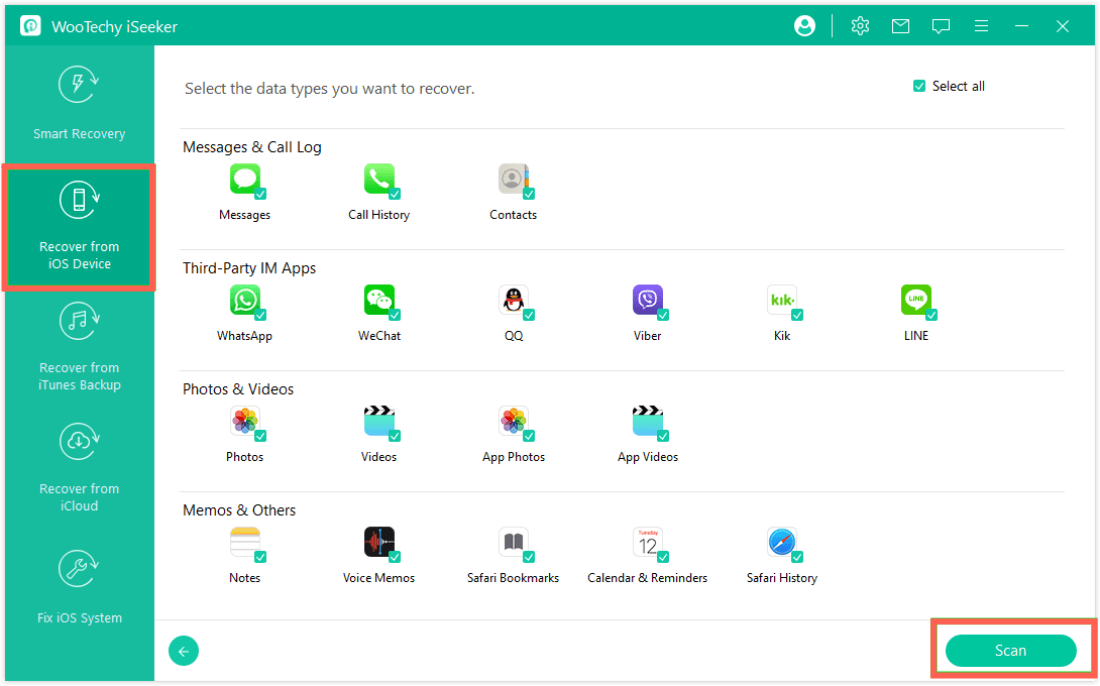
Step 2. iSeeker will now display the various types of files that you can recover. In this case, select Photos and click Scan. The software will scan for all photos on your disabled iPhone.
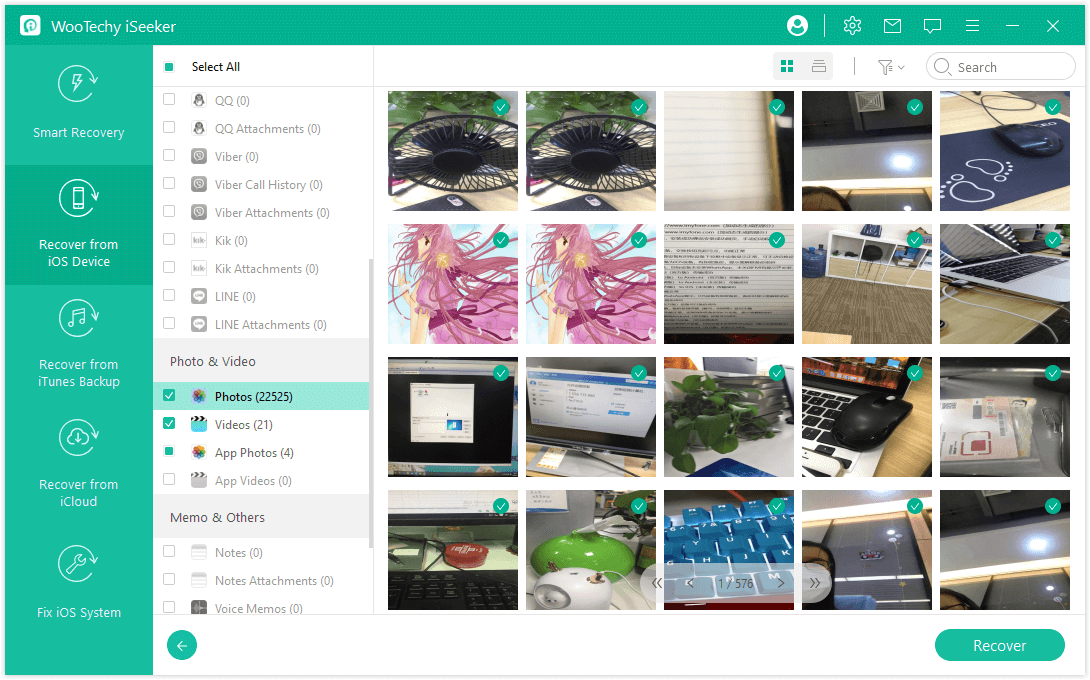
Step 3. When the scan is completed, all the discovered photos will be listed so that you can preview and select the ones you need. Click Recover to start the process. You will be required to choose a safe location on your computer to store the recovered photos. Once the restoration process is complete, you will find all the photos in the folder you selected
Part 3. How to Unlock the Disabled iPhone Using iTunes?
Another useful way to recover the photos from a locked iPhone is to unlock the iPhone with iTunes, then restore a backup from iTunes. After that, you will be able to access your photos and other data on iPhone.
First, we recommend you back up all the exsiting data to iTunes before starting unlocking iPhone. This will help you avoid losing photos that are not included in your last backup. Before starting, you should make sure you are using the latest version of iTunes, or you might come across some unexpected errors.
Follow the steps below to back up your iPhone to iTunes.
Connect your iPhone to the computer, which your iPhone sync with. Launch iTunes. Choose your iPhone's name.
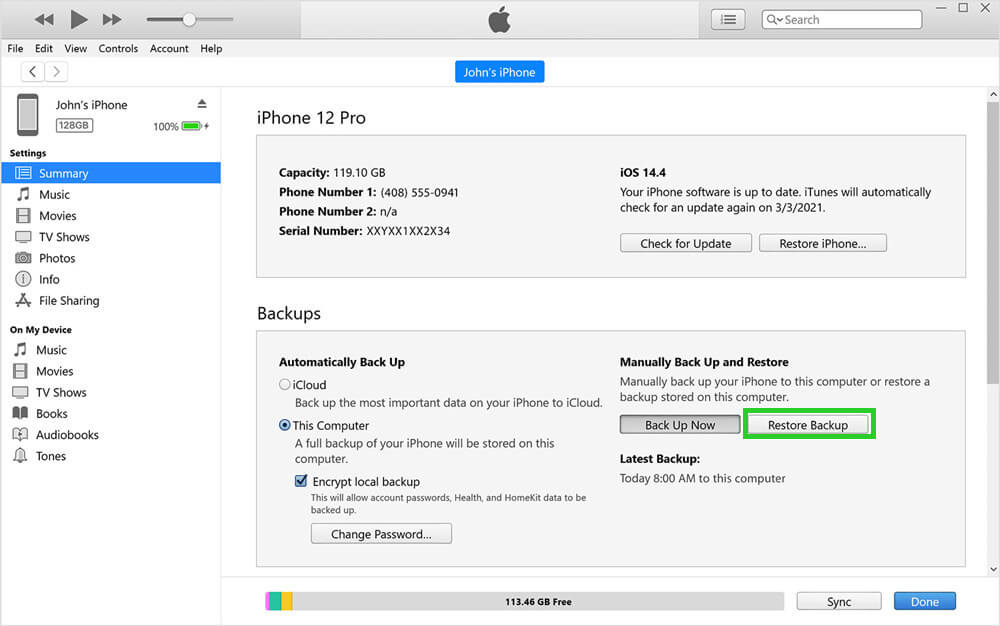
Click Summary. Then choose Back Up Now from the Backups section.
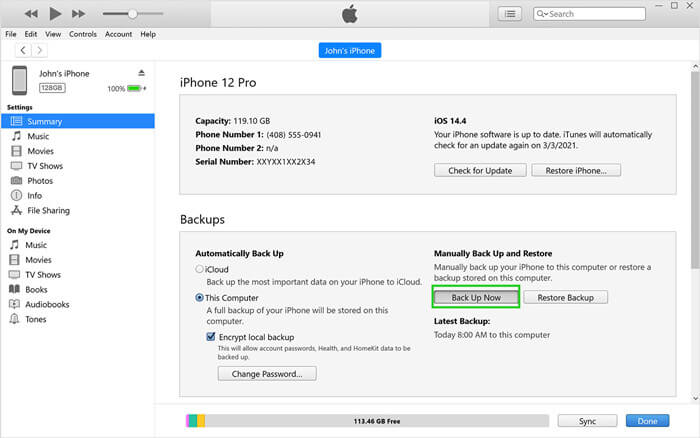
After you successfully back up your iPhone, you could then start unlocking your disabled iPhone with iTunes. Learn how to do this with the following guide.
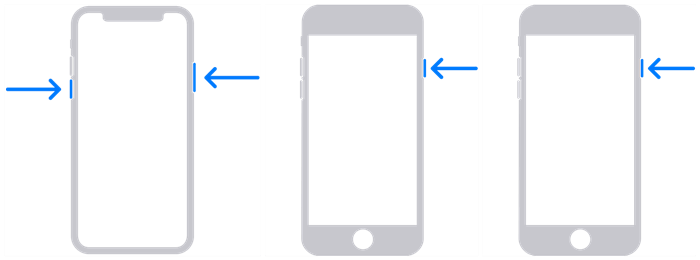
Step 1. Turn off your iPhone. For iPhone 8/ 8 Plus/X or later, press and hold both the Side button and Volume Down button, then drag the slider when it appeared. For iPhone 7 Plus and earlier models, press and hold the Side (or Top button) and drag the slider to turn off iPhone.
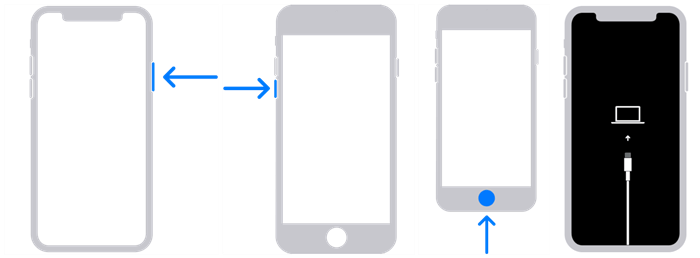
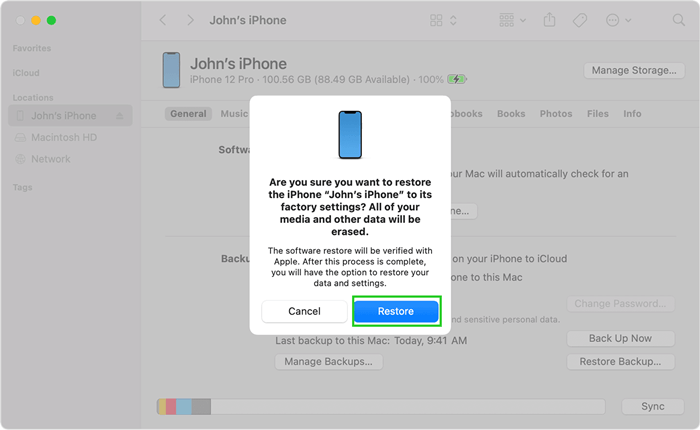
After some basic settings, you could then connect your iPhone to iTunes again and choose Restore Back Up option this time. And choose the backup you made just now to restore. You will then view all photos on your iPhone now.
Bonus: How to Remove Your Screen Lock without Losing Data?
As we can see, unlocking iPhone and then restoring a backup to disabled iPhone is quite complicated and time-consuming. Luckily, we have a better solution to help you remove your screen lock easily and quickly.
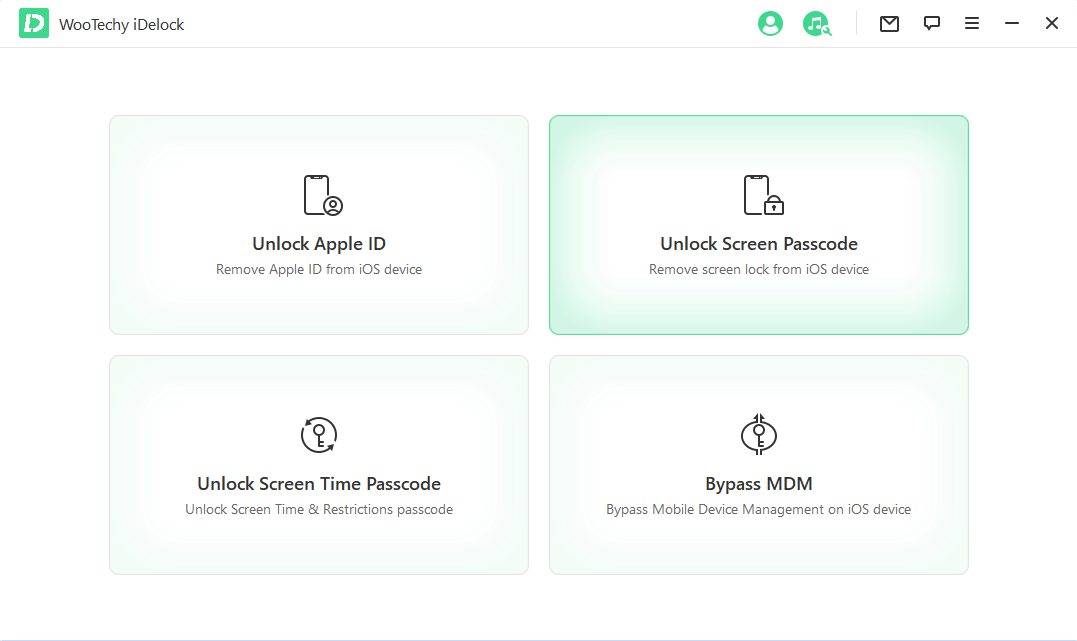
To remove the screen lock without losing any data on your device, a better alternative is using the professional passcode unlocker tool - WooTechy iDelock. It is an all-in-one tool to remove various iDevice locks including the screen lock. If you happen to forget the passwords and get your iPhone disabled, this program can quickly help you unlock your iPhone without the need to restore your iPhone. It's also quite easy and safe to use, protecting your privacy 100%.
Conclusion
There are always the cases where you forgot the passcode or someone else played your iPhone. That will get your iPhone disabled. And when you want to access the data such as photos on the disabled iPhone, it's not quite easy, especially if you don’t have a prior backup on iTunes or iCloud.
However, with the third-party tool WooTechy iSeeker, it is possible to recover all your photos from the disabled iPhone easily and quickly. And WooTechhy also provides you a simple solution to unlock your iPhone in such situations - using iDelock. Download and try any one of them according to your preference.
Download Now
Secure Download


