User Guide of iSeeker (Mac Version)
• Go to iSeeker (Windows Version) >>
Have accidentally deleted important files from your iPhone? Or your device is factory reset and everything is gone? With iSeeker in hand, all lost data will be back like you've never lost them in the first place.
iSeeker provides different data recovery options. Follow the simple steps below and recover your files in no time.
Mode 1. Smart Recovery
Not sure which mode to choose for data recovery? Let Smart Recovery decide for you.
Step 1:Choose Smart Recovery
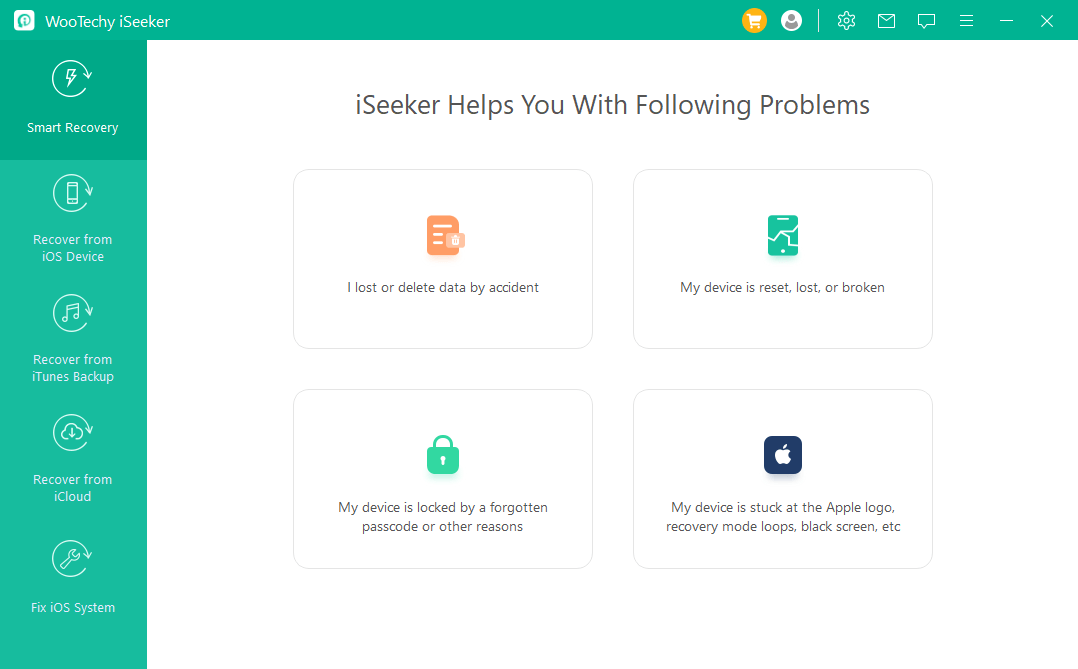
Install and launch the iSeeker iPhone data recovery application, then choose the Smart Recovery option.
Step 2:Select the Situation You Are In
Select the situation you are in and iSeeker software will intelligently guide you to a mode that suits you: either to recover data from iOS device, iTunes Backup, or iCloud, or to fix iOS issues. After that, you can follow the on-screen instructions and solve your issue.
Mode 2. Recover Data from iOS Device
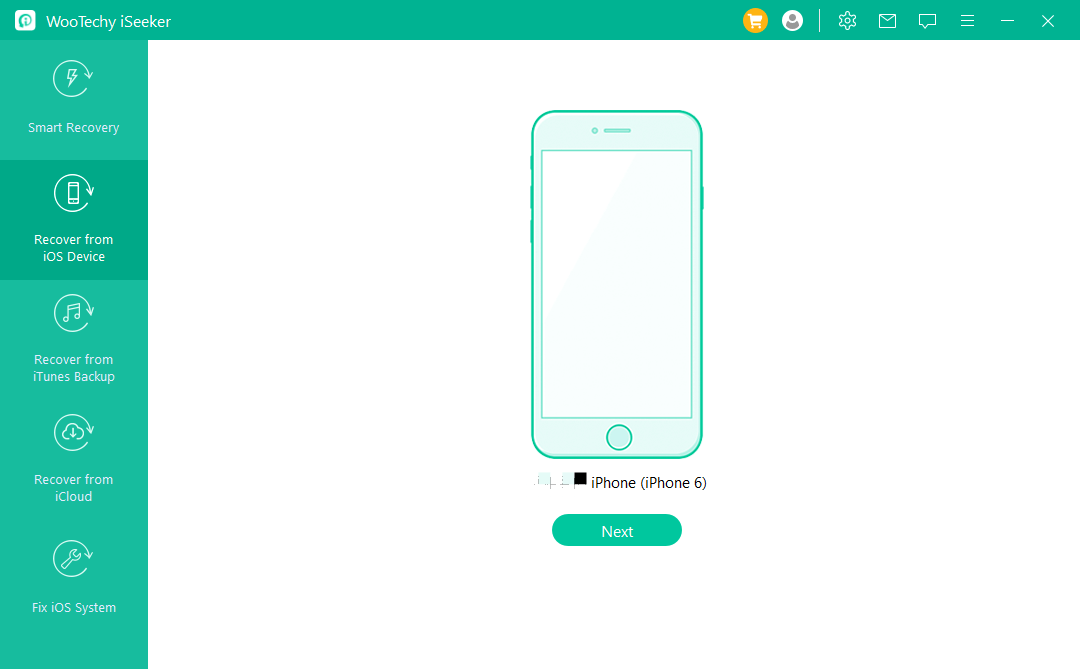
Step 1: Connect Your Device
After opening this recovery software, choose the Recover from iOS Device option, then connect your Apple device to the computer. Once your device is detected, click "Next" to continue.
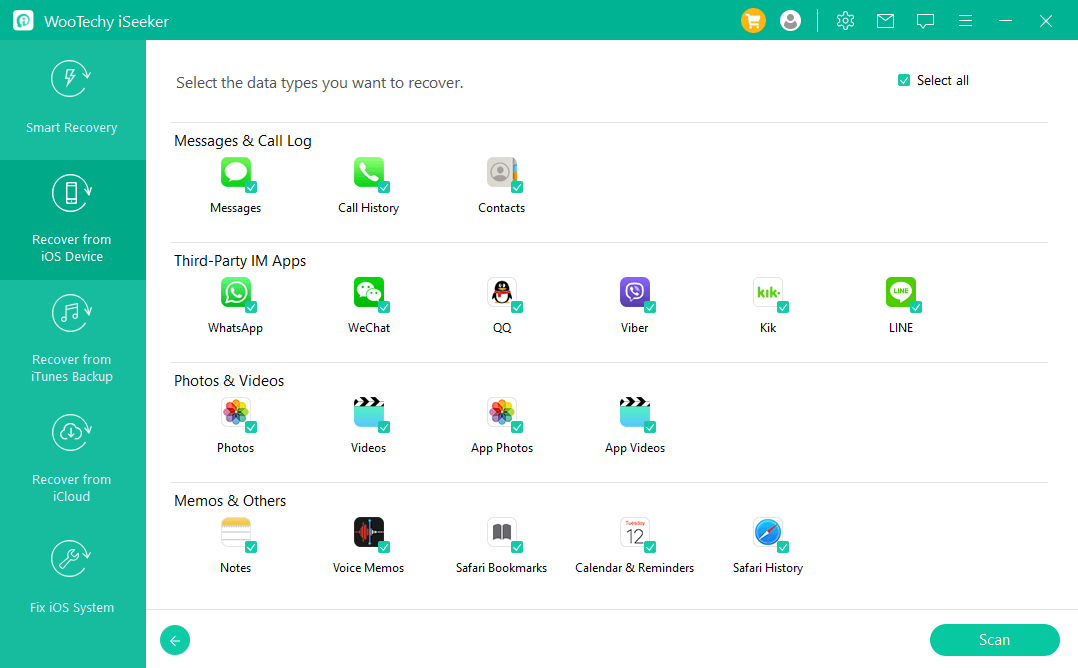
Step 2: Scan for Lost Data
Select the file types you want to recover, then click the "Scan" button. The program will perform a thorough scan on your device to search for lost data.
Step 3: Preview and Recover Lost iOS Data
Once the scan is complete, all recoverable files will be neatly categorized based on data types like messages, third-party app data, photos, videos, etc., so that you can search for the needed files quickly and get a preview. Select all the files you want, then click the "Recover" button located bottom right.

Choose a safe location in which to store the recovered files on your computer and all your data will be back almost instantly.
Mode 3. Recover Data from iTunes Backup
Step 1: Choose an iTunes Backup for Scanning
Select the Recover from iTunes Backup option from the main interface, then choose the exact iTunes backup from which you want to recover data. Click "Next".
Notes:
- iSeeker also supports scanning and recovering data from iTunes backups that you've made with other programs on your current computer.
- To recover data from an encrypted iTunes backup, please enter the password for decryption first.
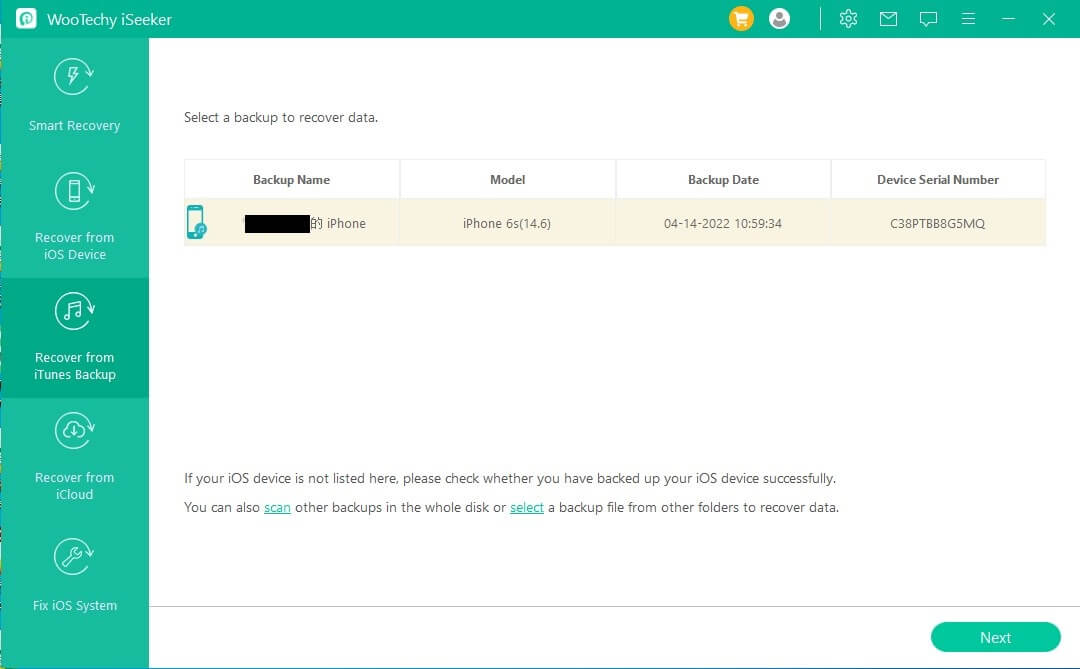
Select the data types to be recovered and click the "scan" button. An all-round scan will be conducted to extract data from the iTunes backup.
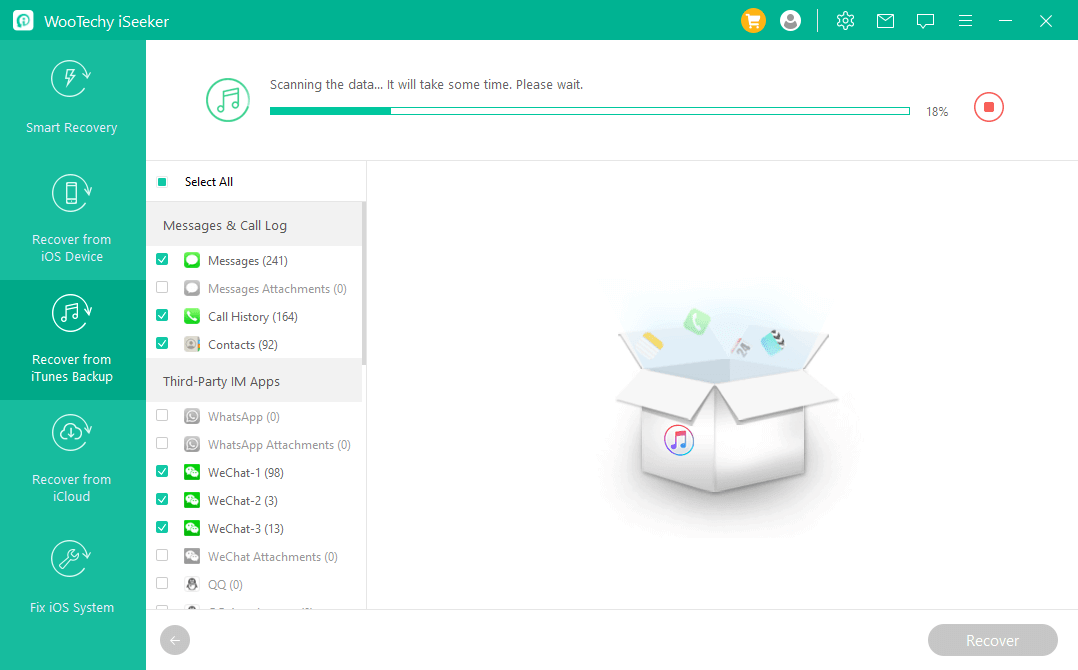
Step 2: Preview and Recover Desired Data
All the found data will be clearly displayed on the interface; you may choose the "Only show the deleted files" option to filter the files. Look through the results and select the files you need, then click "Recover". iSeeker will recover the data within a few minutes.
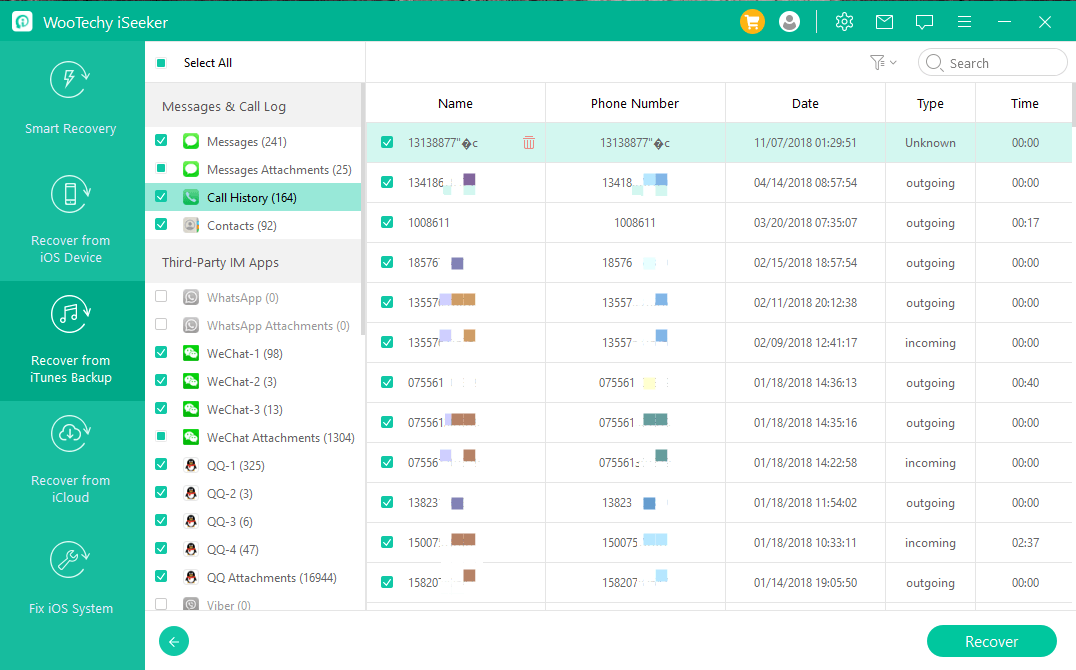
Mode 4. Recover Data from iCloud
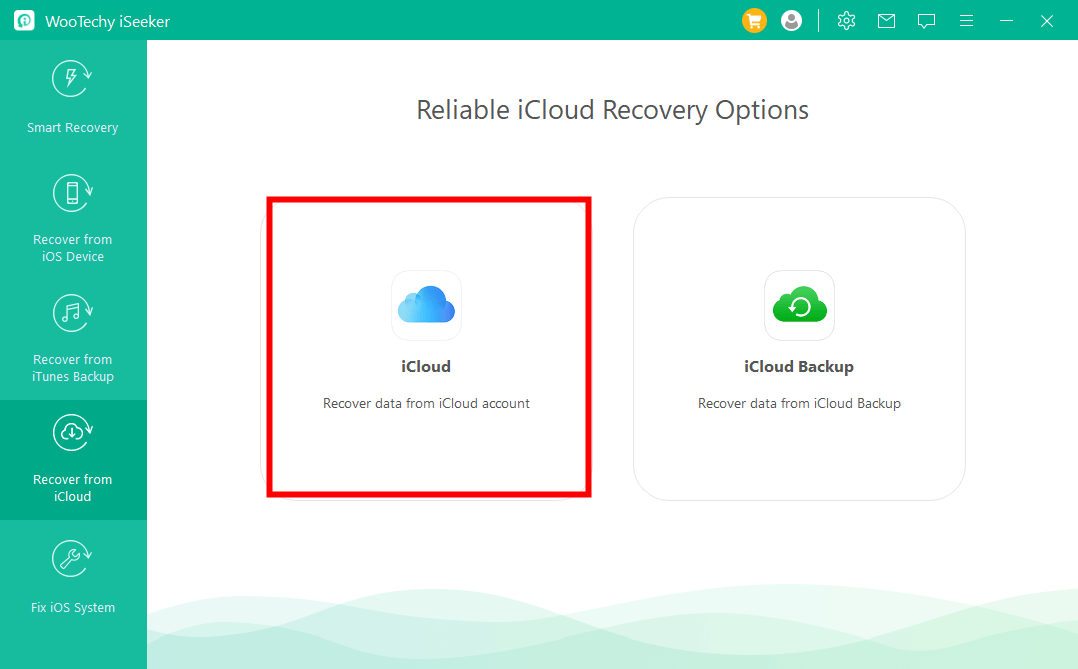
iSeeker iCloud recovery software offers two options to recover data: • If you have signed in to an iCloud account on your iOS devices and the data is automatically synced to iCloud, go to Option 1: Directly Recover from iCloud Account • If you have manually backed up your data, go to Option 2: Recover from iCloud Backup
Option 1: Directly Recover from iCloud Account
Step 1: Sign In to Your iCloud Account
Lanuch iSeeker and select Recover from iCloud, then choose to recover data from your iCloud account.
Sign in to the iCloud with your Apple ID and password. This process is 100% safe: WooTechy will never keep a record of your personal info.
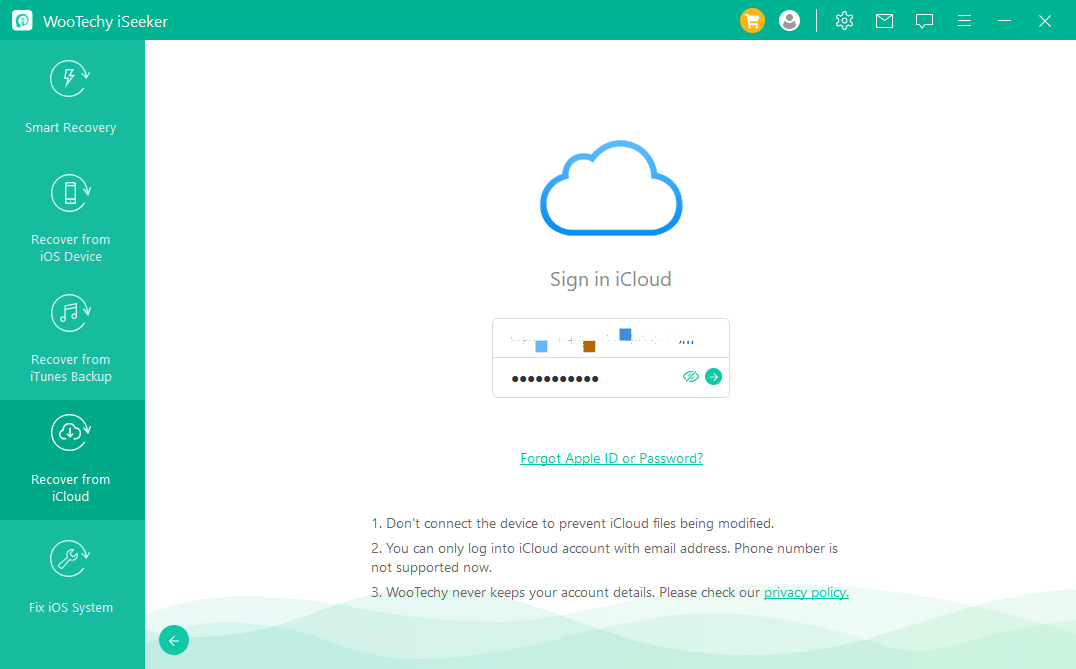
Step 2: Select Data Types and Scan
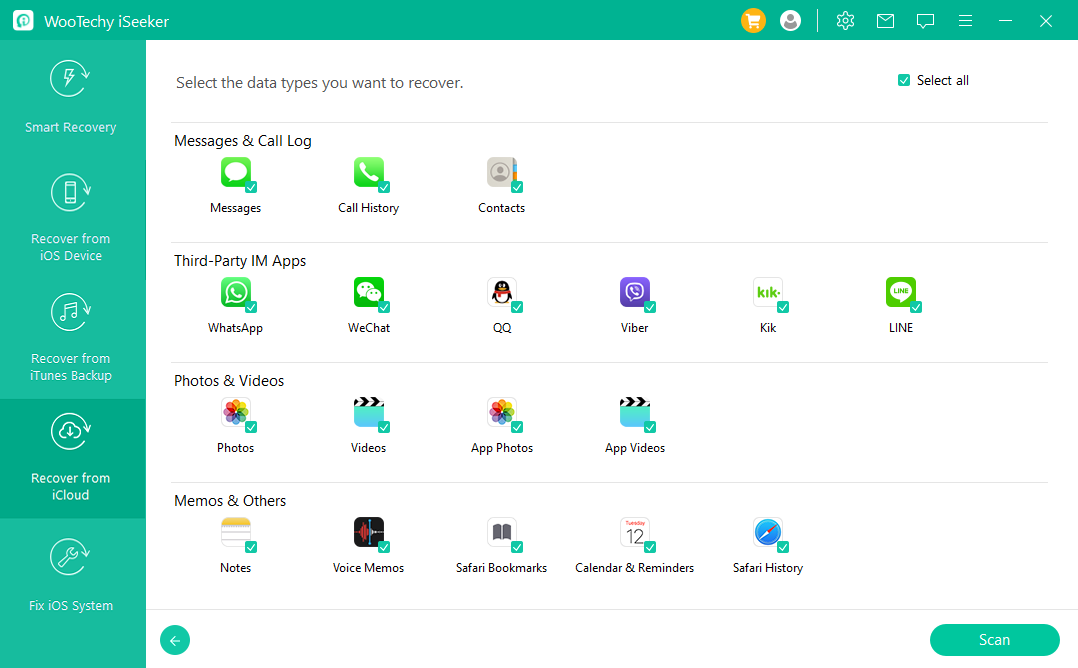
Choose the file types you want to restore from your iCloud account, including but not limited to contacts, photos, notes, and calendar, then tap the "Scan" button in the lower right corner.
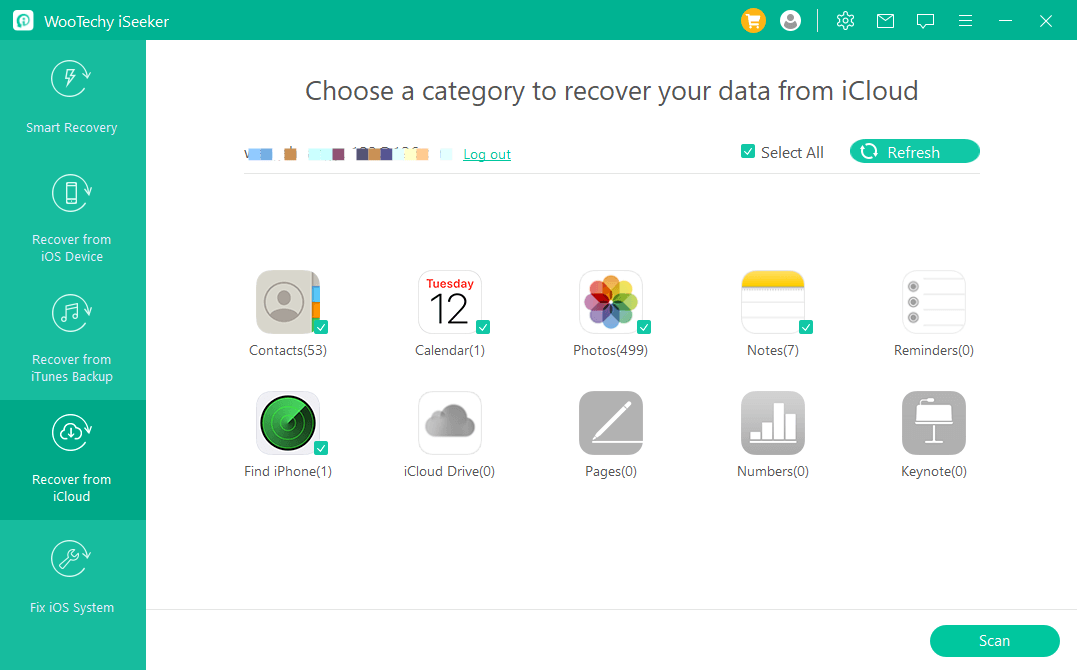
Step 3: Preview and Recover Data
After the scan is completed, you can look through the results and get a preview of the content. Choose the files you need and click "Recover". Congratulations! Your files have been successfully recovered.
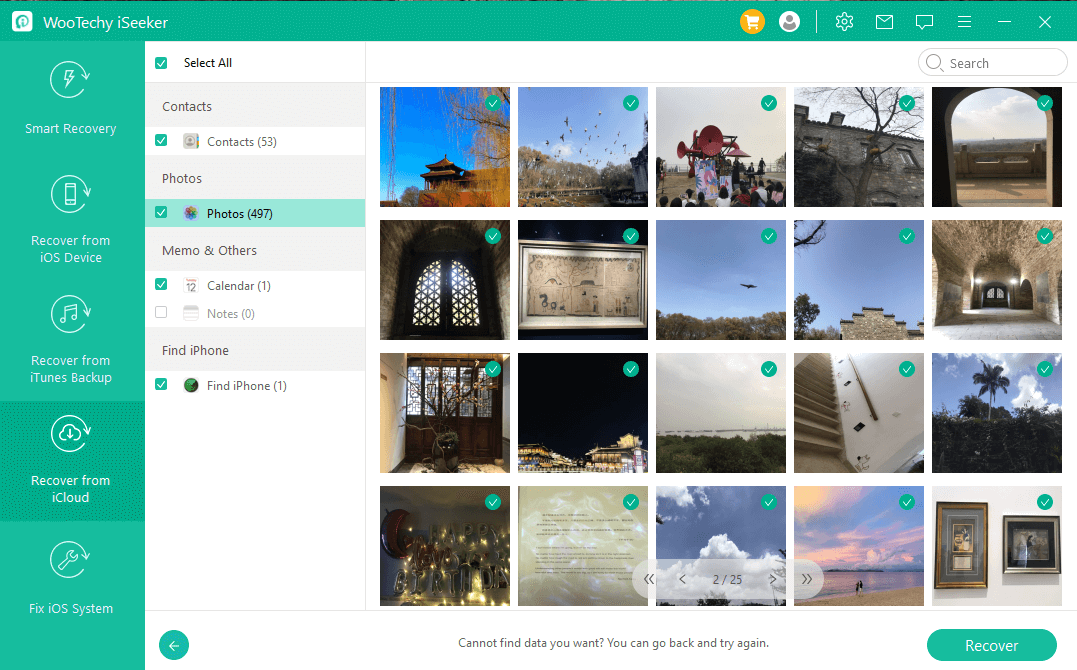
Option 2: Recover from iCloud Backup
Step 1: Prepare Your iDevice
Launch iSeeker and select Recover from iCloud, then choose to recover data from the iCloud backup.
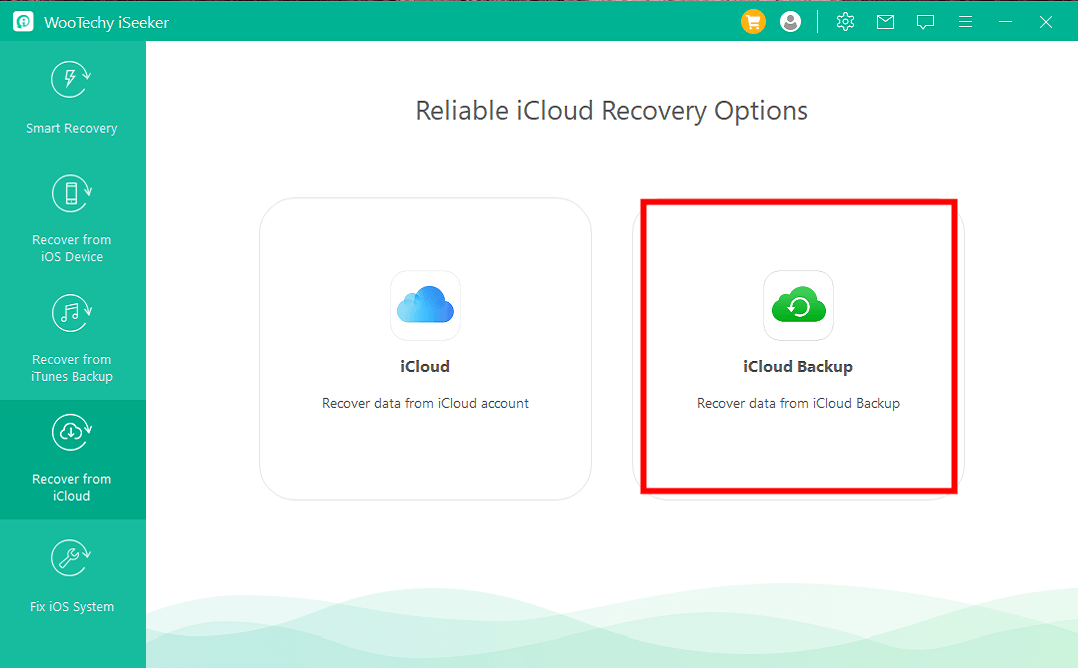
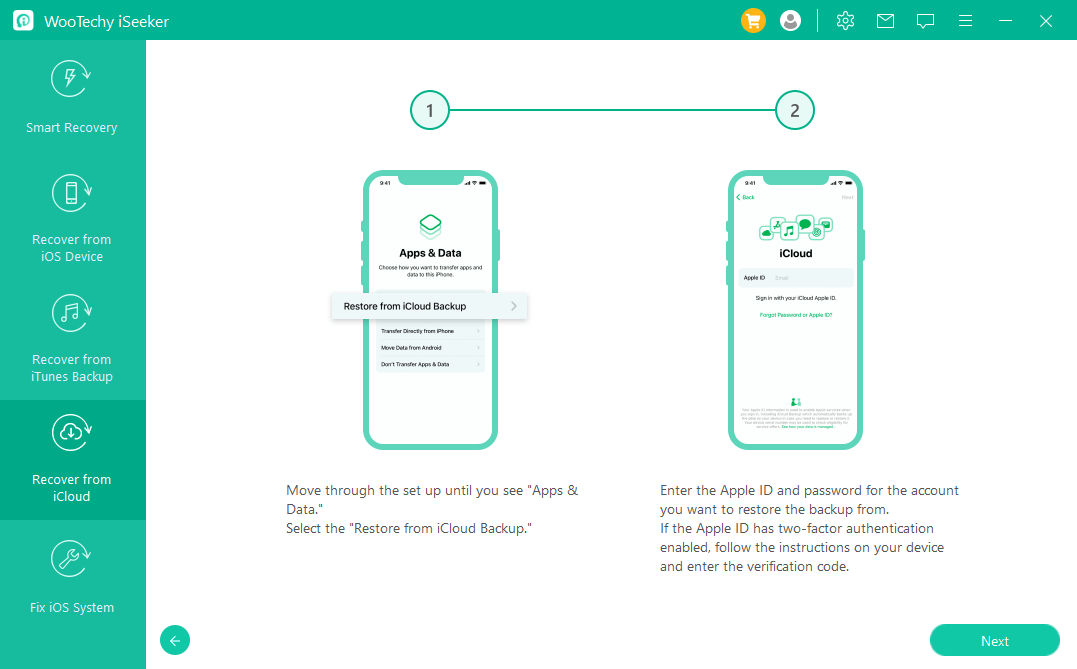
Follow the on-screen instructions to prepare your Apple device for restoration from an iCloud backup. We recommend making a full backup of your device before resetting it.
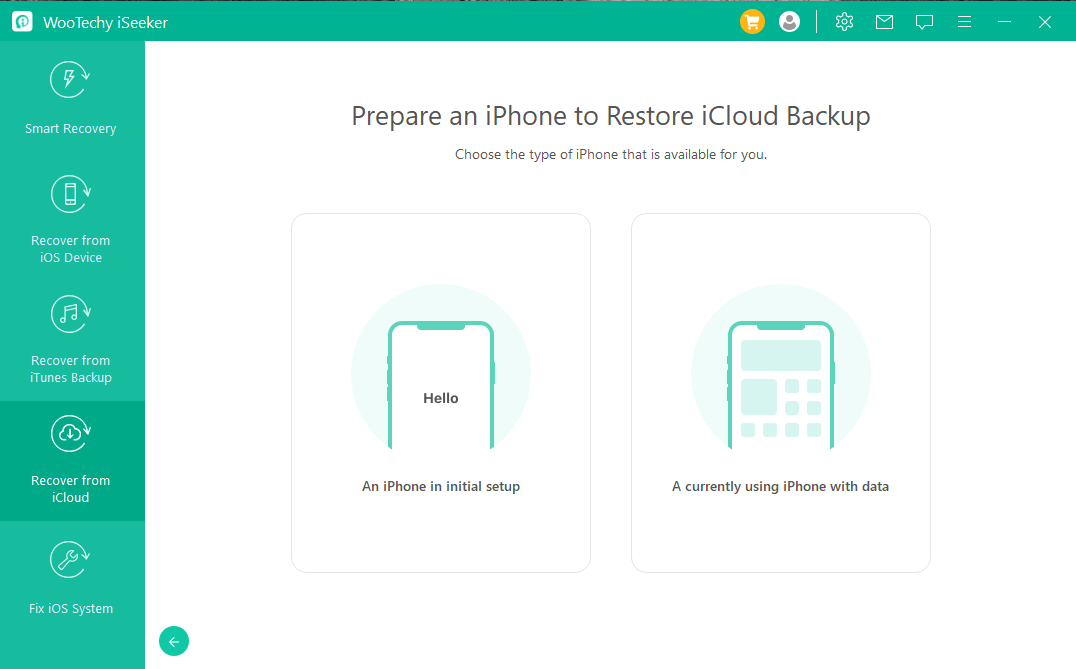
Step 2: Choose iCloud Backup and Restore Data
Choose "Restore from iCloud Backup" on the Apps & Data screen, then sign in to iCloud with your Apple ID.
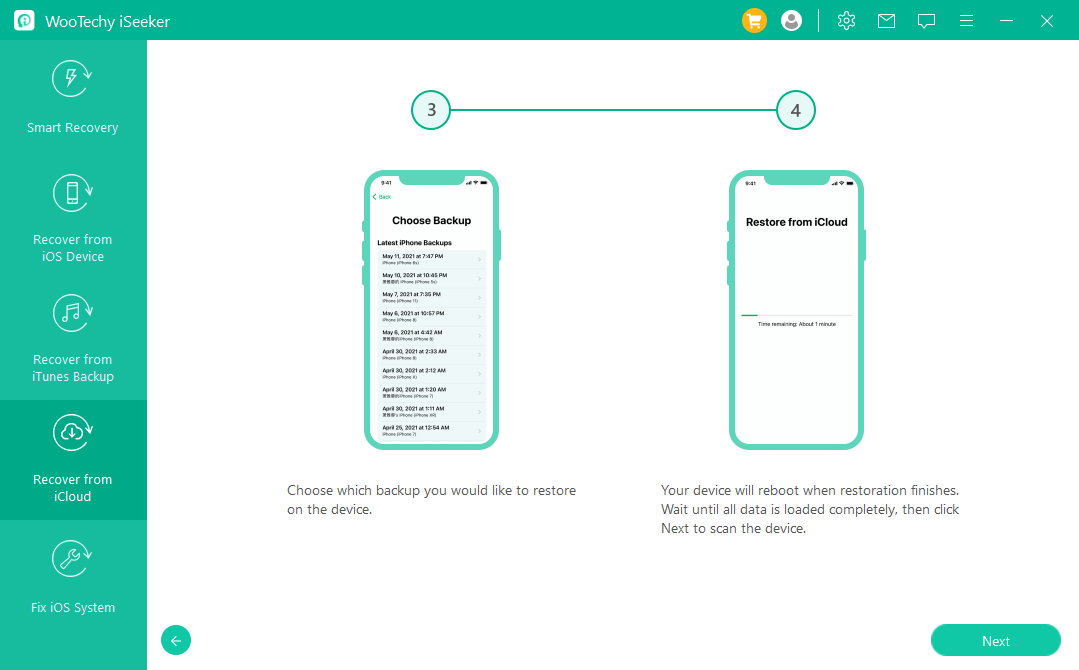
Select an iCloud backup, you may check the date and size of each and pick the most relevant. Your device will reboot after the backup is restored.
After that, connect your Apple device to iSeeker, recover the iCloud backup data to your computer, and view it directly.
Mode 5. Fix Various iOS Issues
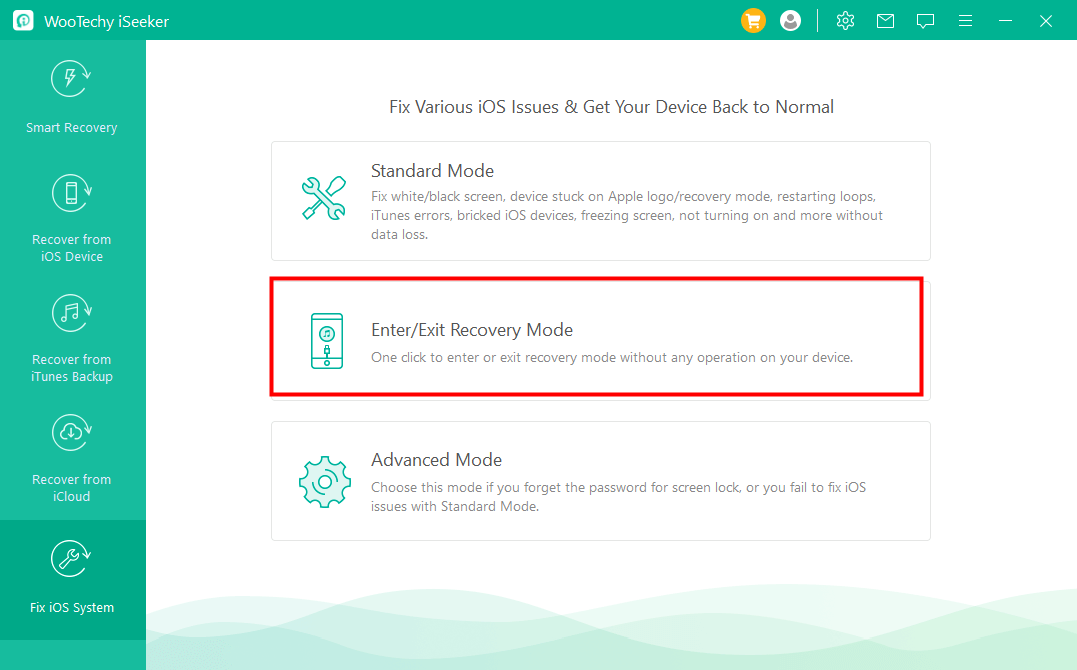
iSeeker iOS repair software offers three modes to fix your iOS issues: • If your iPhone/iPad faces common issues like being stuck on Apple logo/DFU mode, white screen, black screen freezing devices, not turning on, etc., go to Standard Mode • If you want to enter Recovery Mode quickly or device is stuck in Recovery Mode, go to Enter/Exit Recovery Mode • If Standard Mode cannot fix the issue, go to Advanced Mode
Notes:
- After using iSeeker, your device will be updated to the latest iOS version and any Jailbroken device will be restored to the default mode.
- Standard Mode and Exit/Enter Recovery Mode will not affect the data on your device, but Advanced Mode will erase all your data.
Option 1: Use Standard Mode to Fix iOS Issues Without Data Loss
Step 1: Connect Your Device
Choose "Standard Mode" on the interface, then connect your iDevice to the computer via a USB cable and click "Next".
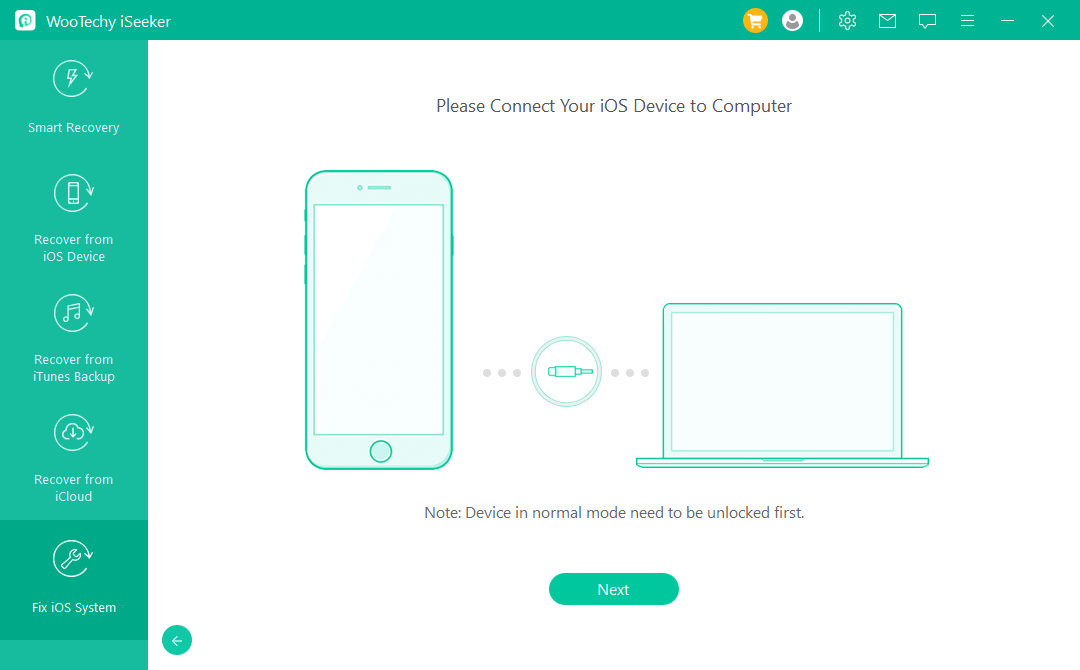
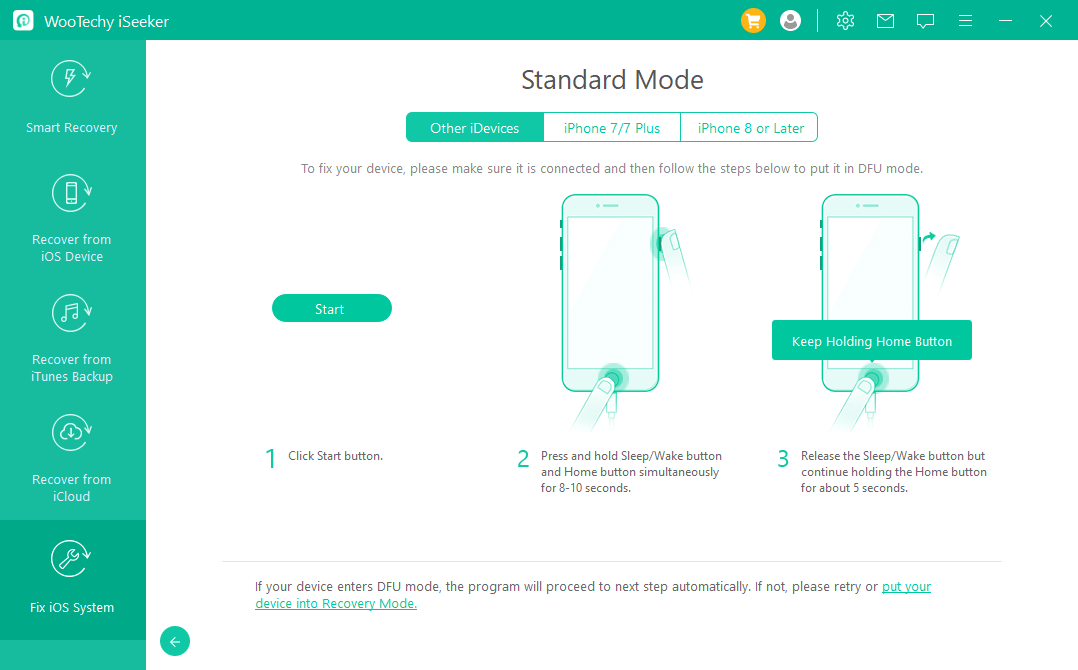
If your device is recognized, go to Step 2. If not, follow the on-screen instructions to put your device in DFU or Recovery Mode.
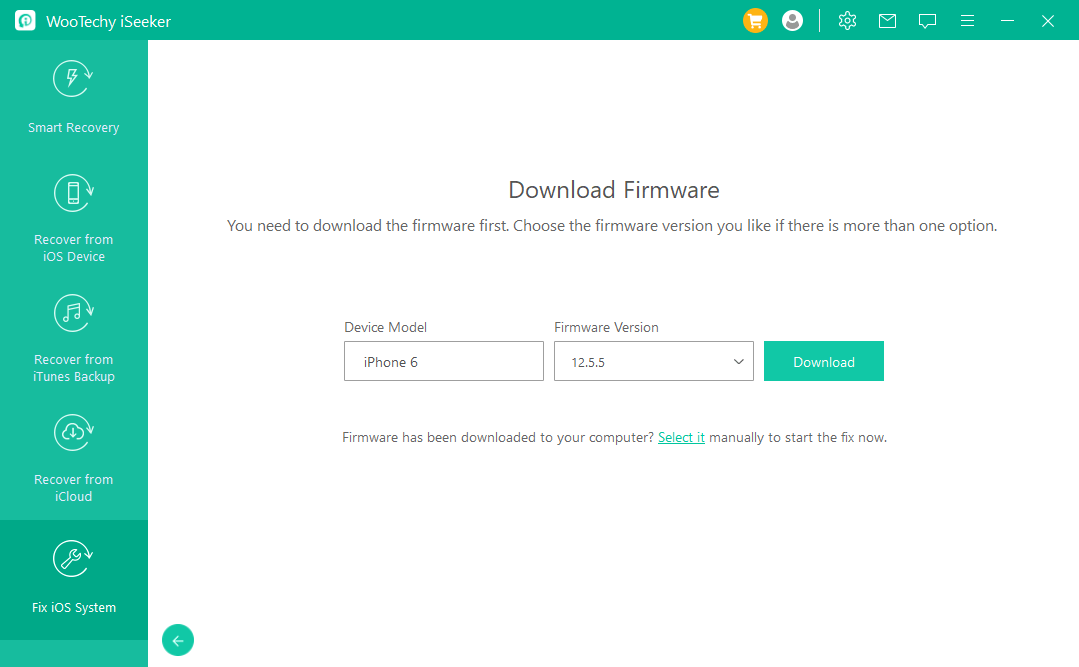
Step 2: Download Firmware
The program will detect your device model and show you the available firmware versions. Choose the version you prefer, then click on "Download" and wait for the process to complete.
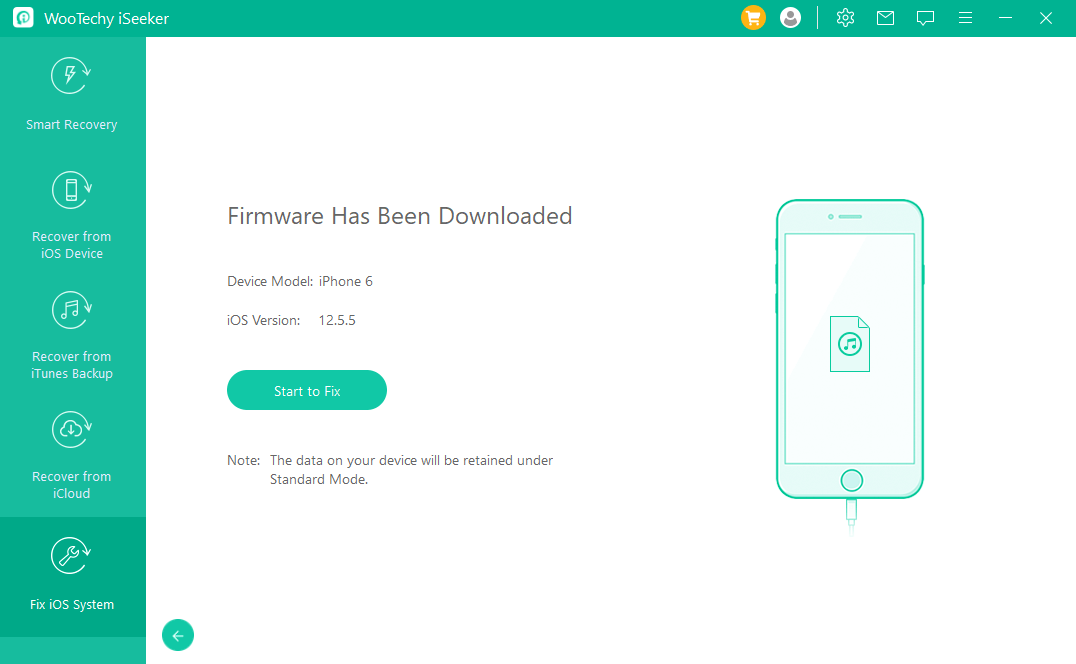
Step 3: Fix the iOS Device
Once the firmware has been downloaded, click on "Start to Fix" to verify and extract the firmware. After that, the program will start to fix your iOS automatically.
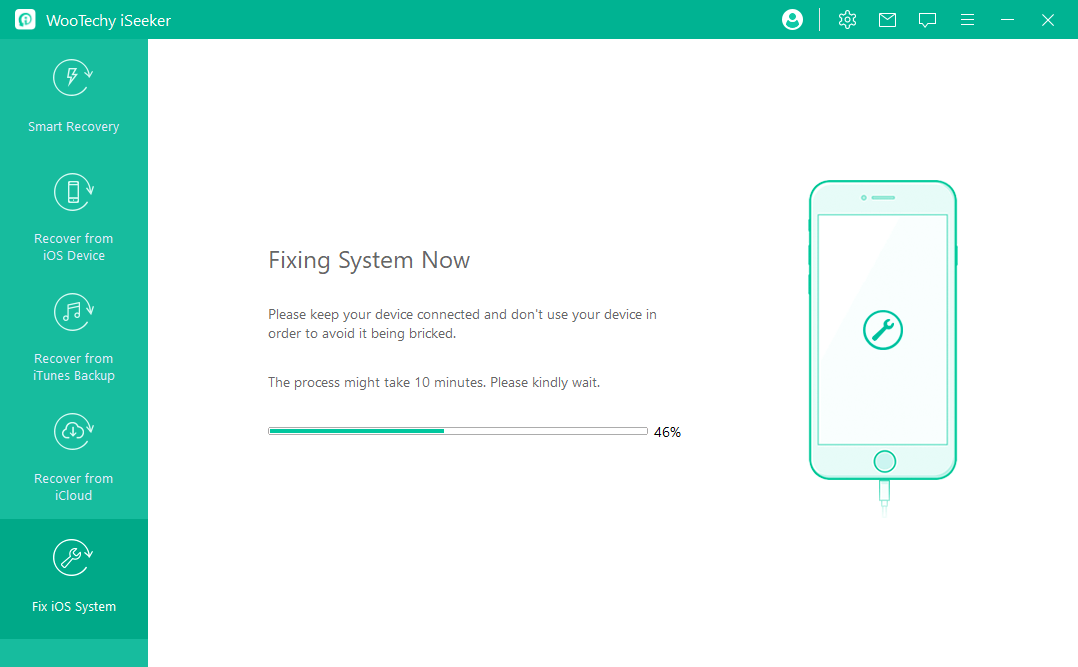
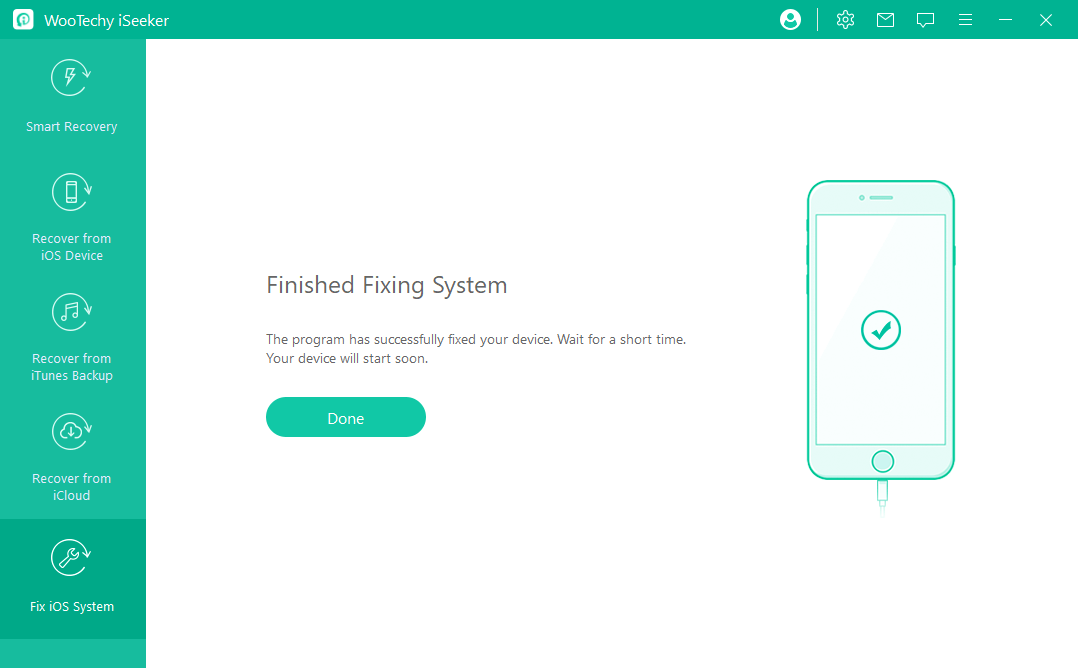
Once the fixing process is finished, please check whether your device can operate normally now. If the fixing has failed, you can retry Standard Mode or use Advance Mode instead.
Option 2: Enter/Exit Recovery Mode in One Click
Choose Enter/Exit Recovery Mode from the main window, then connect your device to the computer and click "Next".
Feature 1: Enter Recovery Mode
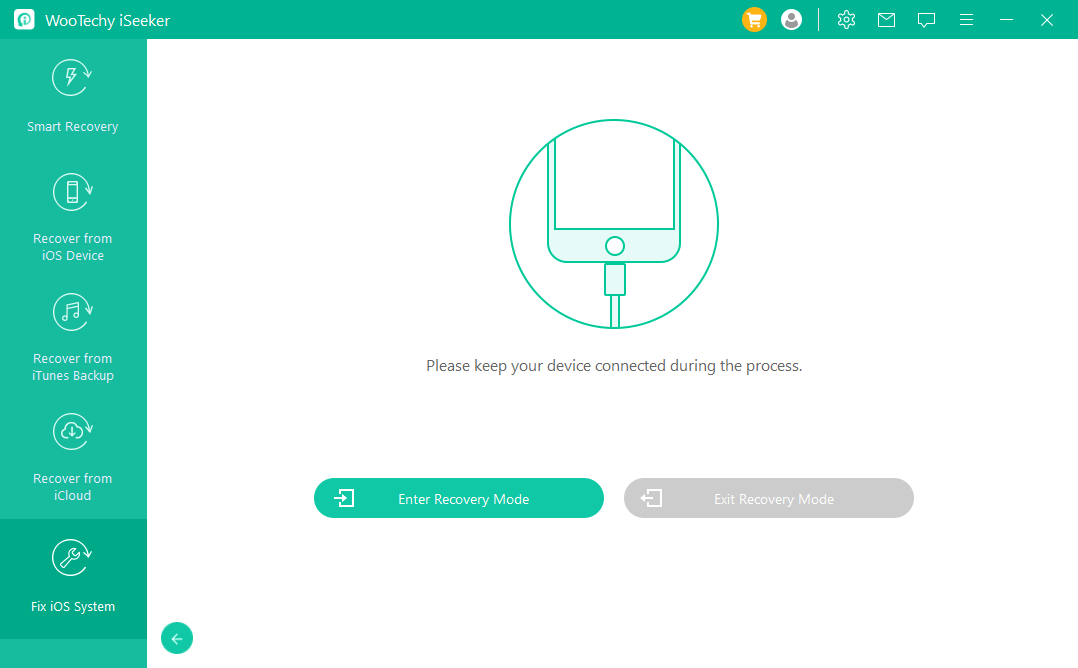
Keep your device connected and choose "Enter Recovery Mode". It will be done within a few minutes.
Feature 2: Exit Recovery Mode
Choose "Exit Recovery Mode" from the interface. Your device will restart shortly and get back to normal.
Option 3: Use Advanced Mode to Reinstall Your iOS
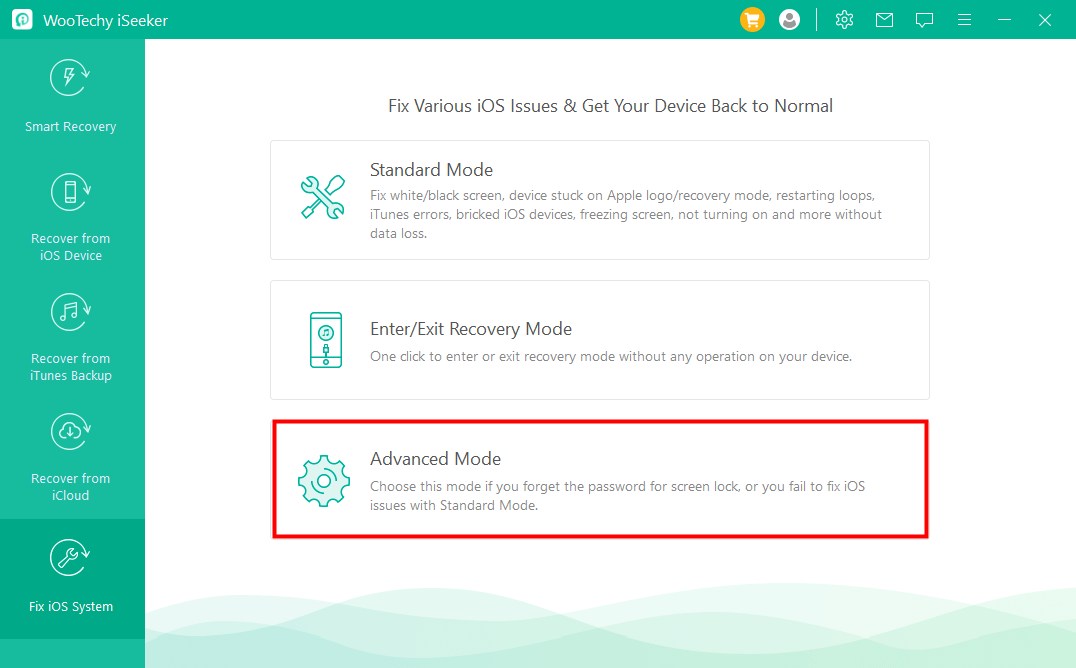
If Standard Mode cannot fix the your Apple device, you can turn to Advanced Mode - just select this mode from the main window. Please not that iOS reinstall will lead to data loss; make a backup of your important data first.

Step 1: Connect Your Device to Computer
Connect your iOS device to the computer and click "Next".

Step 2: Download the Firmware
Download the corresponding firmware for your device.

Step 3: Fix the iOS Issue
Verify the downloaded firmware and start to fix the issue.


