How to downgrade iOS on Windows? Is it possible to downgrade iOS on Windows without iTunes? The search ends here! This complete guide will show you the 3 best ways to downgrade iOS on Windows along with their detailed step-by-step tutorials! Even better, you’ll also get some tips on how to downgrade iOS without data loss! Read on!
- Part 1. How to Backup Before Downgrade iOS on Windows?
- Part 2. How to Downgrade iOS Using Windows?
- Method 1. Downgrade iOS on Windows with iMaster
- Method 2. Downgrade iOS on Windows with TinyUmbrella
- Method 3. Downgrade iOS on Windows with iTunes
- Part 3: How to Restore Backup After Downgrade iOS on Windows?
Part 1. How to Backup Before Downgrade iOS on Windows?
Downgrade iOS and update iOS to another iOS version means installing a fresh new iOS software on your device; hence, all your data will be erased during the downgrade process. To avoid losing any important data, make a full backup of your device before downgrading is very essential, it will help you get your data back after the downgrade process.
Method 1. Back Up iOS with iCloud
Step 1. Connect to Wi-Fi network.
Step 2. Navigate Settings > Your Name > iCloud.
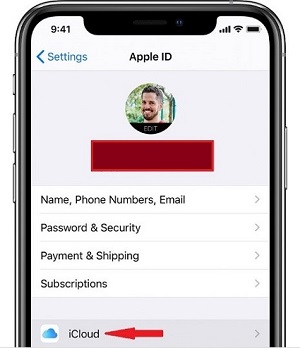
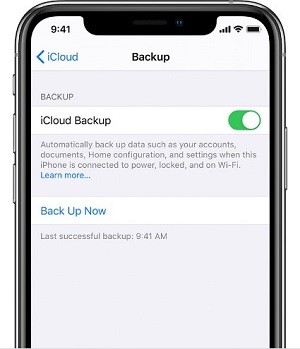
Step 3. Switch on the green button next to iCloud Backup. Tap Back Up Now.
Note
Ensure to stay connected to the wireless network until the backup is done.
Double check that the backup was completed by looking for the Last successful backup.
Method 2. Back Up iOS with iTunes
Step 1. Launch iTunes on your Windows computer.
Step 2. Click the device icon at the top screen.
Step 3. Click Restore iPhone and select Don’t Encrypt if you see an option as such.
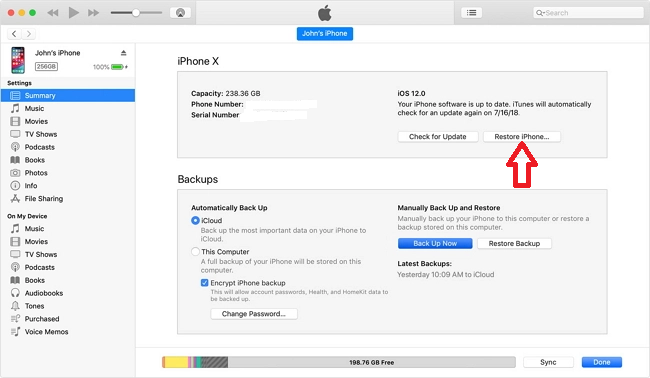
Step 4. Depending on the size of your data, the backup process can take some time.
Part 2. How to Downgrade iOS Using Windows?
Well, now we're officially on topic - how to downgrade iOS on Windows? We've summarized the top 3 best ways to downgrade iOS on Windows, read on and you'll see that it's really not that hard.
Method 1. Downgrade iOS on Windows with iMaster
If you want to downgrade iOS on Windows without losing any data, then iMaster is your best choice. As the most popular iOS downgrade tool nowadays, it can quickly downgrade iPhone to any supported iOS version without data loss, which makes iOS downgrade very convenient. With just a few clicks, your iPhone is ready for iOS downgrade.
WooTechy iMaster - Best Tool to Downgrade iOS

75,000,000+
Downloads
- iOS Downgrade: Downgrade iPhone/iPad to any supported iOS version without data loss
- iOS Upgrade: Upgrade iPhone/iPad to the latest iOS version for 100% free
- iOS Backup: Backup all iPhone/iPad data without any storage limitation
- Easy To Use: Simple steps, no specialized technical knowledge required
- Multi-Language Support: Support for English, Spanish, French, German, Chinese, Japanese, etc
- After-Sales Guarantee: 30-day money back policy with instant refund if unsuccessful
Try For Free
Secure Download
Try For Free
Secure Download
How to Downgrade iOS Using Windows with iMaster?
Step 1. Download, install and launch iMaster on your computer. Connect your iOS device with USB cable and click Downgrade iOS.
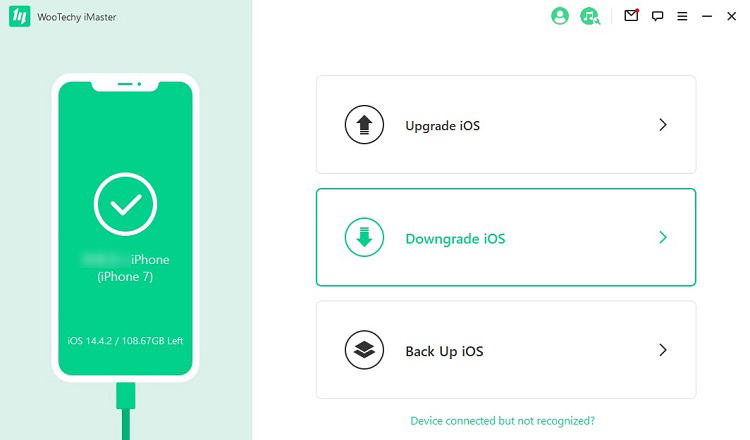
Step 2. Select the firmware version you want to downgrade to, click Next to download it.
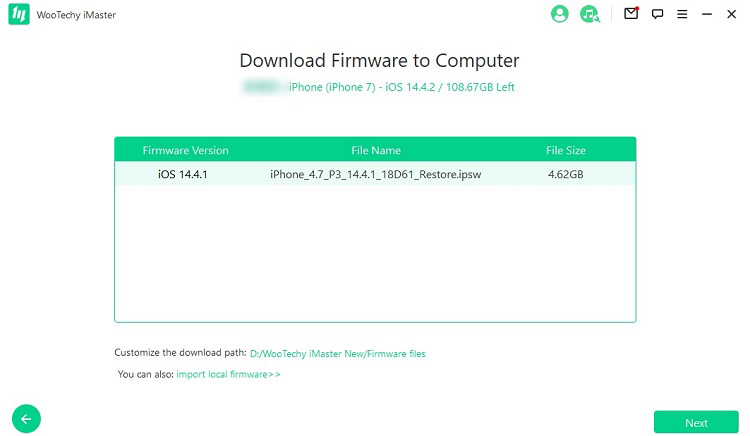
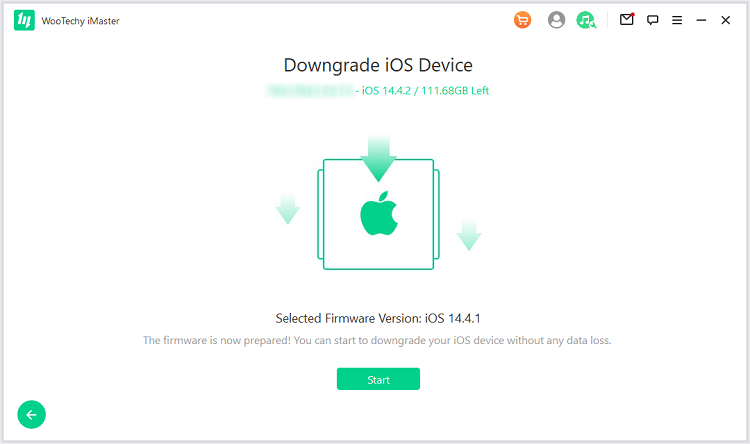
Step 3. Once the firmware is downloaded and verified, click Start to begin the downgrade process.
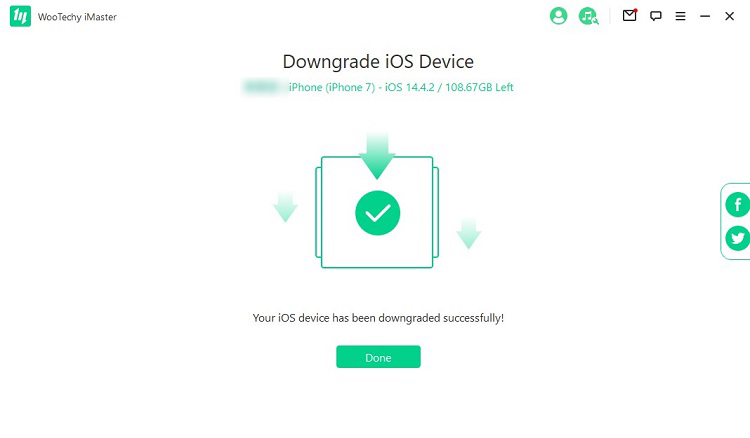
Step 4. When the downgrade is complete, click Done. Now your iOS device has been downgraded successfully!
[Video Guide] How To Downgrade iOS Using Windows?
Try For Free
Secure Download
Try For Free
Secure Download
Method 2. Downgrade iOS on Windows with TinyUmbrella
TinyUmbrella is a software program available on the Windows platform that can be used to a previous iOS version. It finds and detects automatically the SHSH Blob for your iOS device. The steps outlined below will help you use TinyUmbrella to downgrade your device.
How to Downgrade iOS on Windows via TinyUmbrella?
Step 1. Download TinyUmbrella on your PC.
Step 2. Install and launch the TinyUmbrella program.
Step 3. Connect your iOS device to your PC using a USB cable.
Step 4. In the top-right screen of TinyUmbrella, click Save SHSH. This process will display all available SHSHs files. Select the appropriate option.
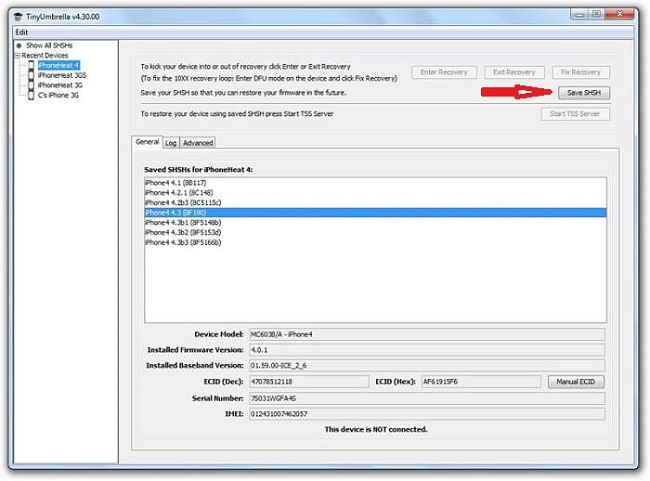
Step 5. Click Start TSS Server.
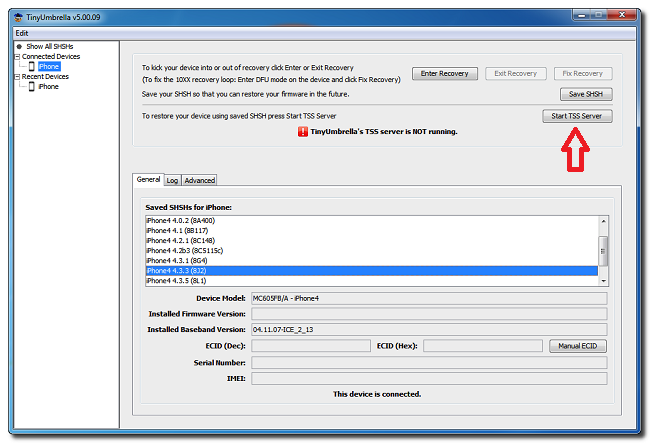
Step 6. After the server performs its function, an Error 1015 will appear on the screen. On the left panel, right-click your device name, and click Exit Recovery.
Step 7. Under Advanced, untick Set Hosts to Cydia on Exit to finish up the process. (If you need a clean restore from Apple uncheck this box)
Method 3. Downgrade iOS on Windows with iTunes
If you have iTunes installed on your computer, you can use iTunes to downgrade iOS. The steps below will show you how to use iTunes to downgrade your iOS device on Windows.
How to Downgrade iOS on Windows with iTunes?
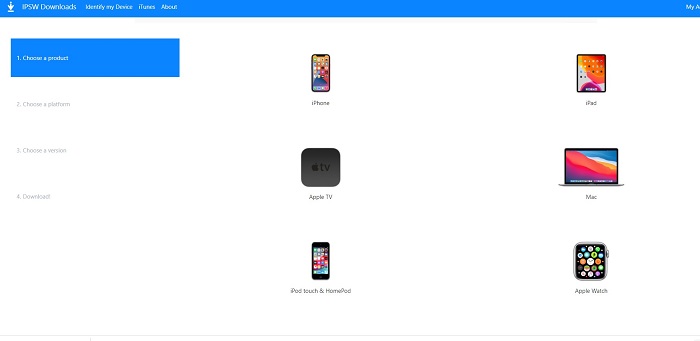
Step 1. Go grab a signed iOS firmware from the official iOS firmware website - ipsw.me. (An unsigned IPSW can’t be restored via iTunes)
Step 2. Open iTunes on your Windows PC.
Step 3. Connect your iOS device to your computer using USB cable.
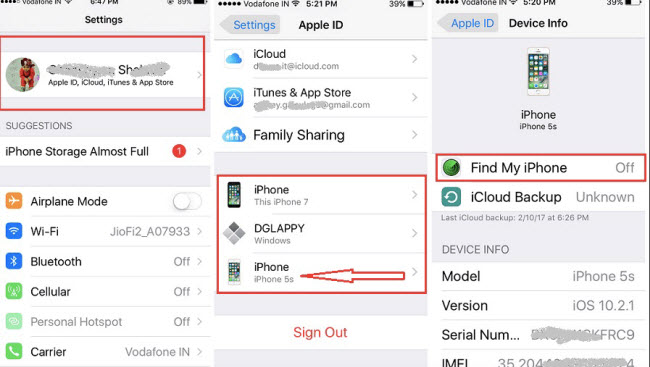
Step 4. On your iOS device, tap on Settings > Your Name > Find My, and then turn off Find My iPhone.
Step 5. Restore your device to the IPSW file you download from the official Apple IPSW site:
Click the phone icon at the top screen of iTunes.
Click Restore iPhone while holding down the Shift key.
Select the iOS firmware file you downloaded earlier and click Restore. Now, your iPhone will start downgrading to your new iOS software version.
Step 6. Once the downgrade is completed, your device will need to set up just as you’d a new iPhone. While setting up your device, ensure to select the Don't Transfer Apps & Data option when you reach the Apps & Data screen.
Part 3. How to Restore Backup After Downgrade iOS on Windows?
After downgrading to another iOS version, you will find that all your data are no more. Do not fret if this happens. You can restore your data from the backup you made through iTunes.
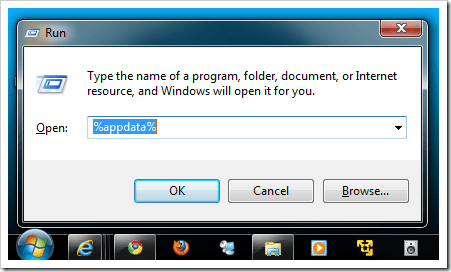
Step 1. On your Windows computer, search for Run and open the app that comes up.
Step 2. Type %appdata% and click OK.
Step 3. Navigate Apple Computer > MobileSync and open the Backup file.
Step 4. Right click and open info.plist with any Text editor app.
Step 5. Press Control + F key, search for product version and change its version from 14.0 to 13.0 (or 17.0 to 16.0).
Step 6. Close out the info.plist file.
Step 7. From your mobile device information screen on the iTunes app, click Restore Backup and select the modified backup file.
Step 8. Select Use Old Backup if any dialog box displaying that comes up.
Step 9. Wait until the restore complete and you have your lost data back. This restore will bring back your images, videos, messages, and more.
Conclusion
Well, now you know the 3 best ways on how to downgrade iOS on Windows! What I have to say is that as a must-have software for many iPhone users, iMaster is really recommendable. It's full-featured, easy to use, and not only can you downgrade iOS without losing data, but it's also great for iOS upgrade, iOS backup, and backup restore! Try it for free today!
Try For Free
Secure Download
Try For Free
Secure Download


