Did you want to downgrade iOS 14 to 13 without computer? Apple is always updating it's mobile operating system, iOS, to fix bugs, add new features, and improve overall device performance.
These updates, sometimes, cause glitches and problems. For example, if you’re running on an earlier version of iOS 14, you may be experiencing battery drain issues, Wi-Fi problems, or anything other problem many more Apple users are facing with the version.
If you want to downgrade from iOS 14 to 13, this resource is for you.
Can I Really Downgrade iOS 14 to 13 without Computer?
It’s NOT possible to downgrade from iOS14 to 13 without making use of a computer. This is because Apple authenticates any iOS firmware through iTunes PC before allowing you to install it.
If you don’t own a PC or you’re out of home, use a friend’s PC or wait until you get home to downgrade your iOS. Remember, however, that any method, app, or trick promising to downgrade your iOS 14 to 13 on PC is simply a scam or trying to expose your device to a host of risks, such as hacking.
Downgrade iOS 14 to 13 with Computer
Just as mention earlier, reverting from iOS 14 to 13 requires a computer. You’ll need it to connect your iPhone device to iTunes, back up your files, amongst other uses.
1. Downgrade iOS 14 to 13 with iTunes
While you need a PC, you can use either a Windows PC or a Mac computer.
Step 1: Start by plugging in your phone to your PC using a data cable. If you’re prompted whether to “Trust The Computer”, tap “Trust”and set your phone to the side.
Step 2: Visit the IPSW website on your computer to download the latest version of iOS 13 IPSW restore (firmware) file.
a: On the IPSW webpage, Choose a product(ex.: iPhone), Choose a platform (ex.: iPhone X Global), and then Choose a version. For product and platform, ensure to select that of your device. As for version, select the most recent release of iOS 13 you want to downgrade to, making sure it is signed. An unsigned IPSW file won’t work. See the image below.

Step 3: Back up your iPhone data to your PC through iTunes.
a: Open iTunes on your Mac or Windows PC.
b: Click the “Phone icon” in iTunes’ top toolbar. This will take you to a screen with your mobile device information. The below image shows what the interface looks like.
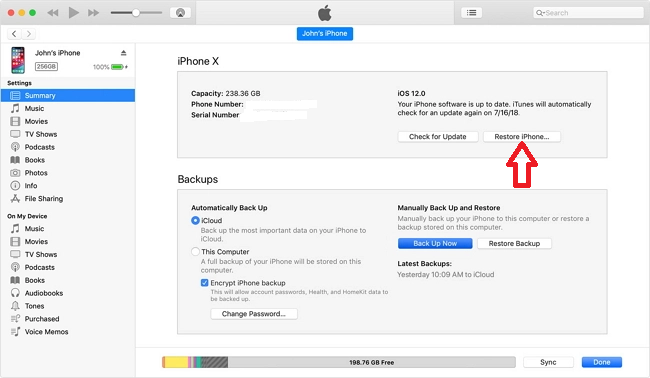
c: At the top-right screen, click “Restore iPhone” and choose “Don’t Encrypt”. This method backs up your data to your computer. The backup can take a pretty amount of time, depending on how much data you have.
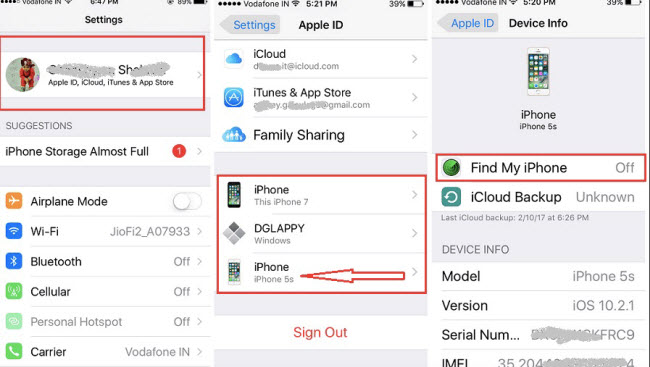
Step 4: Disable Find My iPhone as you wait on the backup to complete.
a: On your iPhone device, navigate Settings > Your name > Find My > Find My iPhone. Turn off the green switch to the right of Find My iPhone.
Step 5: After the backup is complete, double-check to be sure by looking under Latest backup in the iTunes’ mobile device information screen.
Step 6: Restore your iPhone back to iOS 13 (or the version you downloaded).
a: On the iTunes’ mobile device information screen, hold down Option (MAC) or Shift (Windows) key and click “Restore iPhone”. This will pop up a dialog box.
b: Locate the IPSW file you downloaded earlier and click open.
c: Click “Restore” from the confirmation dialog.
d: Your phone will go blank and through the restore process.
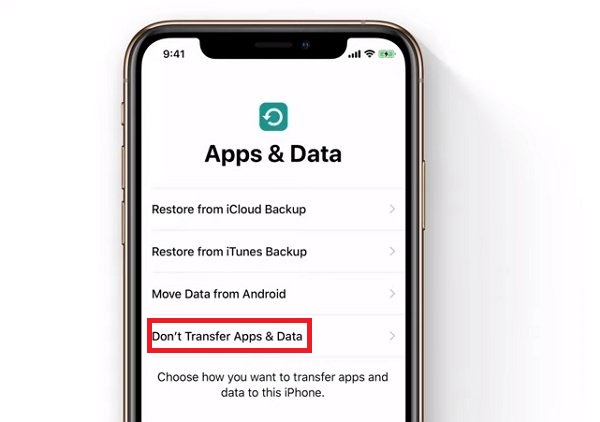
Step 7: Once your iPhone comes back up, set it up as you would a new iPhone. When you reach Apps & Data, choose “Don’t Transfer Apps & Data”, and then finish the rest of the installation.
2. Downgrade iOS 14 to 13 Using Recovery Mode
This method is similar to the first option. To do this, first ensure to download the corresponding iOS firmware file as we did in the first guide. Afterward, proceed with the following steps.
Step 1: Open the more recent iTunes app on your Mac or Windows PC.
Step 2: Connect your iPhone to the computer using a data transfer cable.
Step 3: Put your iPhone into Recovery mode.
a: iPhone 6s and earlier: Hold down the Sleep/Wake button simultaneously. Keep holding down the button until the recovery mode screen appears.
b: iPhone 7 or iPhone 7 Plus: Press down the Sleep/Wake and Volume Down buttons simultaneously. Keep holding until the Apple logo followed by the recovery screen appears.
P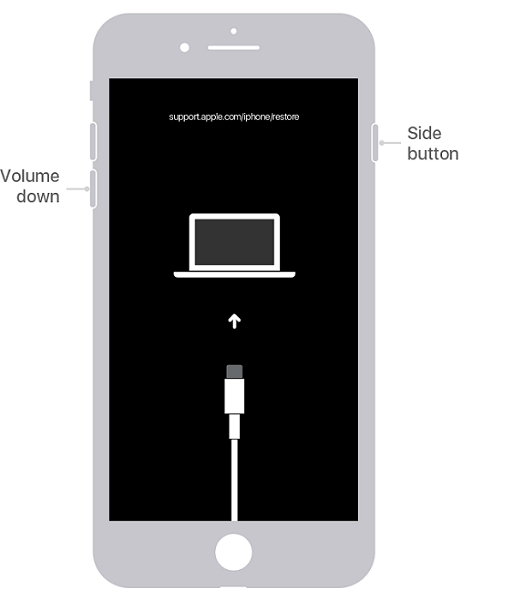
c: iPhone 8 or later: Quickly press and release the Volume Up button. Do the same with the Volume Down button. Finally, hold down the Side button until the recovery screen appears.
d: iPad Pro with Face ID: Hold down and quickly release the Volume Up button. Do the same for the Volume Down button. Now, hold down the Top button until your device starts to restart.
Step 4: Once your phone is in recovery, you will see a prompt from iTunes asking you to choose Restore or Update your iOS. Choose the “Restore” option.
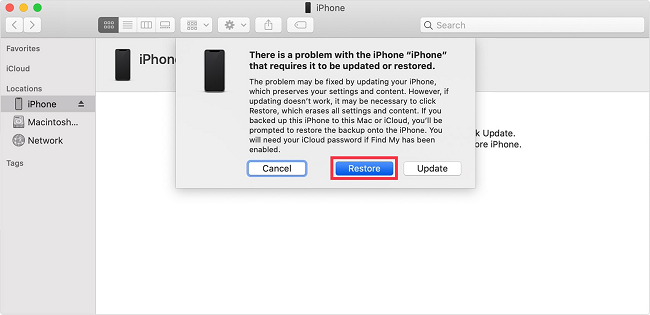
Step 5: Your iPhone will format and start to install to the new iOS firmware.
Step 6: Once the restore is done, you’ll be taken to the setup screen where you can set up your phone as if it is new.
Step 7: During the setup, choose to restore your backup from iCloud.

3. (iOS 15 Supported) Downgrade iOS 14 to 13 with WooTechy iMaster
All methods mentioned above will erase all your data in your iPhone, if you don't make a back up manually, which is time-comsuming and complicated. If you want to aviod any hassle, WooTechy iMaster is highly recommened. Within a few clicks, your data will be saved. Then you can start to downgrade iOS 14 to 13 without any worry, because iMaster has specific instructions.
Great Features of WooTechy iMaster
- Easy and fast to downgrade iOS 14 to 13.
- Free to back up data before downgrade/upgrade.
- Both iPhone and iPad are supported.
- Any signed iOS version can be reverted or updated to by iMaster, even the newest iOS 15.
Video tutorial for you to downgrade to iOS 14 to 13:
Here are the steps to downgrade iOS:
Step 1: Download and launch WooTechy iMaster.
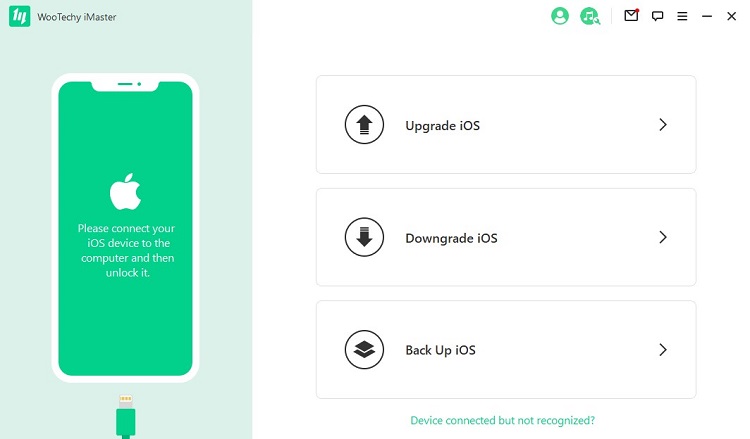
Step 2: Connect your iPhone to the computer via USB and click on "Downgrade iOS".
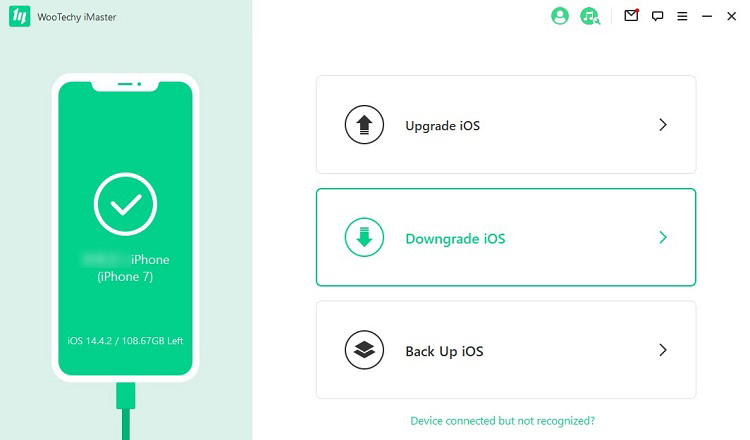
Step 3: Click on "Next" to download firmware to computer. In this step, you can choose the download path as you like.
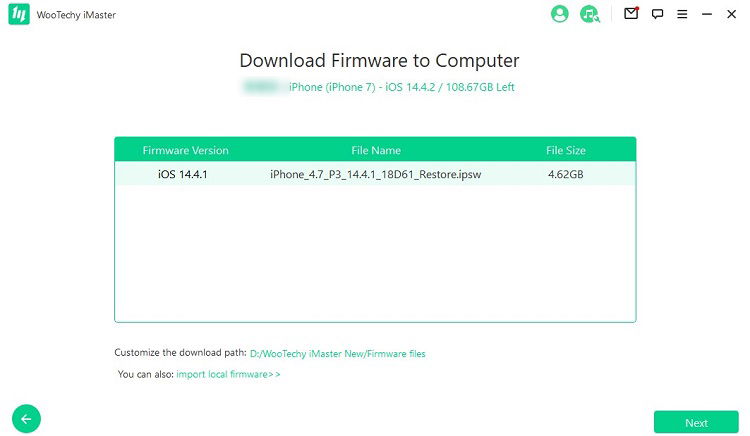
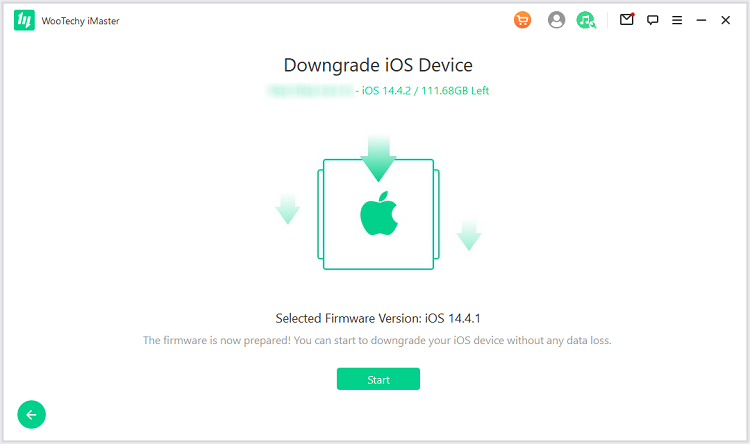
Step 4: Once the firmware is downloaded and verified, click "Start" to downgrade iOS device.
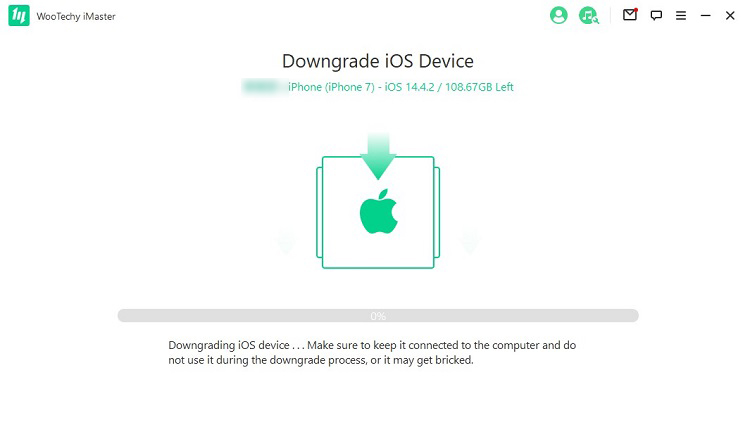
Step 5: Wait for the process to be done. Make sure to keep your iPhone connected during the process.
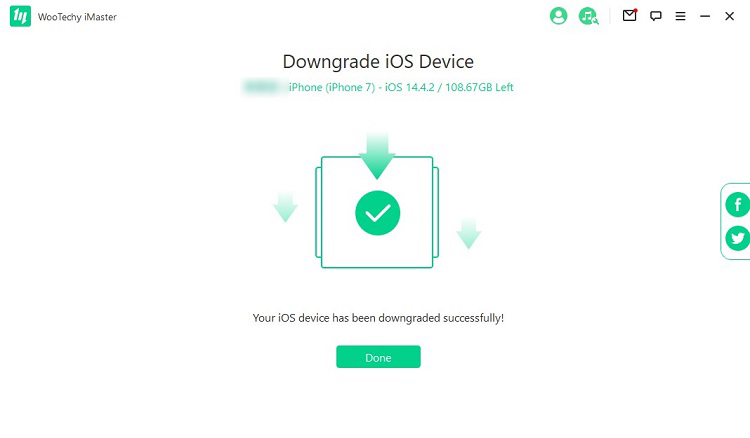
Step 6: Congratulations! You have just downgraded iOS 14 to 13. Click "Done" to exit the program.
FAQs about Downgrade iOS 14 to 13
Q1: How Do I Downgrade My iPhone without a Computer?
You can’t downgrade iOS 14 without computer because you’ll need the PC to connect to iTunes through which Apple will verify if the firmware files inauthentic and signed. Any trick, app, or method promising you can might actually expose your device to risks.
Q2: How Do I Downgrade My iPad from iOS 14?
If you’re facing iOS update related issues on your iOS 14 iPad, you can downgrade it to a previous version using a signed iOS software downloaded from the IPSW website.
Q3: How Do I Downgrade from iOS 14 to 13 in iTunes?
To downgrade from iOS 14 to 13, you’ll need a signed iOS 13 firmware file, a data cable, Mac or Windows iTunes app, and then follow the guide above. Backing up your files and data to iCloud and your PC is also necessary before downgrading.
Q4: Which Phones Will Get iOS 14?
When Apple rolled out iOS 14 last year, not every iPhone device could run it back then. But almost every iPhone device can run iOS 14 now. For example, the earlier iPhone 3G has a signed iOS 4.0 firmware, while the recent iPhone 12 Pro has a signed version of iOS 14.4.
Wrapping Up
This resource considered three ways to downgrade iOS 14 to iOS 13. If you want to be hassle-free, WooTechy iMaster would be your first option. It is worth mentioning that this tool can also help you downgrade the latest iOS 15 without data loss. At the same time, you also learned it is impossible to downgrade from iOS 14 without computer because of Apple’s authentication with iTunes. So avoid tricks and methods claiming otherwise.


