If you want to revert to an earlier version of iOS, futurerestore is one iOS restore tool many iOS users find useful. For this reason, we prepared this guide to show how to downgrade iOS 14 using FutureRestore.
But before getting to the downgrade instructions, you need to know what FutureRestore is, how it works, criteria for downgrading with the tool, and other preparatory steps. Of course, all these are contained in this resource. Without further ado, let's get into them, starting with what FutureRestore is.
What is FutureRestore?
Futurerestore is a software tool designed for iOS, iPadOS, and tvOS users to downgrade, upgrade, and restore their device to any unsigned corresponding firmware. With the tool, for example, you can move your iPhone back or restore it to any iOS firmware version, even if the firmware is no longer signed by Apple.
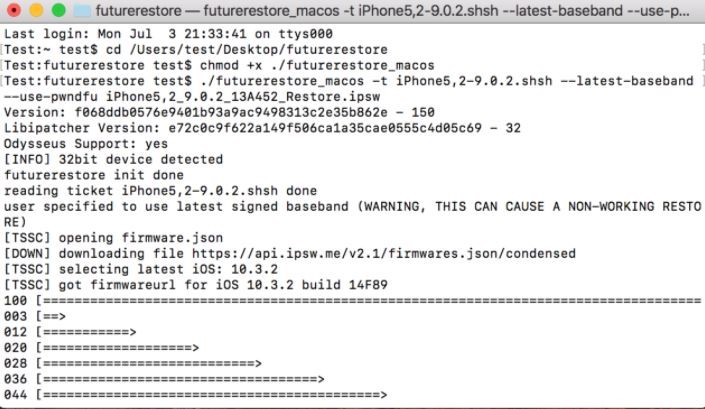
But the FutureRestore can't do it all alone. It needs the support of other tools, including the saved SHSH2 blob file of the destination firmware, to get the job done.
Also, FutureRestore has four modes: iOS 9.x re-restore bug, Odysseus, Apnonce collision, and generator mode. The generator option is the most used option for restoring with FutureRestore. It supports almost all iOS devices.
But note that FutureRestore usually lets users move between a range of recent firmware. Let's say you have iOS 14.4 and want to revert to 14.2, then you're good to go with the generator mode. But the tool won't be useful if you intend to FutureRestore iOS 13 from 14.
Requirement for Using FutureRestore
Remember we earlier mentioned that there are different modes to FutureRestore. This guide will focus on the generator mode. To use it, you'll need all these.
· A jailbroken iOS firmware or one (firmware) that has a generator-setter.
Tip: Before commencing a restore, upgrade, or downgrade project with FutureRestore, ensure to fully backup your iPhone device. This will help prevent the loss of important files. However, a backup should not contain any jailbreak data. This is why we recommend you always use a modern jailbreaking tool that lets you remove a jailbreak at any time without potential harm to your device.
· A more recent version of the FutureRestore tool, which you can download here.
· An unsigned IPSW firmware file you are downgrading to. Download the right file for your iPhone version.
· The SEP and baseband of the unsigned iOS firmware you're restoring to match any currently signed firmware by Apple. With FutureRestore, you can generally move from let's say iOS 14.5 to firmware such as 14.2 or 14.3 because they are in the same range of version. They are compatible. You'll be disappointed trying to move from 14.5 to a 12.5 iOS firmware as they aren't compatible.
· A Linux, Windows, or Mac computer.
· A Valid .shsh2 blob file of the firmware you are migrating to. "Valid" here means that the blob was saved while the iOS firmware is still being signed by Apple. You can download your blob file from TSS Saver. You will only be able to download a Blob file from the TTS website if you already saved it when the iOS firmware is still being signed by Apple.
Unfortunately, there's nothing you can do if you didn't save the destination IPSW restore file when it's still being signed by Apple.
Preparation before Using FutureRestore to Downgrade iOS 14
If all the above requirements are set, take things a step further by doing some preparatory tasks listed below.
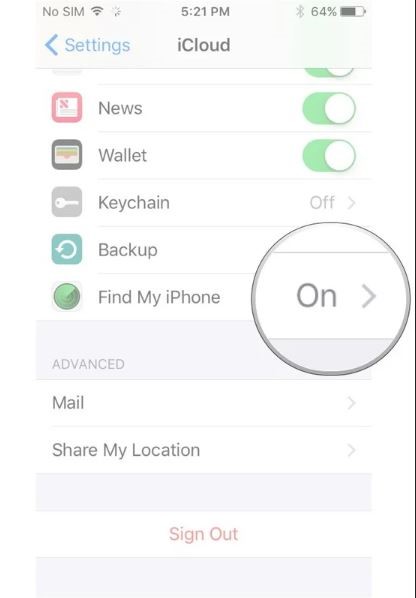
Step 1: Turn off Find my iPhone/iPad on your iPhone. Navigate Settings > Your Name> Find My iPhone and turn it off.
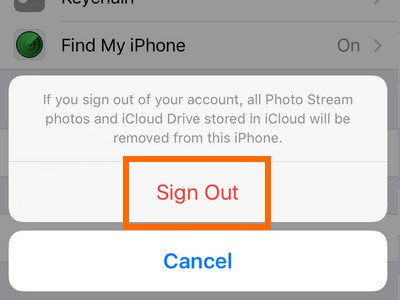
Step 2: Sign out of iCloud or iTunes on your iPhone if you're logged in. Go to Settings > Your Name and scroll down to the bottom of the page. Then tap Sign Out and follow the instruction to effect the change.
Step 3: If you are a Windows PC user, ensure that the iTunes installed on your machine is a version from the official Apple website, not the one from Microsoft.
Step 4: Place all files -blob (exec) file, exe, and the destination unsigned IPSW firmware - in one folder.
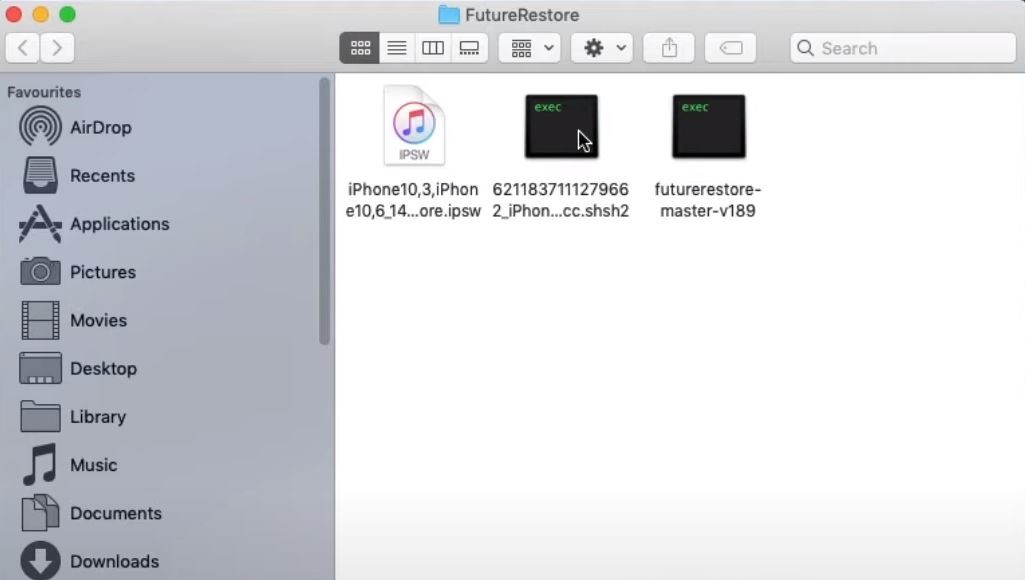
Step 5: You'll need to edit the blob file with the correct generator value. This guide provides a detailed explanation.
Use FutureRestore to Downgrade iOS 14
With all necessary requirements and files in place, it's time to execute the restore process. Follow the below steps to downgrade iOS 14 using FutureRestore.
Step 1: On your Mac, open both the Terminal app and the folder containing all the three requisite files.
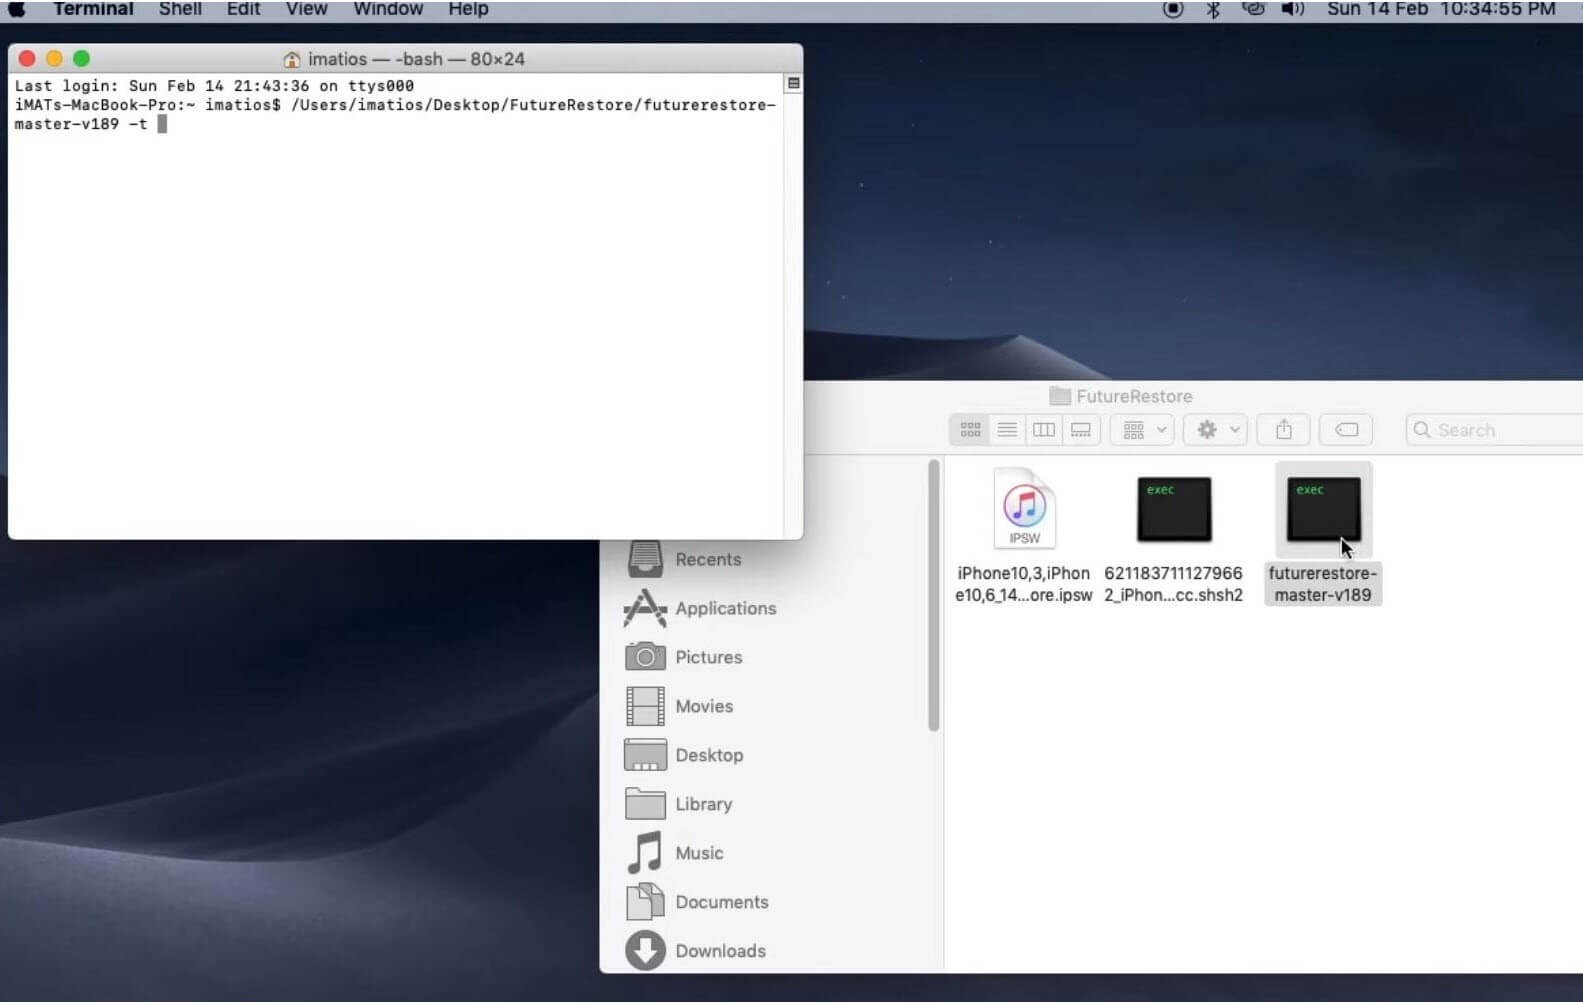
Step 2: Drag your unzipped FutureRestore file into Terminal and type -t.
Step 3: Drag the blob file as you did in step 2 and type --latest-sep --latest-baseband.

Step 4: Drag the unsigned iOS firmware you're downgrading into the terminal interface, just as you did with the two previous files. After putting all three files in Terminal, the Terminal screen should look like this:
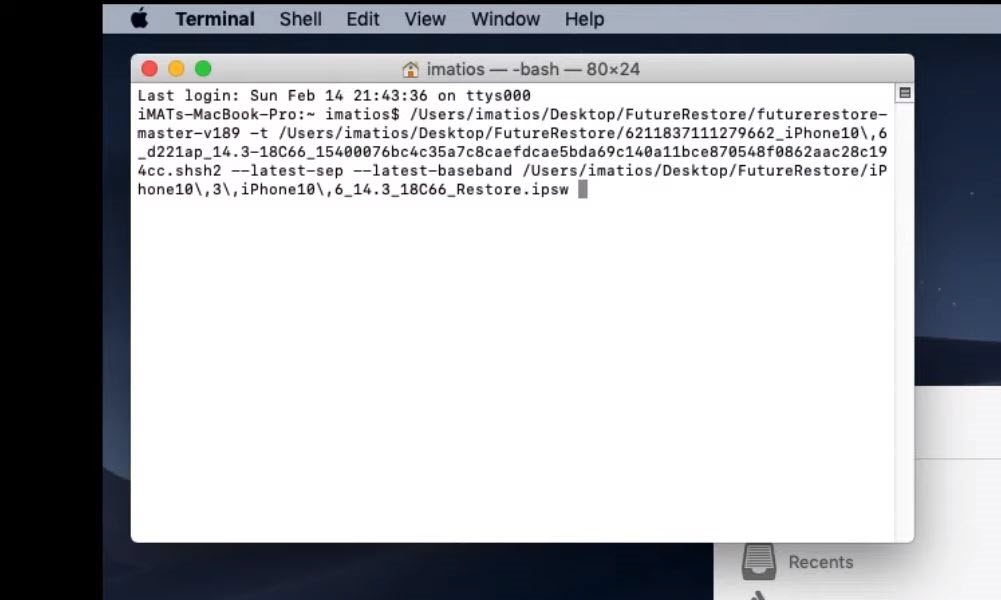
Step 5: Connect your iPhone to your Macbook or Windows computer and press Enter on your keyboard.

Step 6: Wait for the downgrade process to complete.
Step 7: If your device gets stuck in recovery mode, enter those commands againand you should be fine.
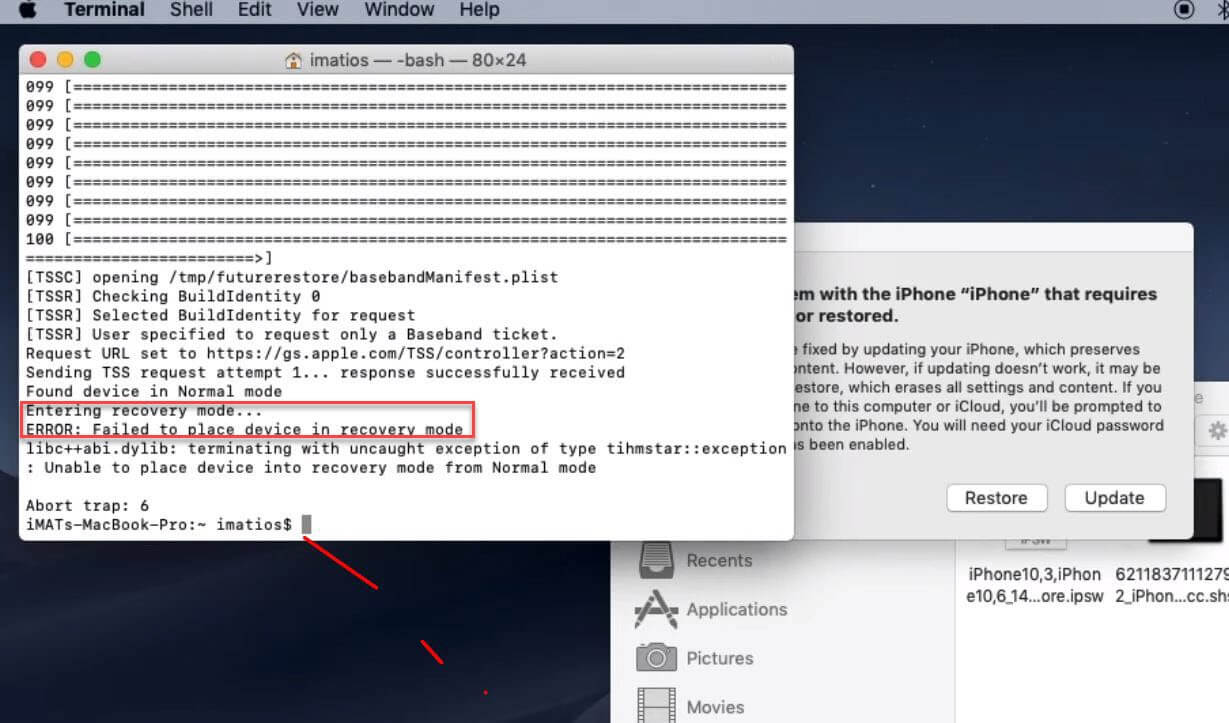
Step 8: Once the restore process is completed, go ahead and set up your iPhone.
Bonus: One-click Solution to Downgrade iOS 14
If you are not tech-savvy, using FutureRestore to downgrade iOS 14 can be really daunting, for all the complicate steps you need to do. Fortunately, if you don't want to go through such hassle, WooTechy iMaster can give you a hand.
Great Features of WooTechy iMaster
- No hassle. You can downgrade any iOS version, like the latest iOS 15, in a few clicks.
- Upgrade and Back Up features are easy-to-use as well.
- No risk of losing data. Everything will be saved before downgrade upgrade.
- Free trial are available for checking compatibility.
Watch this video to downgrade iOS 14 in one click:
Here are the steps to use WooTechy iMaster to downgrade iOS 14:
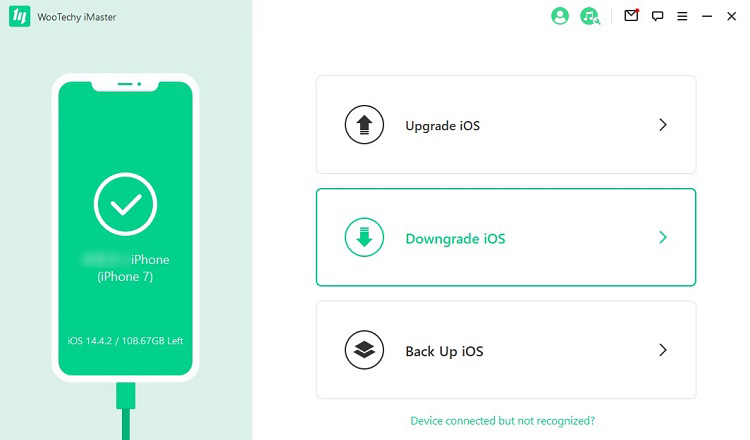
Step 1: Open WooTechy iMaster.
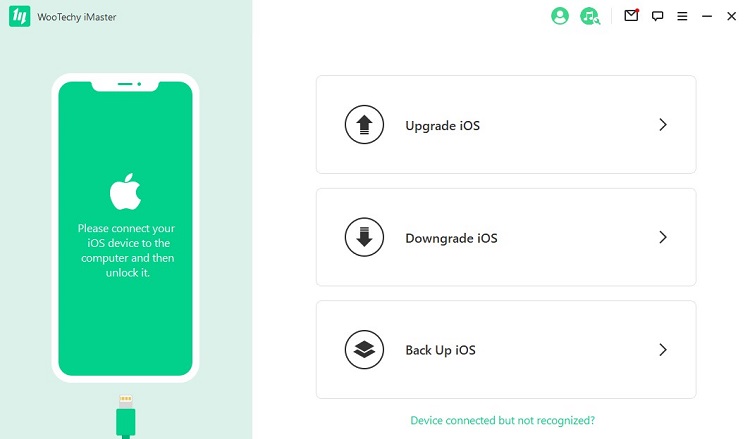
Step 2: Connect your iDevice to the computer, followed by selecting "Downgrade iOS".
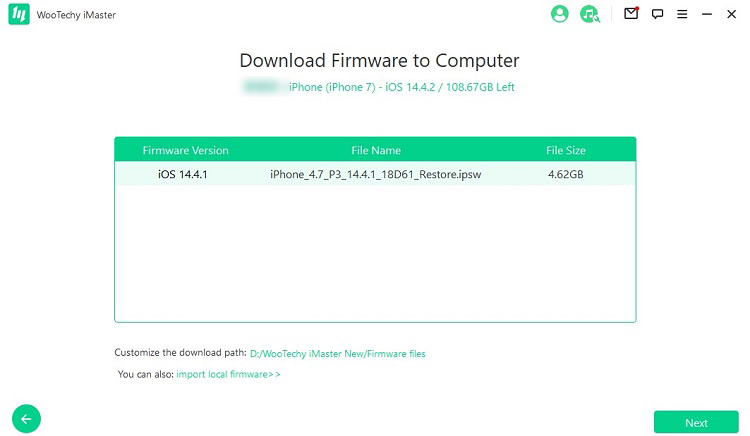
Step 3: You will be guided to download an iPSW file. Click "Next" to download the firmware to your computer.
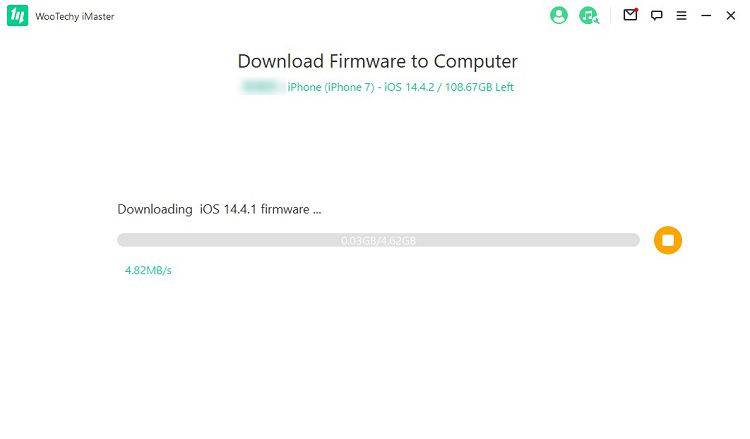
Step 4: Wait for the download process to complete. Make sure you have sufficient storage pace for this step.
Step 5: Then the download process is done. Click "Start" to downgrade iOS device.

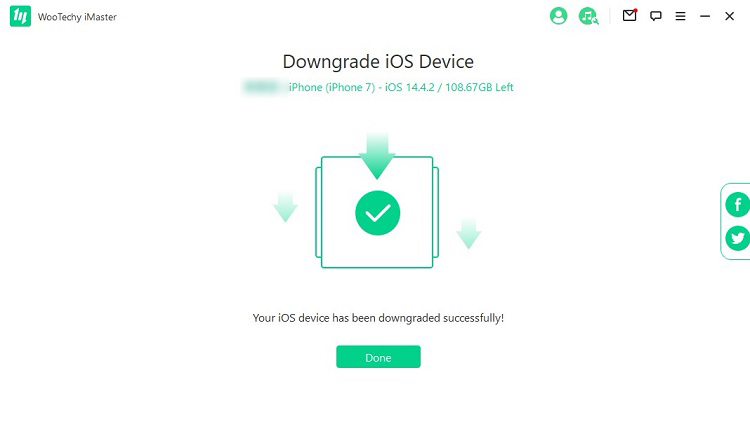
Step 6: All we have to do is wait. Once the process is done, click "Done" to finish whole downgrade process.
Conclusion
This article explained what FutureRestore is, how to use its generator mode to downgrade iOS and other requirements. Besides, if you're still confused about how to downgrade iOS with FutureRestore, I would recommend you to WooTechy iMaster, with which you can cut the corners and save time. By the way, this tool now supports the downgrade from iOS 15 to iOS 14. If this is what you need now, you can give it a try.
As a reminder, FutureRestore won't work for you if you don't save the blob file of the iOS version you're restoring to while Apple was still signing it. But if you have the blob part handled, then getting other required tools and executing the downgrade process shouldn't be a problem.


