Apple stopped signing iOS version 13.7 in September 2020. That means you won’t be able to downgrade to iOS 13.7 through iTunes. Of course, this update didn’t come as a surprise because Apple routinely stops signing a previous version of iOS shortly after a new version is released.
In case you still like the features and functions iOS 13 offers and want to go back to that version, this blog will show you how to revert your iPhone back to iOS version 13.7 step by step using some iOS downgrade tools you’ll discover in this blog.
| Product | Success Rate | Ease of Use | Need Signed iOS Firmware |
| WooTechy iMaster | above 98% | Very Easy to use | Yes |
| AnyFix | 70% | Easy to use | Yes |
| TinyUmbrella | 55% | The user interface is a little bit hard | Yes |
| TaigOne Downgrader | 75% | Easy to use | Yes |
| Future Restore | 80% | Challenging to use | No |
Part 1: Downgrade to iOS 13.7 Using WooTechy iMaster
WooTechy iMaster is professional iOS upgrade and downgrade software, with backup features available. Follow the steps below for how this software works.
Great Features of WooTechy iMaster
- A few clicks will finish the downgrade process.
- The best alternative to iTunes to back up iOS data to the computer.
- Without any technical skills required, you can freely update or revert your iPhone/iPad.
- Latest iOS 15 version is supported.
Here is a video tutorial for you to downgrade to iOS 13.7:
Here are the steps to downgrade iOS:
Step 1: Launch WooTechy iMaster.
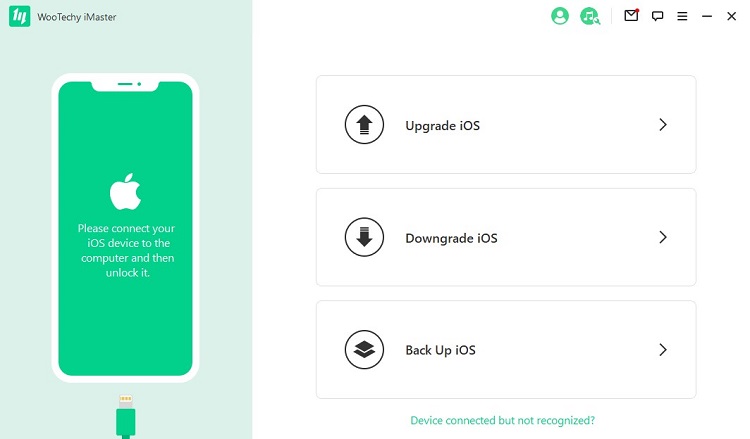
Step 2: Connect your iOS device with computer using cable and choose "Downgrade iOS".
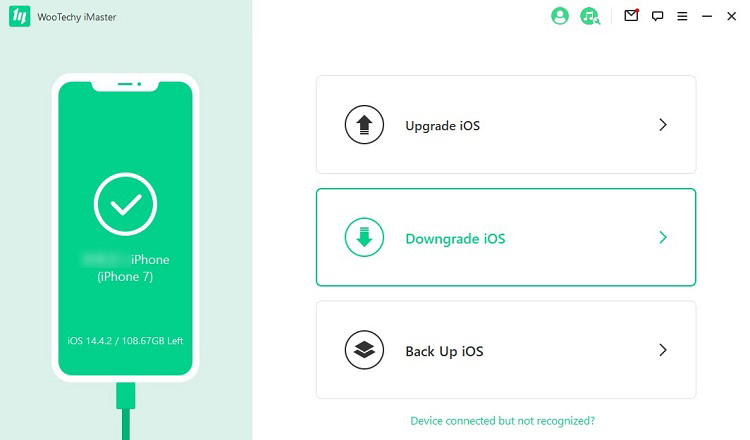
Step 3: Click on "Next" to download firmware to computer.
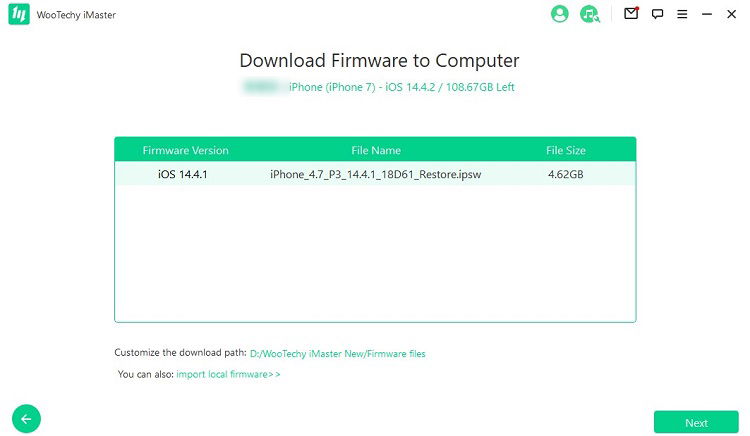
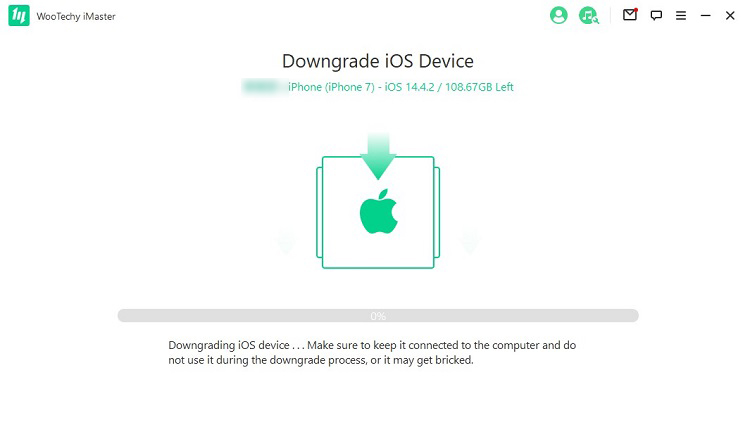
Step 4: Click "Start" to start downgrade iOS device.
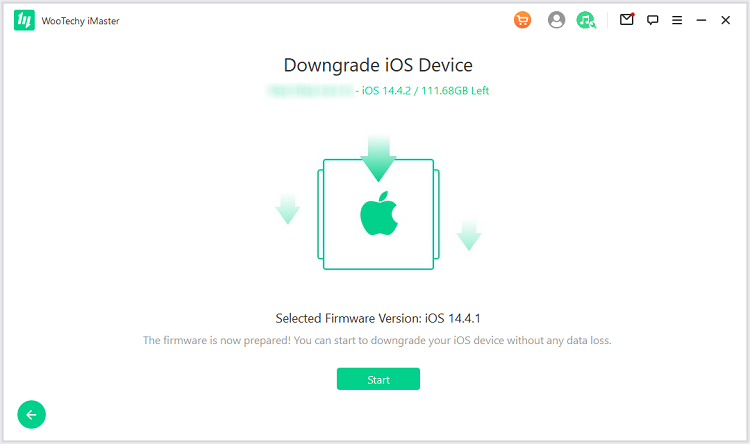
Step 5: Wait patiently, until iMaster tells you "Your device has been downgraded successfully". Click "Done" to finish the downgrade process.

Part 2: Downgrade to iOS 13.7 Using AnyFix
AnyFix is an iOS system recovery tool that offers solution to iOS users seeking to downgrade their device to a previous iOS version. Follow the steps below for how the tool works.
Step 1. Download and launch AnyFix app on your computer.
Step 2. From the several options displayed on the screen, click the "Upgrade/Downgrade iOS".
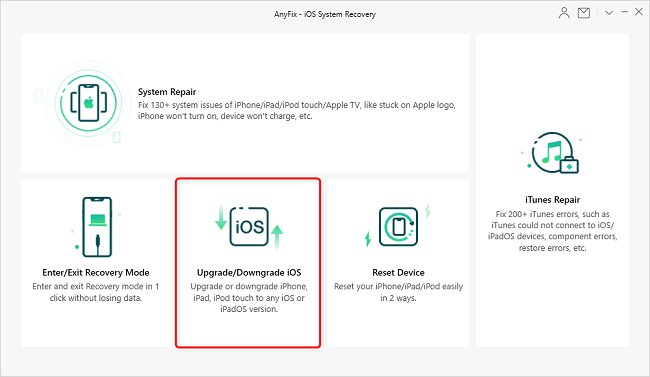
Step 3. Use a data transfer cable to connect your iOS device to your computer. When your device has been detected, a screen displaying your device model information will show up.
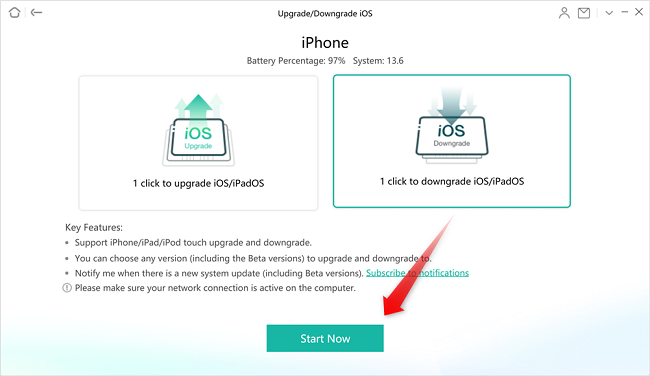
Step 4. Click "1 Click to downgrade iOS/iPadOS", and then "Start Now" button below.
Step 5. The next screen will display different available iOS firmware versions. Choose your desired version and click the "Downgrade" button found at the bottom right screen.
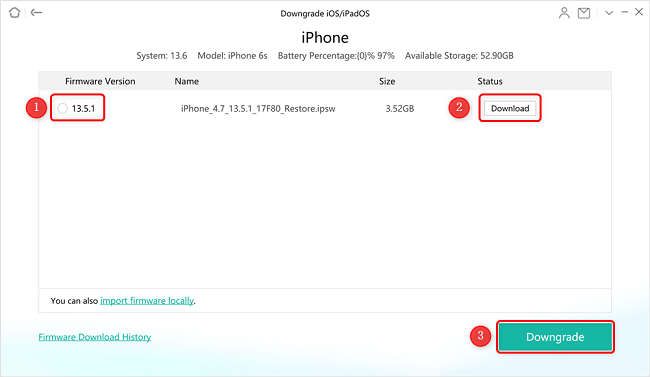
Step 6. Upon clicking the "Downgrade" button, AnyFix will start to downgrade your iOS version automatically.
Step 7. After the downgrade is completed, click the "OK" button below the success notification or the back button at the top left screen.

Part 3: Downgrade to iOS 13.7 by TinyUmbrella
Developed by The Firmware Umbrella Company, TinyUmbrella is a software program designed to help users restore to a previous iOS firmware. It automatically finds and detects the SHSH Blob or the right firmware file for your iOS device. Apart from helping with downgrading, it can also solve some issues like iPhone being stuck in recovery mode.
After backing up your important data and files, follow the steps below to revert to an earlier version of iOS using TinyUmbrella.
Step 1. Download and install TinyUmbrella.
Step 2. Launch the program.
Step 3. Connect your iPhone or iPad device to your PC using a USB data transfer cable. If everything is okay, TinyUmbrella should detect your device automatically.
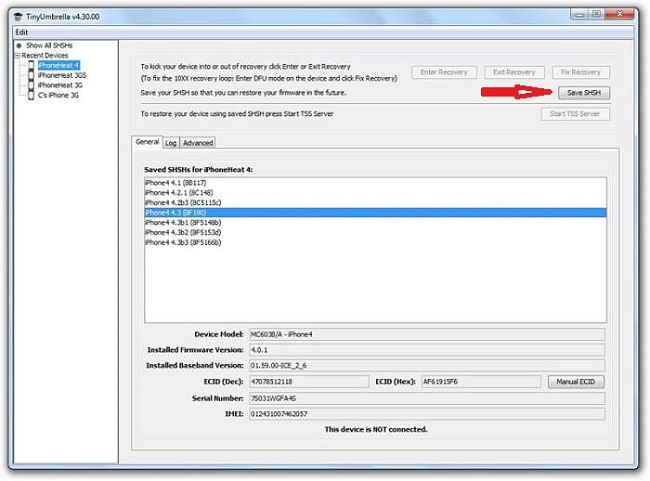
Step 4. In the top-right screen, click the "Save SHSH" button, and all available SHSHs files will appear.
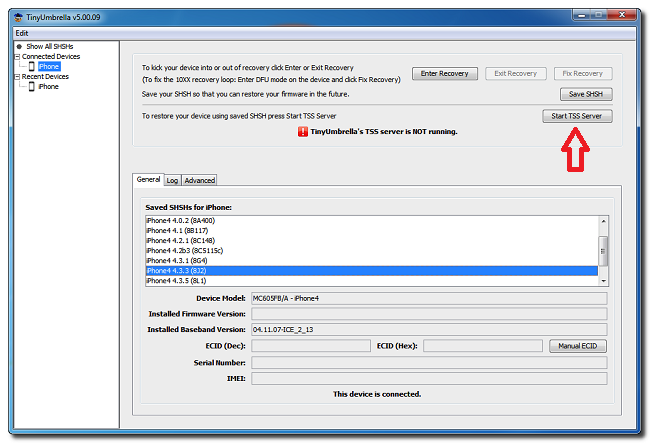
Step 5. Click the Start "TSS Server" button.
Step 6. After the server has completed its function, you will see an Error 1015. On the left panel, click your device name, right click on it, and then click "Exit Recovery".
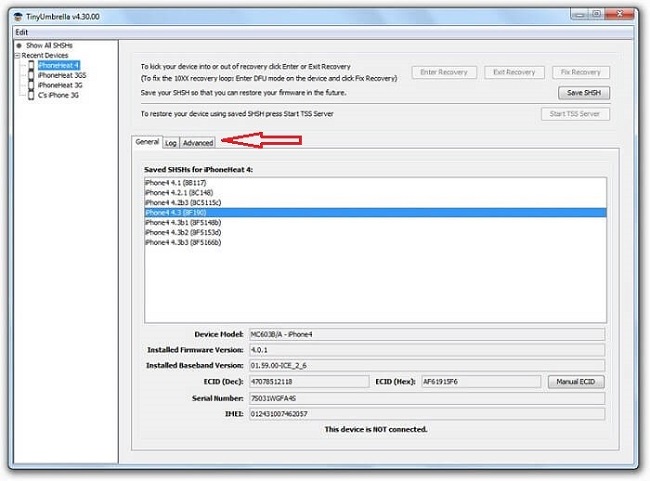
Step 7. Under the Advanced tab, uncheck "Set Hosts to Cydia on Exit" (If you need a clean restore from Apple uncheck this box) to complete the process.
Pros:
•It is a free app. No premium version, so you wouldn’t have to pay.
•It can put your device into recovery mode and out of it.
•It can help solve the issue of iPhone getting stuck in Recovery mode.
Cons:
•The interface can be quite tricky, unlike other iOS firmware downgrade tools that are relatively easy to use.
•You must download the IPSW restore file before you can downgrade. This is a minus because you wouldn’t be able to revert back to an iOS firmware that Apple has stopped signing.
•Your iOS device must be jailbroken to use this software.
Part 4: Downgrade to iOS 13.7 Using TaigOne Downgrader
TaigOne is a jailbreak tool for iOS-based devices but can also be used to downgrade iPhones to a previous or an earlier version. Using this tool to downgrade your iOS device is simple and straightforward.
Follow the steps below for how to use the app.
Step 1. Download, install and launch TaigOne.
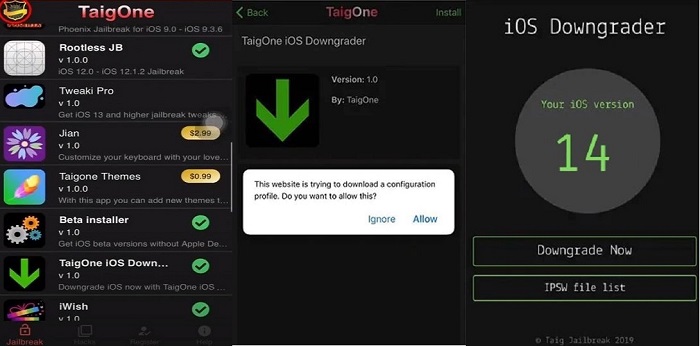
Step 2. From the many apps in TaigOne, scroll down and find TaigOne Downgrader.
Step 3. Select TaigOne iOS Downgrader and install it.
Step 4. Tap "Downgrade Now".
Step 5. Wait until the process is completed.
Pros:
•It is easy to use.
•It is free to use.
•You can easily downgrade to an old iOS version.
Cons:
•Your iOS device must be jailbroken before you can use the app.
•It doesn’t work for newer versions of iOS.
Part 5: Downgrade to iOS 13.7 with FutureRestore
FutureRestore will completely erase your data, so make sure to back up your iPhone or iPad before proceeding. You’ll need three items for this process: the latest version of FutureRestore, IPSW file, and IPSW blob.

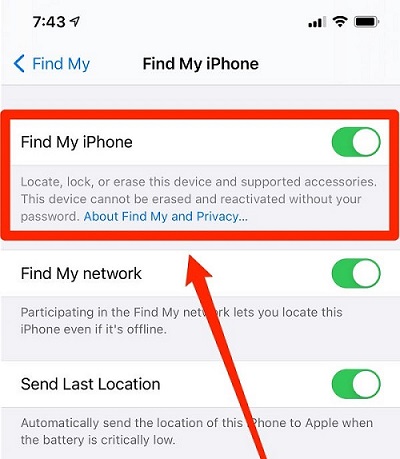
Step 1. On your iPhone, go to settings and turn off Find My iPhone.
Step 2. Sign out of your iTunes or iCloud account.
Step 3. Download the latest version of FutureRestore from GitHub.
Step 4. Download the IPSW file version you're restoring to.
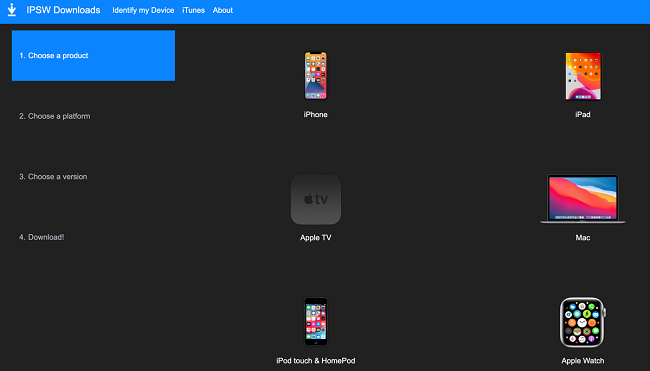
Step 5. Get the blob from TSS Saver. On the page, you'll be asked for your iPhone device’s model and ECID to generate the blob.
Step 6. Create and name a folder SHSH DOWNGRADE and put all files – unzipped FutureRestore, IPSW file, and the blob – in the folder.
Step 7. Open the blob file with Plist Editor. Find List View and copy the value there. Check this resource on how to set the nonce value.
Step 8. Connect your iPhone device to your Windows PC using a data transfer cable.
Step 9. Search for and open Command Prompt on your PC.
Step 10. Drag FutureRestore into the Command Prompt interface. After the dragged app changes into certain characters, then type –t. Afterward, drag the SHSH blob file into the interface and then type "–latest-sep –latest-baseband". Add space and drag the IPSW file into Command Prompt as well.
Step 11. Press Enter key and let the process run while making sure your phone is connected and active during the process.
Pros:
•This method allows you to restore to an unsigned iOS firmware.
•All the tools required are free to use.
Cons:
•The steps, which is a bit complicated, rely on a jailbroken iPhone device.
•It does not work for every iOS device. Check this GitHub page for compatible iOS devices.
Conclusion
To help you downgrade to iOS 13.7 on Windows PC, this resource explained five ways to go about the process. Hopefully, you’ll find them useful. And don’t forget to always make a full backup of your device before downgrading or even upgrading your iOS to avoid losing important data. To do that, WooTechy iMaster would be your trusted companion. This useful tool can help you downgrade even the latest iOS 15 to previous version without data loss. Just download and give it a try!


