 Problems
"iPad is disabled connect to iTunes."
"iPad Unavailable"
Have those message popped up on your iPad, and you don't know what to do? Apple is very serious and intentional about the security of your account information. When you or someone else enters the wrong password too many times, Apple thinks someone is trying to gain unauthorized access to the device and will disable your iPad to protect sensitive information on your device.
Luckily, we have collected all the effective methods to bypass the disabled or unavailable iPad showing connect to iTunes. Keep reading to find them out!
- How to Bypass the Disabled iPad Showing Connect to iTunes
- 1. Bypass the Disabled or Unavailable iPad Using WooTechy iDelock (For All iPads)
- 2. Restore the Disabled iPad via iTunes (Only for iPads That Have Been Synced With iTunes)
- 3. Restore the Disabled or Unavailable iPad with Recovery Mode
- 4. Erase the Disabled or Unavailable iPad via iCloud
- 5. Erase the Disabled or Unavailable iPad via Find My App
How to Bypass the Disabled iPad Showing Connect to iTunes
Bypass the Disabled or Unavailable iPad Using WooTechy iDelock
WooTechy iDelock is the best tool so far that caters to bypass various locks of iOS devices, even the disabled iPad showing connect to iTunes. This highly versatile iPad unlocking tool can help you regain the access to your disabled iPad in a couple of minutes. And all you need to do is following the interface guide and click at proper time. Is it convenient? Let's check some other great features of this amazing tool.
Prominent features of iDelock
- Remove various iDevice locks: screen lock, Apple ID, Screen Time & Restrictions and MDM.
- No need to be a tech-savvy. And you can do the unlocking at home or anywhere you want.
- iDelock can work with all iPads and all iPadOS versions including the newest iPadOS 18.
- The Support Team is available anytime when you have any questions.
The steps involved in using WooTehy iDelock to bypass the disabled iPad screen showing connect to iTunes are:
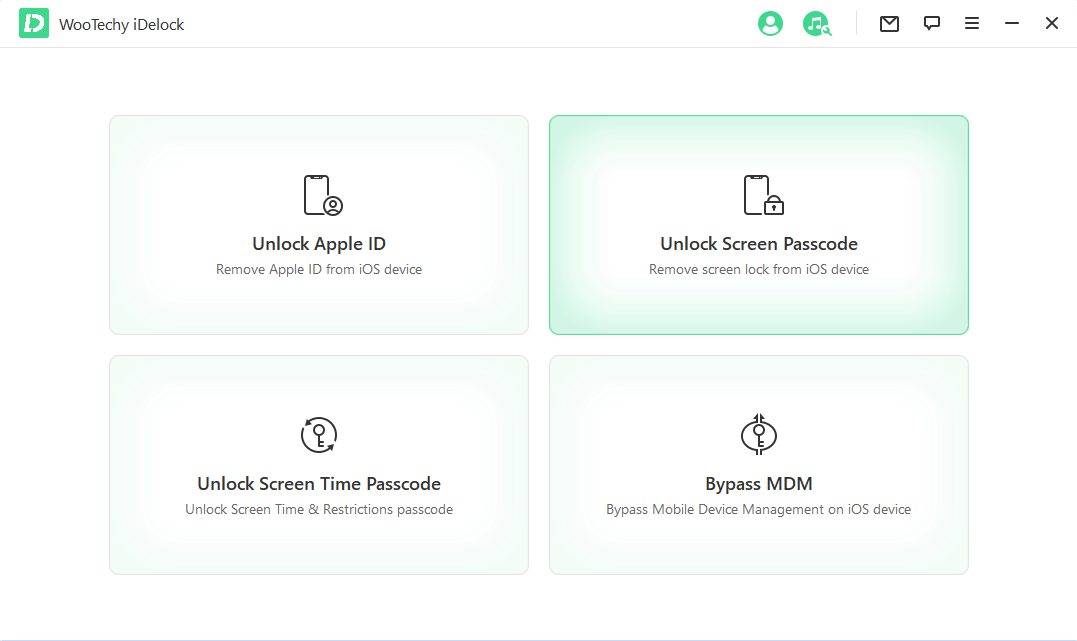
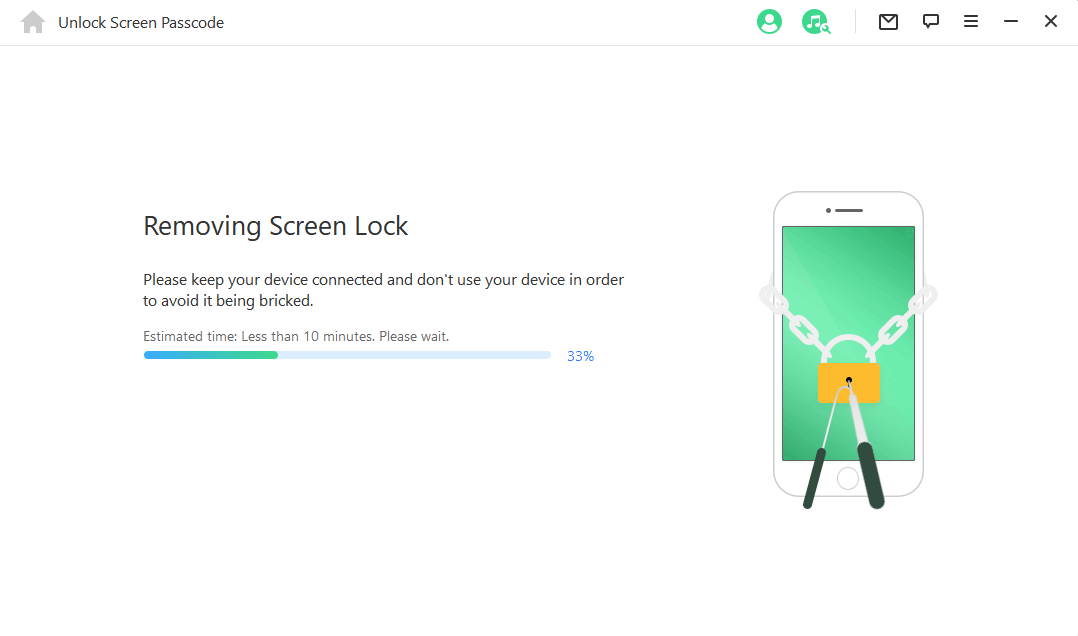
- Install and start WooTechy iDelock on your computer. Among the options provided, select Unlock Screen Passcode mode.
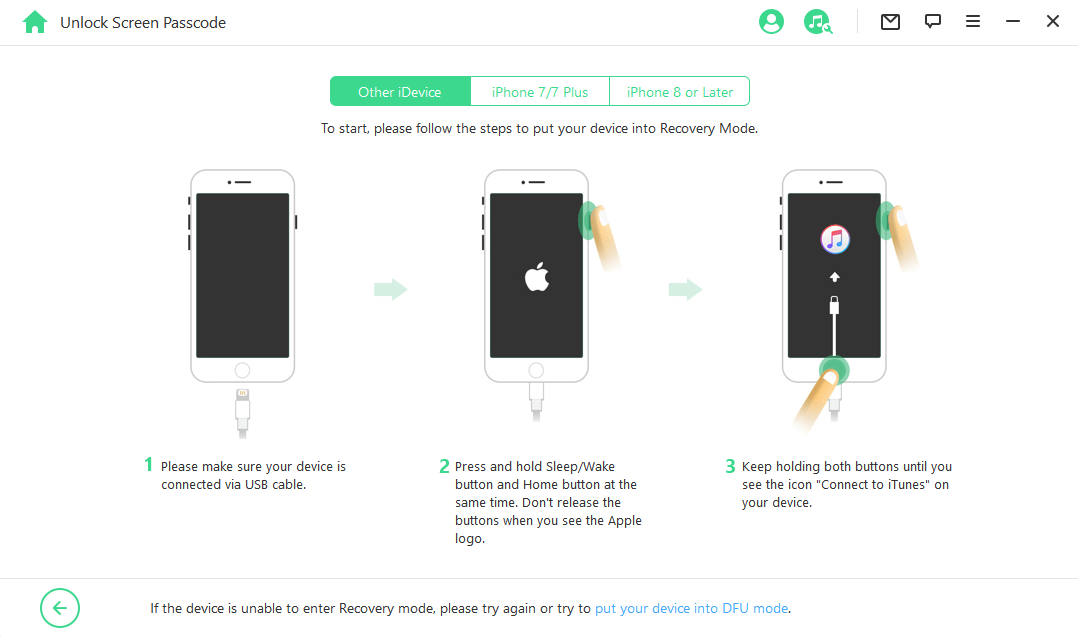
- Connect your disabled or unavailable iPad to your PC using a USB cable. Then, put your device into DFU or Recovery Mode as the instruction shows.
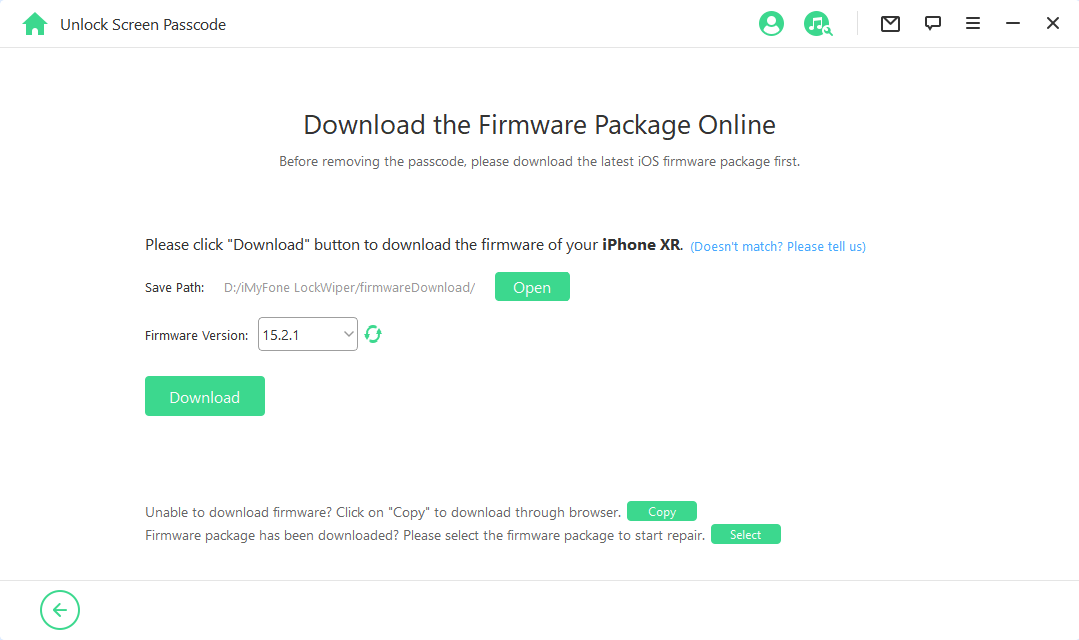
- Click Download after choosing a firmware version provided. Wait for the download and extraction of the firmware package to complete.
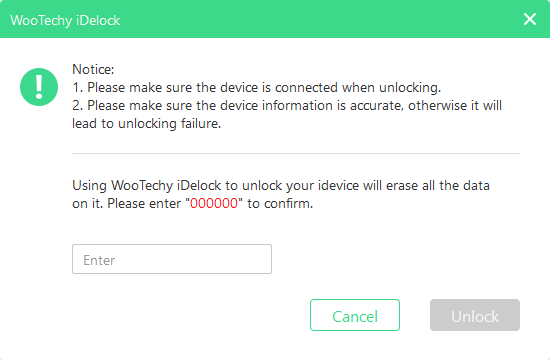
- Choose Start to begin. Read the notice carefully before entering 000000 to confirm you agree to unlock your device.
- After a few minutes, the lock will be bypassed from your disabled iPad showing connect to iTunes.
Restore the Disabled iPad via iTunes
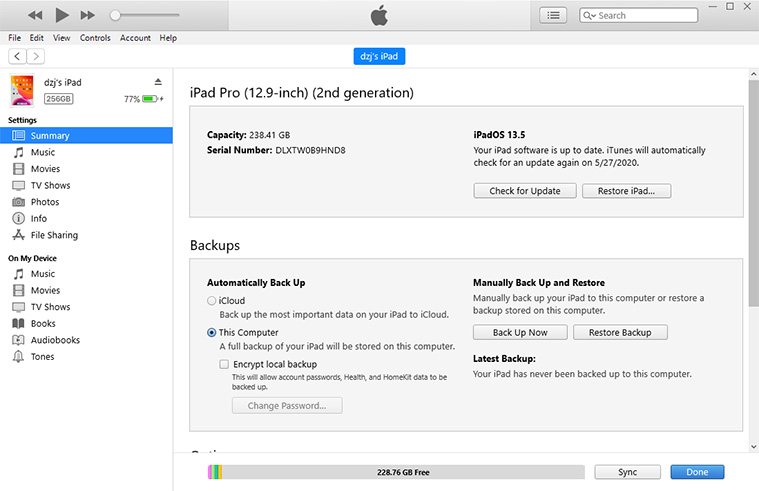
If your have synced your iPad to the iTunes before, you can try to restore your disabled iPad showing "connect to iTunes". However, some people reports that their iPad can not be recognized even if they have synced it with iTunes before. Anyway, you can give this game of chance a try.
- Connect your iPad to a computer using a USB cable and launch the iTunes.
- Wait for the iTunes to recognize your device. And this may fail even if you have synced the iPad before.
- If luckily, your device is detected, click on the device icon on the top left corner to reach the Summary section.
- Select Restore iPad on the screen and confirm your action. Wait a few minutes for the process to complete.
Restore the Disabled or Unavailable iPad with Recovery Mode
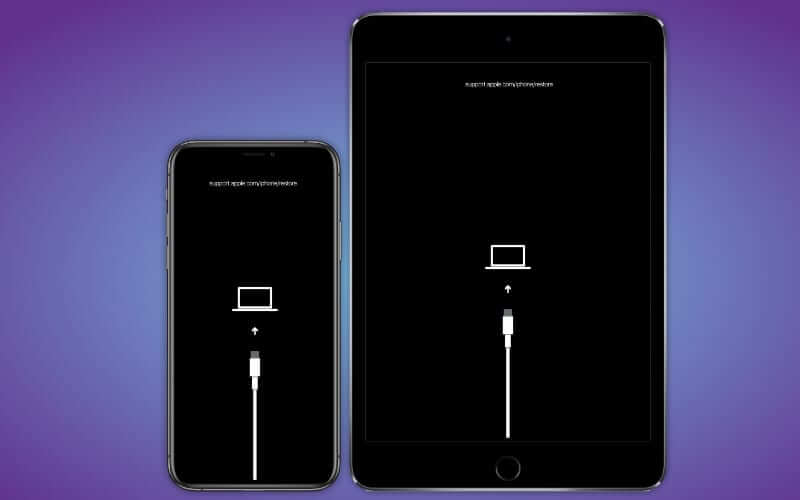
If you have not synced your iPad with iTunes or your disabled iPad failed to be detected, you can restore it with recovery mode. Keep in mind that this method will erase all your data. So think twice before you leap if you have no backup. Before restoring your disabled iPad, you need to put it into recovery mode. And please keep the iPad connected to the PC during the whole process.
Here is how to do this:
- For iPad with a Home button: Press the Home button together with the Sleep/Wake button. Keep holding until you see the recovery mode screen. Don’t release them when you see the Apple logo.
- For iPad without a Home button: Press and release the Volume-Up button and then the Volume-Down button. Finally press and hold the Sleep/Wake button. Release it when you see the recovery mode screen. Keep holding when you see the Apple logo.
Now you can restore the disabled iPad showing connect to iTunes:
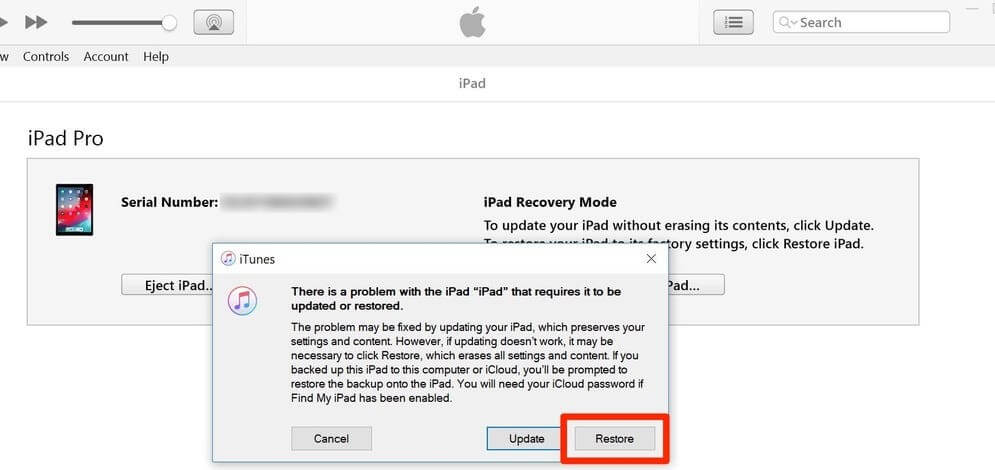
- Launch the latest iTunes on your PC.
- You’ll see a pop-up window with two options. Choose Restore and confirm your action.
- Wait for a few minutes for the process to complete.
Now you can restore the disabled iPad showing connect to iTunes:
Erase the Disabled or unavailable iPad via iCloud
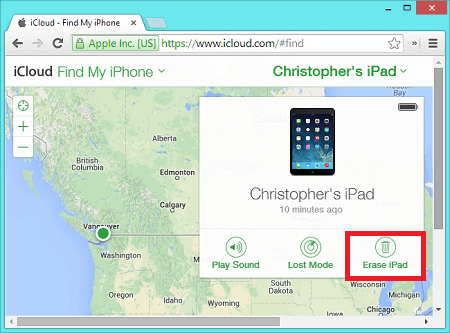
Another method to bypass the unresponsive iPad screen is by erasing the it via iCloud. Before you restore disabled iPad via iCloud, ensure that Find My iPad is enabled on the device and you remember the Apple ID and password logged on the disabled device.
- Go to iCloud on your computer.
- Enter your Apple ID and password logged on the disabled iPad.
- When you're logged in, choose Find iPhone.
- Click All Devices at the top of the screen and choose your disabled or unavailable iPad.
- Click Erase iPad and confirm the action.
- Enter your Apple ID password to continue. And your iPad will begin reset to the factory settings.
Erase the Disabled or Unavailable iPad via Find My App
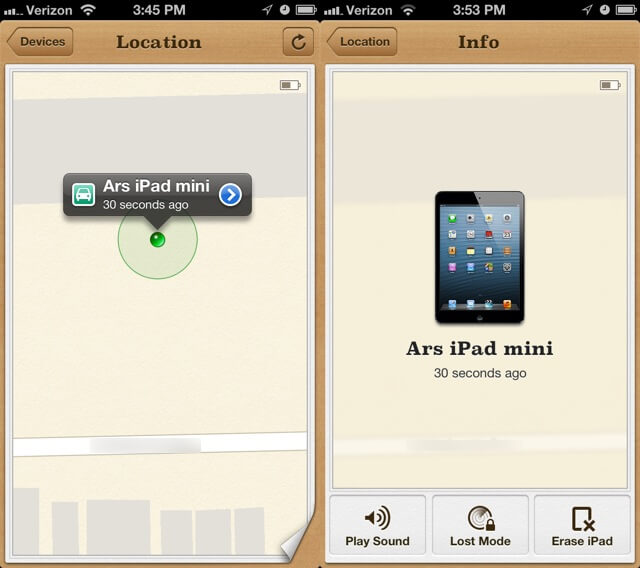
If you have no PC but an iPhone at hand now, you can use the Find My app to unlock disabled iPad without computer. Of course, these two devices must be signed in with one Apple ID and the disabled/unavailable iPad has the Find My features on.
- Open Find My app on your active iPhone or iPad.
- Click Devices at the bottom-left side of the screen and select your disabled iPad.
- Scroll down and click Erase iPad/This Device.
- Click Continue and then Erase.
- Enter your Apple ID password and click Erase again.
Conclusion
When you or someone else trying to gain access to your iPad but enters the wrong password up to ten times, Apple will disable your iPad. This can be frustrating to deal with but you're not without help. Already, we've highlighted the various methods you can use to regain access to your disabled iPad showing connect to iTunes. Here the WooTechy iDelock is strongly recommended. With it, you can bypass the disabled or unavailable iPad in no time. Just download and give it a try!


