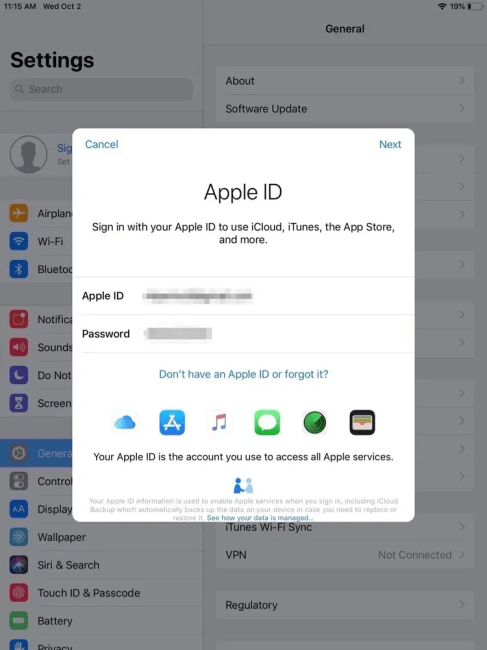
In general, your iPad keeps asking for Apple ID password after an iPadOS update or because the iPad has been ocked after a long period of time. Usually, you will see "Enter the password for your Apple ID" on your screen.
Of course the first action to it would be entering Apple ID password so that the verification prompt does not return. However, sometimes it won't work due to software glitches or you just can not remember the password. In this case, you need to find other solutions, which will be showed in this article. Keep reading.
- What to Do if iPad Keeps Asking for Apple ID Password
- Check the Apple System Status
- Log out of the Apple ID and Back in
- Turn On and Off FaceTime and iMessage
- Turn Off Require Password for iTunes & App Store
- Force Restart iPad
- Reset Apple ID Password
- Reset Network Settings
- Reset All Settings
- Update iPadOS to the Latest Version
- Restore iPad via iTunes
- Bonus Tip: Forgot Apple ID password? Remove Apple ID Without Password Using iDelock
What to Do if iPad Keeps Asking for Apple ID Password
Tips
If you want to save all the trouble trying every poosible method to slove your problem of "iPad keeps asking for Apple ID password", you could just check out WooTechy iDelock, a iPad unlocker that can could help you unlock any kind of passwords on your iPad, including Apple ID, screen passcode and screen time passcode within minutes.1 Check the Apple System Status
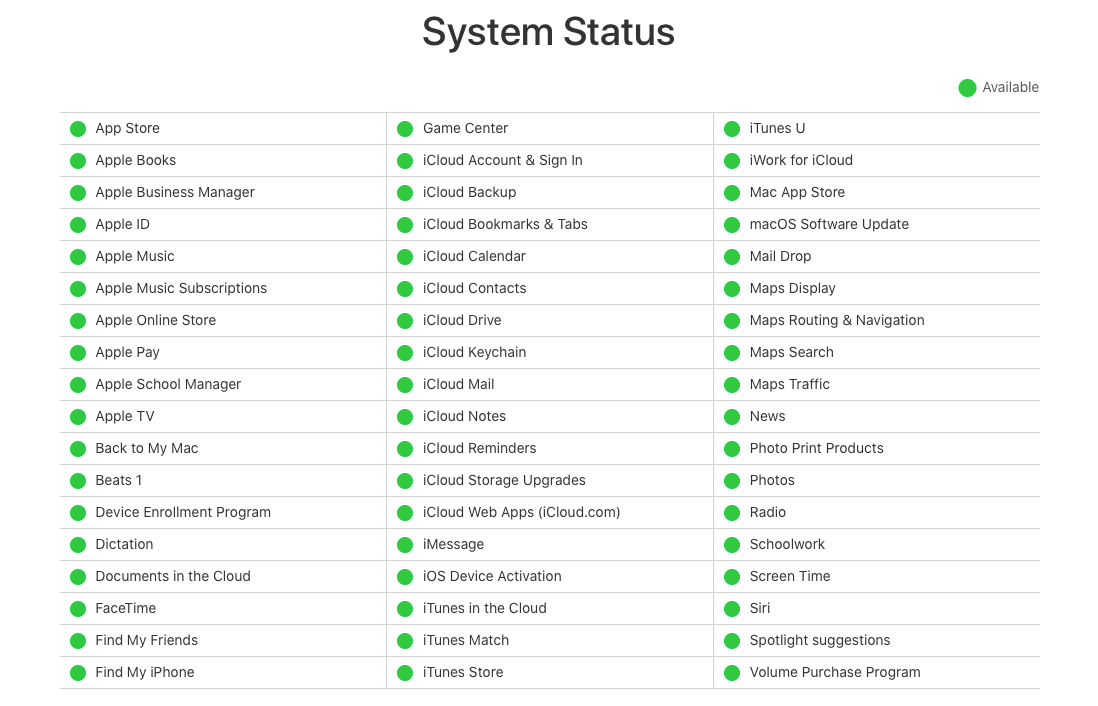
Feeling frustrating when iPad/iPhone keeps asking for Apple ID password? You can check Apple's system status to see if Apple Servers is down or having service issues. If your iPad is consistently asking for your Apple ID, an outage could be the problem. If this is the case, you will experience this issue until Apple resolves the issue.
2 Log Out of the Apple ID and Back In
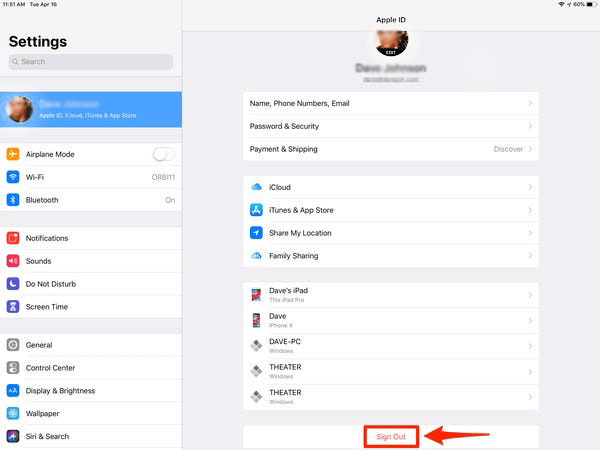
If you have entered the Apple ID password but your iPad keeps asking for the verification. You can try logging out of the Apple ID and then log back in.
Step 1 Go to Settings > [your name]. Scroll to bottom and tap on Sign Out.
Step 2 Type your Apple ID password to confirm your action. After signing out your Apple ID, go back to Settings > [your name] and again begin signing in with Apple ID and password.
3 Turn On and Off FaceTime and iMessage
It is a trick provided by users who have the same issue, and it works in many cases. Although it sounds weird, you can give it a try. Here is how to do it.
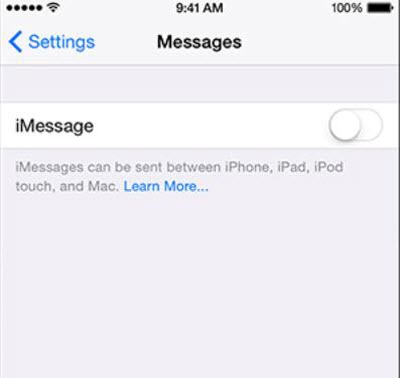
Step 1 Go to Settings > Messages and toggle the switch to turn off iMessage.
Step 2 Go to Settings > FaceTime and toggle the switch to turn off FaceTime.
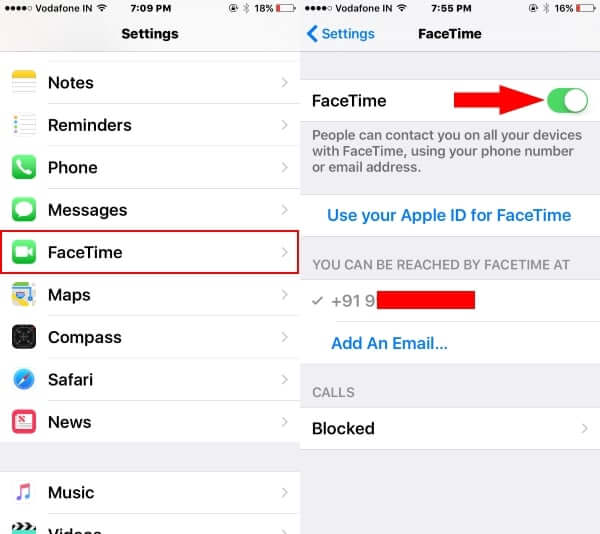
Step 3 After that, restart your iPad and go back to the same place to turn them on.
4 Turn Off Require Password for iTunes & App Store
If you have enabled Touch ID or Face ID for App Store and iTunes Store purchases, this iPad keeps asking for Apple ID password issue is likely to happen every now and then. In this case, you can turn of App Store password and iTunes password. This method can also free yourslef from "App Store keeps asking for password" issue.
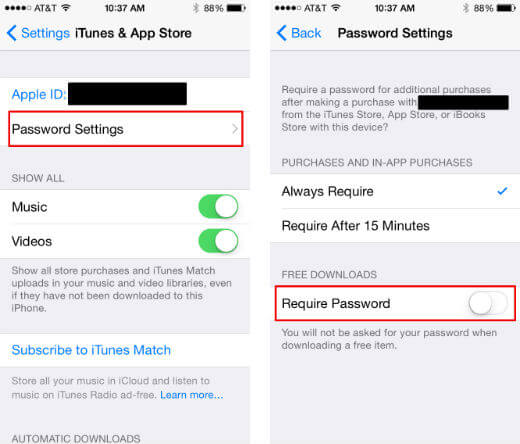
Step 1 Click Settings > [Your Name] > Media & Purchases > Password Settings.
Step 2 Disable the Require Password option and Enter your Apple ID and password to confirm the action.
5 Force Restart iPad
This is the general fix for all the common issues of iPad. And you need to follow different steps according to your iPad models. Here is how to do it.
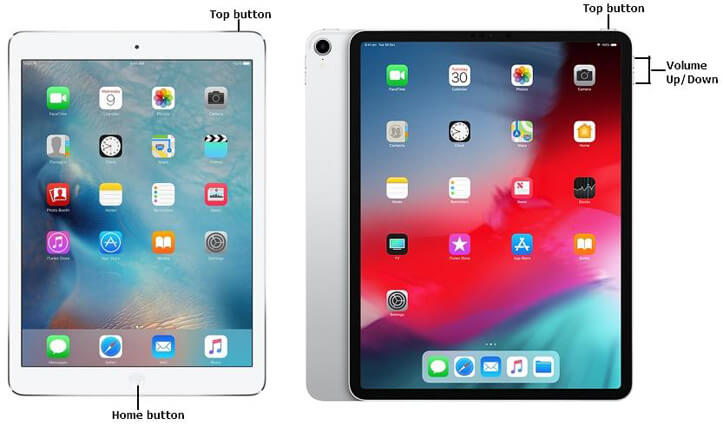
For iPads with a Home button Press and hold the Home button as well as the Top button. Keep holding until you see the Apple logo.
For iPads without a Home button Press and release the Volume Up button and then the Volume Down button. Finally, press and hod the Top button until you see the Apple logo.
After restarting, your iPad should not ask for Apple ID verification any more.
6 Change Apple ID Password
If the issue persist, you can cahnge Apple ID password to solve this issue. Below are steps to show you how to change password on an iPad:
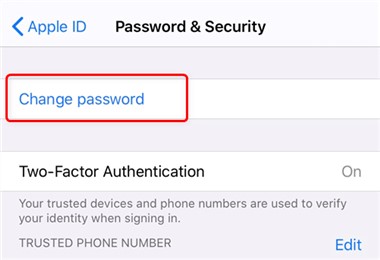
Step 1 Click on Settings > [your name] > Password & Security > Change Password.
Step 2 Enter your screen passcode and follow onscreen steps to reset the password.
7 Reset Network Settings
Problems with your Wi-Fi network can cause your iPad to keep asking for password. To fix the error, you will need to reset your network settings. Go to Settings > General > Reset > Reset Network Settings.

8 Reset All Settings
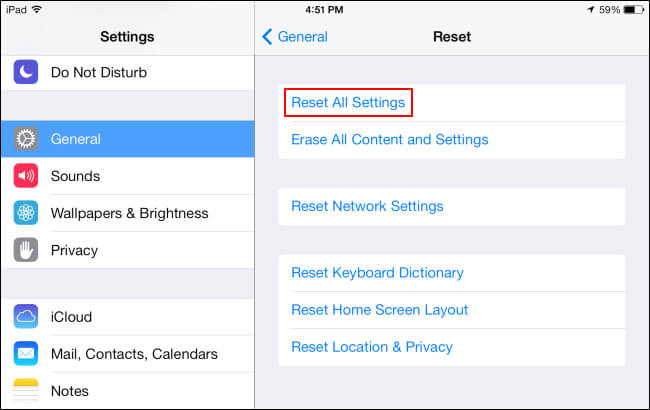
If resetting network settings doesn't work, you may need to reset all settings to stop your iPad asking Apple ID password. And you can rest assured that it will not erase the data on your device. The "all settings" includes network settings, the keyboard dictionary, the Home Screen layout, location settings, privacy settings, and Apple Pay cards.
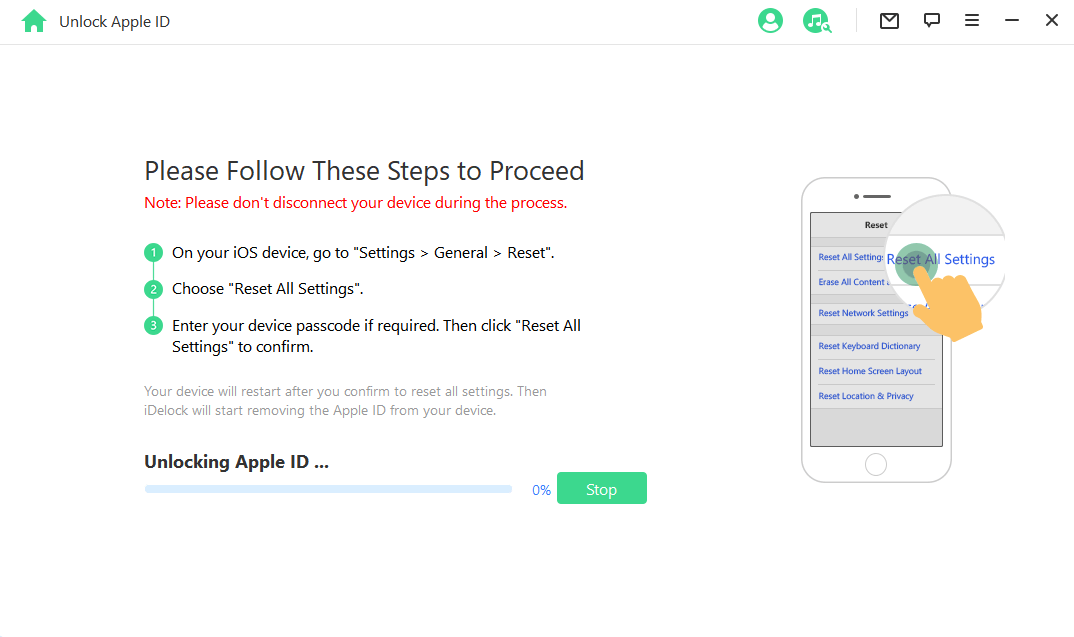
To do it, tap Settings > General > Reset > Reset All Settings.
9 Update iPadOS to the Latest Version
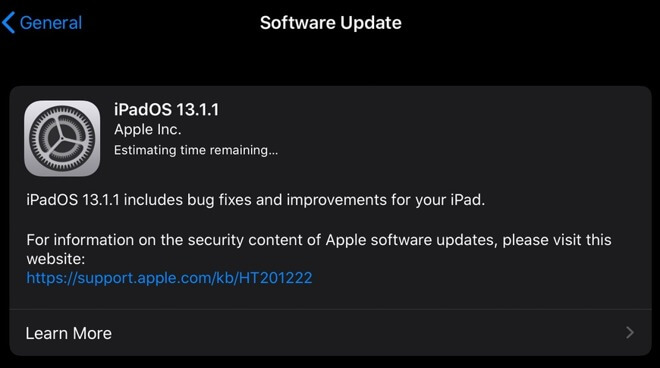
If this iPad keeps asking for Apple ID verification issue happens after an iPadOS update, then you can skip this method. However, if it occurs in daily use, you may need to update your iPad to the latest version. Go to Settings > General > Software Update. If there is an update, choose Download to get an available iPadOS version installed on your device.
10 Restore iPad via iTunes
You could also restore your iPad via iTunes to solve this issue. However, this method will erase all your data on the device. Think twice before you leap.
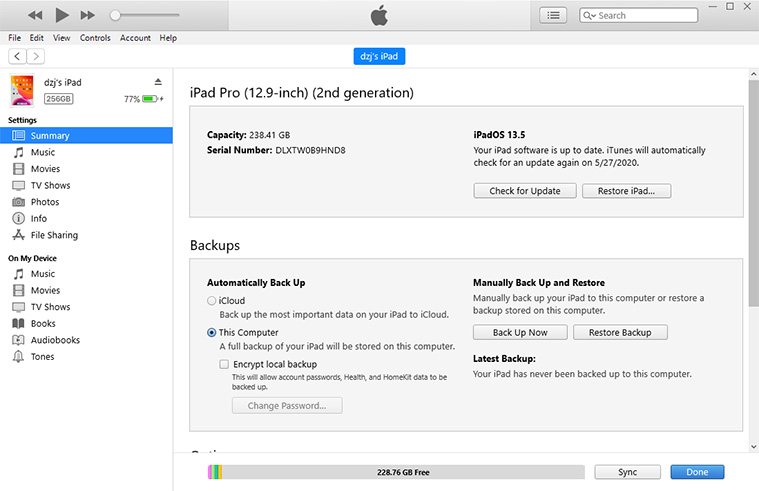
Step 1 Connect your computer to the iPad with a USB cord and launch iTunes. Click on the device icon on the top-left corner and go to Summary.
Step 2 Click on the option Restore iPad and follow the prompt to finish the whole process. Wait for the process to finish, and your iPad will be restored to factory settings. You can restore the backup if you have.
Bonus Tip: Forgot Apple ID password? Remove Apple ID Without Password Using iDelock
Forgot Apple ID password? Cannot change Apple ID password for iPad because you forgot? If you need to remove the Apple ID from your iPad without the passcode, you can try WooTechy iDelock. It is a great iPad passcode bypass tool that can help remove Apple ID, screen passcode, Screen Time password and MDM. With the exclusive technology, iDelock promises a high success rate. And you don't need to have any technical knowledge. With several clicks, you can bypass various iDevice locks with ease.
Features:
It can work on almost every iOS versions and models, including the latest iOS 16.
Forgot Apple ID password, forgot screen passcode, forgot Screen Time passcode? iDelock can remove it all without Apple ID and password within minutes.
Bypass MDM and remove remote management within 3 clicks.
Free Download
Secure Download
Here is how to use it:
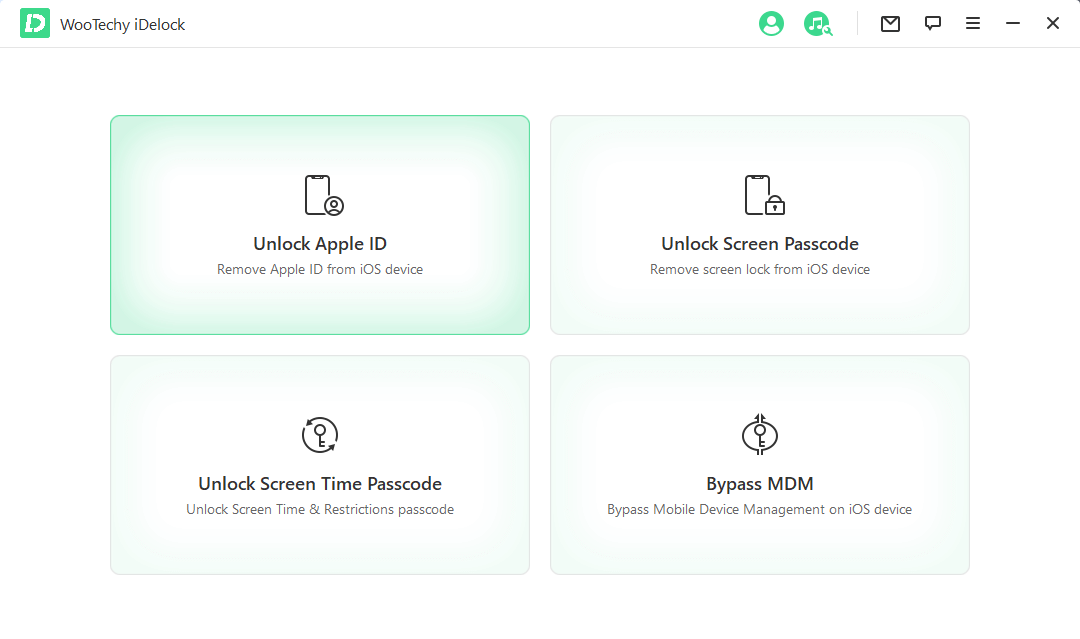
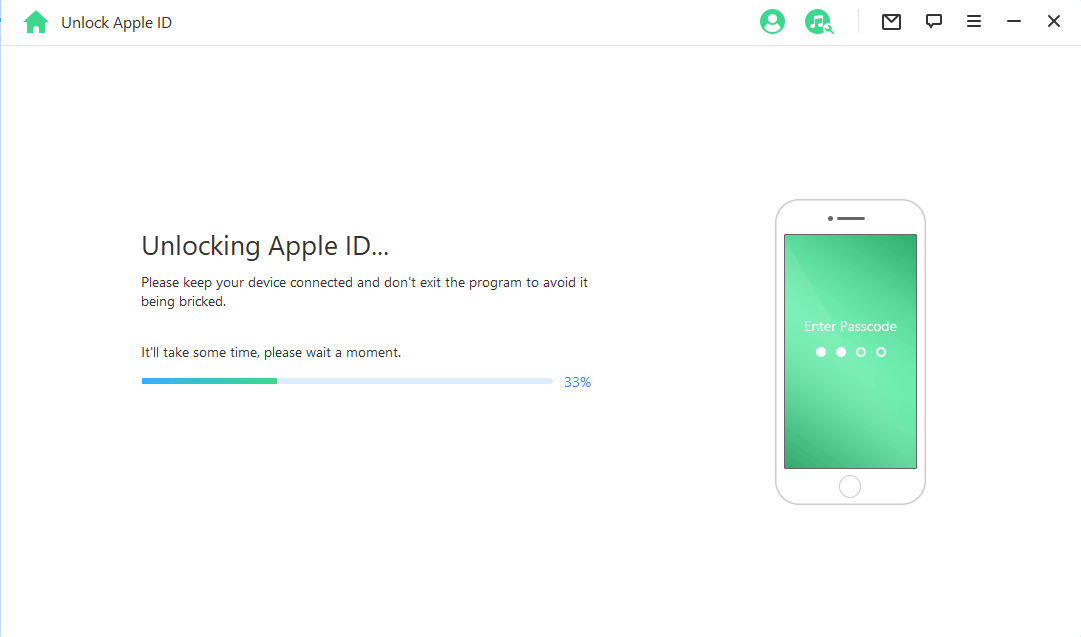
Step 1. The first thing you will need to do is download iDelock and launch it. Then, select Unlock Apple ID among four options.
Step 2. Follow the instructions on your screen to start the process. There are 3 scenarios based on your iPad's situation. (Find My disabled/Find My enabled/Two-Factor Authentication enabled)
If you have Find My feature disabled, WooTechy iDelock will start removing the Apple ID. Just wait until the process finishes.
If Find My feature is enabled on your iPad (below iOS 11.4), then you need to reset all settings on your device. Go to Settings > General > Reset All Settings. After this step, iDelock will begin removing the Apple ID.
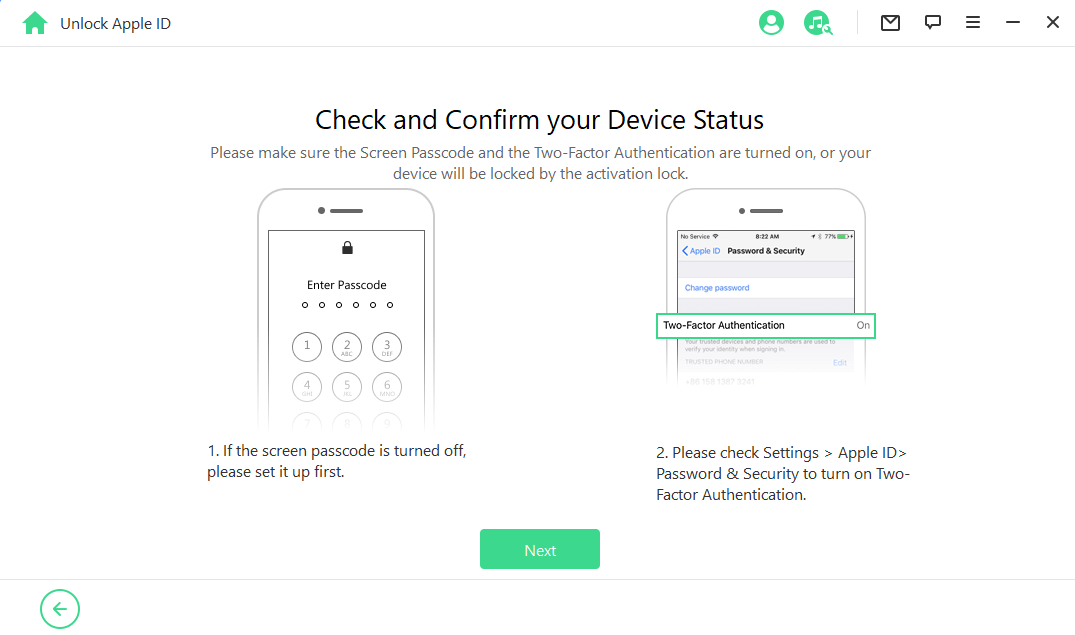
If Two-Factor Authentication is enabled on your iPad, check it twice by following the on-screen instructions. Then, click on Next.
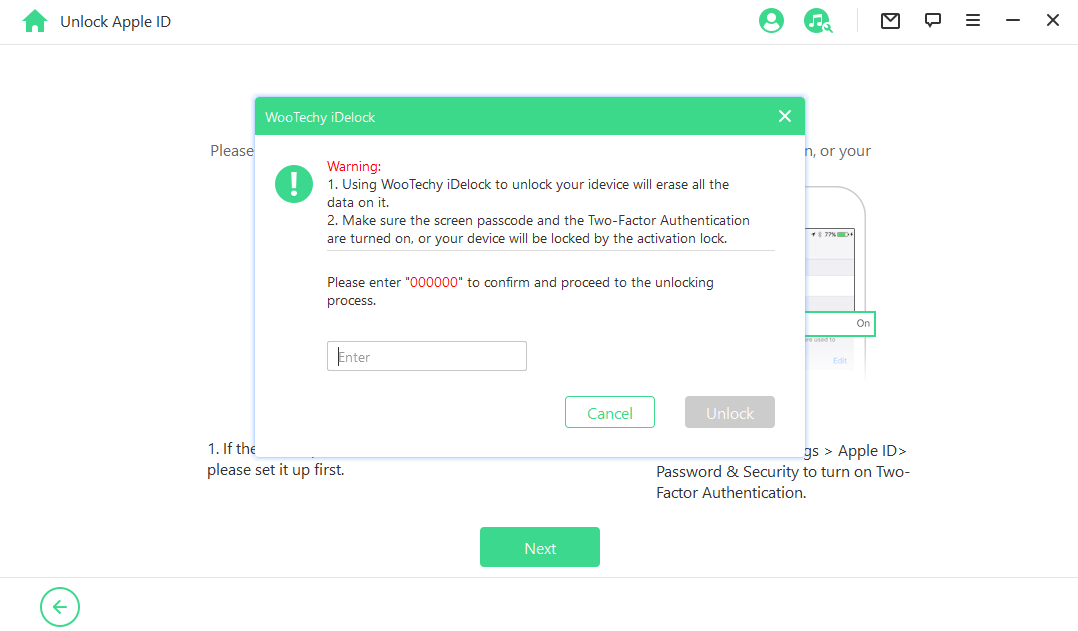
When your device is prepared, enter "000000" in the pop-up and click Unlock. This will start the unlocking process.
After several minutes, the Apple ID will be removed from your iPad without any password. Is it easy and quick?
Conclusion
In this article, we have shown you how to fix your iPad if it keeps asking for an Apple ID password. Hope you can fix this issue with any of the methods above. And if you want to remove the Apple ID from your iPad without password, opt for WooTechy iDelock!
Free Download
Secure Download


