User Guide of WooTechy iMoveGo
Want to change your location on Android? Looking for a way to customize your route in AR games without actually walking? This guide will walk you through how to easily mock and change your GPS location with WooTechy iMoveGo, giving you full control over your virtual movement.
- WooTechy iMoveGo PC User Guide (Android System)
- iMoveGo PC User Guide (iOS System)
- WooTechy iMoveGo Android App User Guide
- WooTechy iMoveGo iOS App User Guide
Depending on your operating system, you can choose:
1. Get Your Android Device Prepared
Step 1: Launch WooTechy iMoveGo
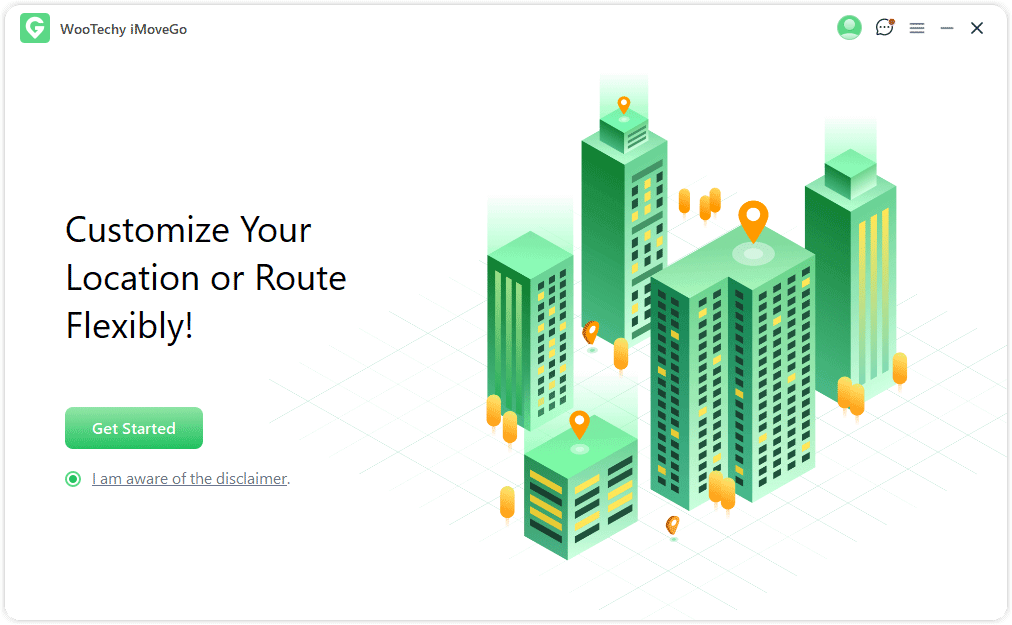
Download and install WooTechy iMoveGo on your computer. Open the program and click "Get Started."
Step 2:Connect Your Android Device
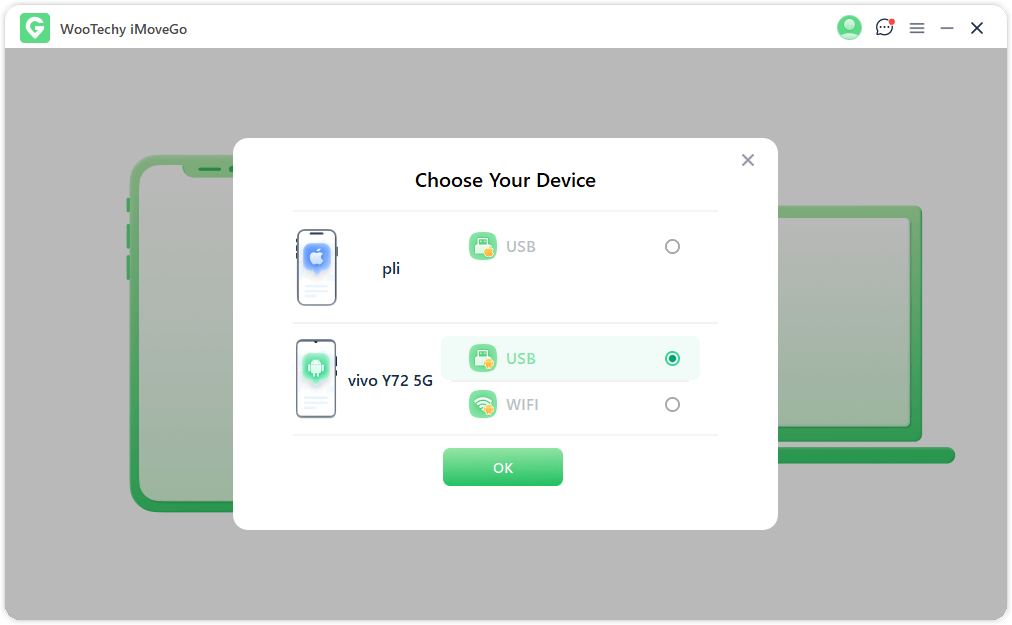
You can connect your Android device to your computer using either USB or WiFi.
- USB Connection: Use a USB cable to connect your Android phone to the computer.
- WiFi Connection: Ensure both your Android device and computer are connected to the same WiFi network for a seamless connection.
Once your device is detected, select it from the "Choose Your Device" list.
Step 3: Select the USB Connection Mode
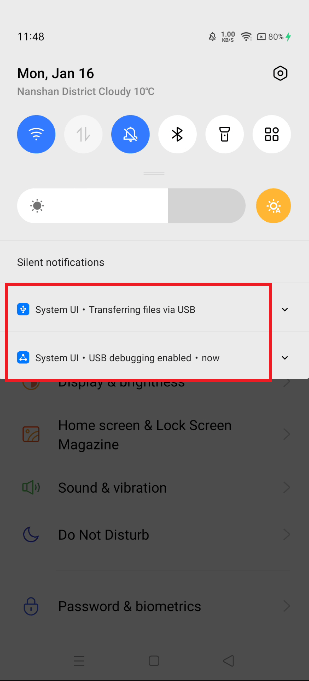
To ensure proper detection, you need to set the USB connection mode to Media Transfer Protocol.
- For most Android devices: Select MTP (Media Transfer Protocol) in the USB settings.
- For LG devices: Choose PTP (Picture Transfer Protocol) instead.
Note:
Depending on the brand of the phone, the steps to set up the USB connection mode may differ. You can typically change the USB connection mode from the notification panel after plugging in the USB cable.
Step 4: Turn on USB Debugging
Follow the on-screen instructions in WooTechy iMoveGo to turn on USB Debugging on your Android device.
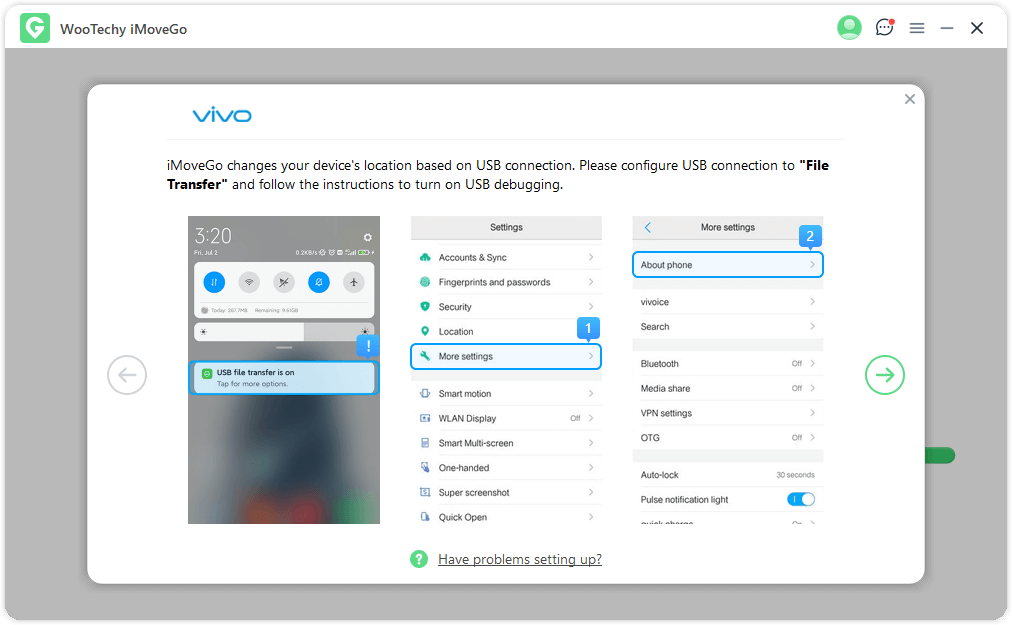
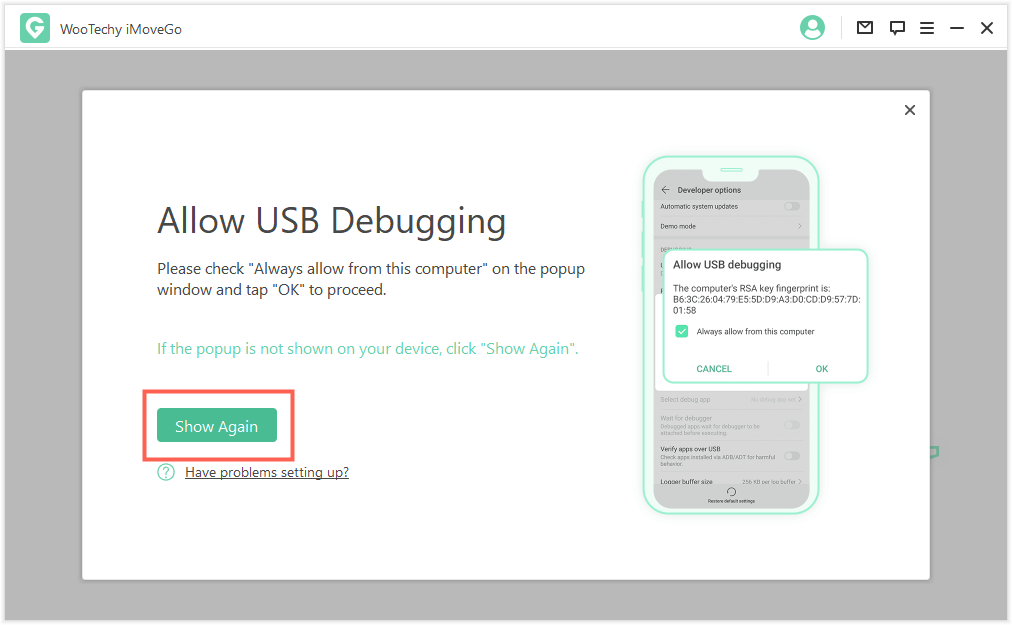
Then, confirm "Allow USB debugging" on your phone. (Click "Show Again" in the program if the popup does not appear.)
Step 5: Choose the Mode According to Your Needs
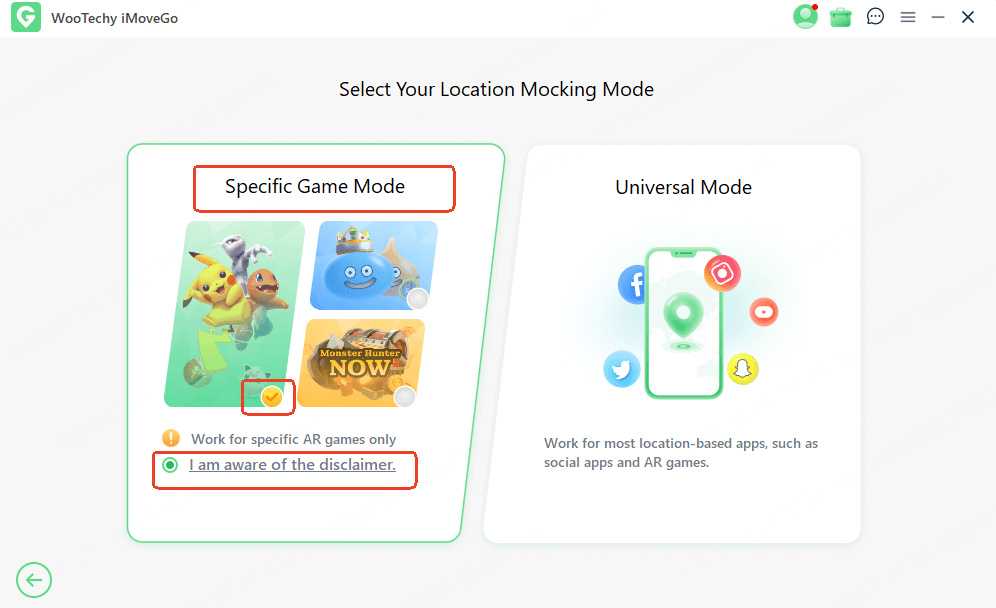
Once connected, you will be directed to the mode selection screen, where you can choose Special Game Mode or Universal Mode.
Special Game Mode
Step 1: Select a Game
This mode supports Pokémon Go, Monster Hunter Now, and Dragon Quest Walk. To access it, check the disclaimer, select your desired game (Pokémon Go is the default), and click the Specific Game Mode button.
Note:
Game Mode may not always be accessible. If the server is undergoing maintenance or updates, you will see an alert message, and the mode will be temporarily unavailable. In such cases, please wait for a few minutes to a few hours and try again.
Step 2: Finalizing Setup
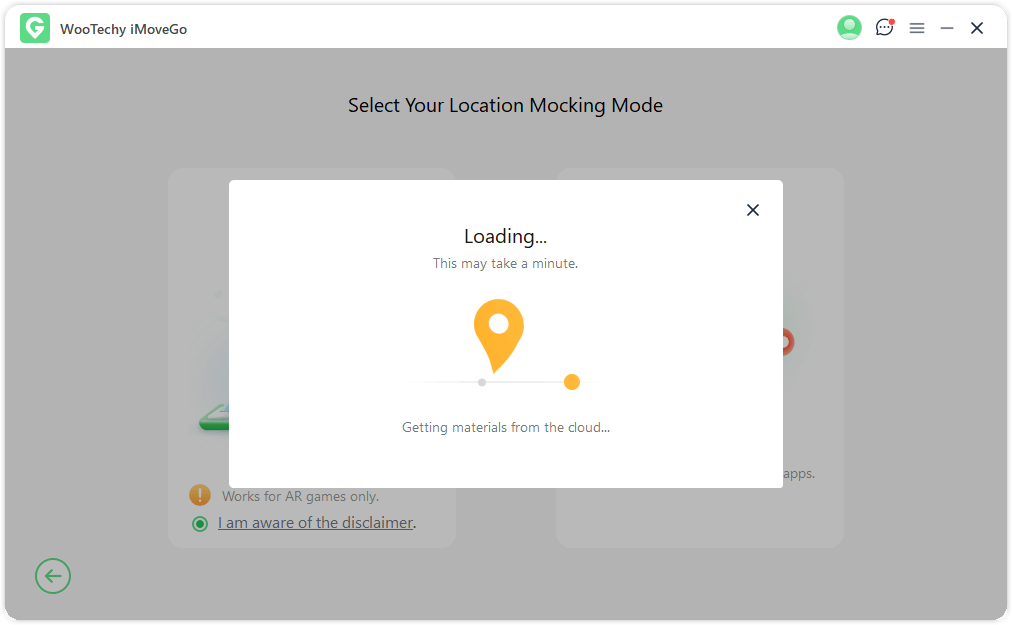
Once you've selected the game mode, WooTechy iMoveGo will begin loading. A progress bar will indicate the process—simply wait until it completes.
After loading, a "You're All Set!" popup will appear. If needed, log in to your game account, as this message only shows when launching the game for the first time.
Note:
- Keep an eye on your phone during this step, as some devices may require you to confirm permissions.
- If the map doesn't load, tap "Refresh Now" at the bottom of the screen and restart the game.
Universal Mode
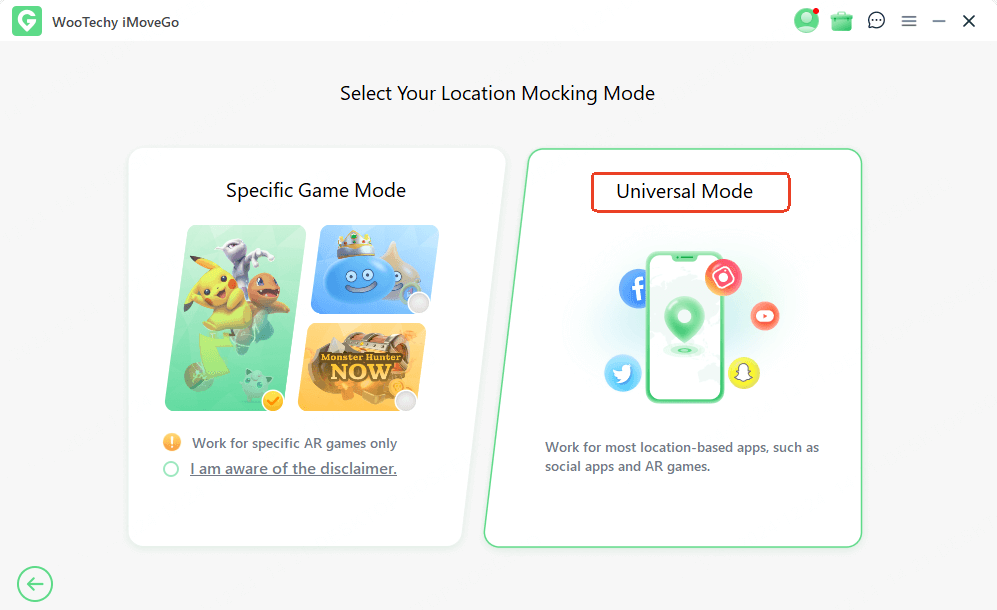
Step 1: Select the Mode
This mode supports most location-based apps, including “Find My”, Google Maps, Facebook, WhatsApp, and more. To get started, click on Universal Mode for seamless location changing and GPS simulation.
Step 2: Install iMoveGo Assistant
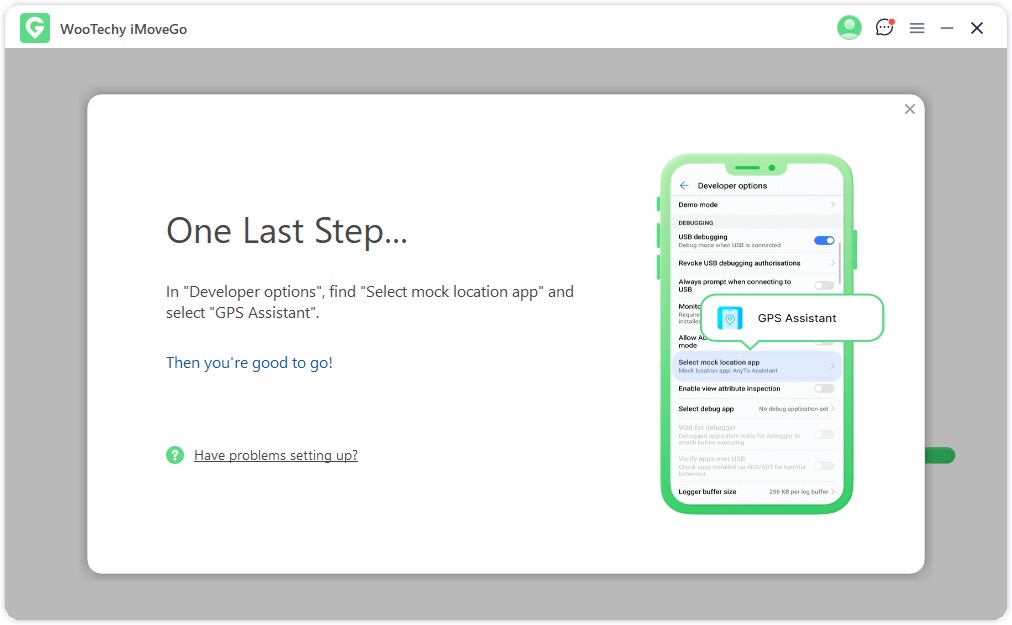
If you're using Android 10 or later, iMoveGo Assistant installs automatically—no manual setup required. Just ensure it remains installed on your device.
Once installed, select "iMoveGo Assistant" under Developer options.
Step 3: Start Spoofing Your Location!
Once setup is complete, you can instantly change your GPS location or simulate movement. Customize your route, speed, and destination to match your needs!
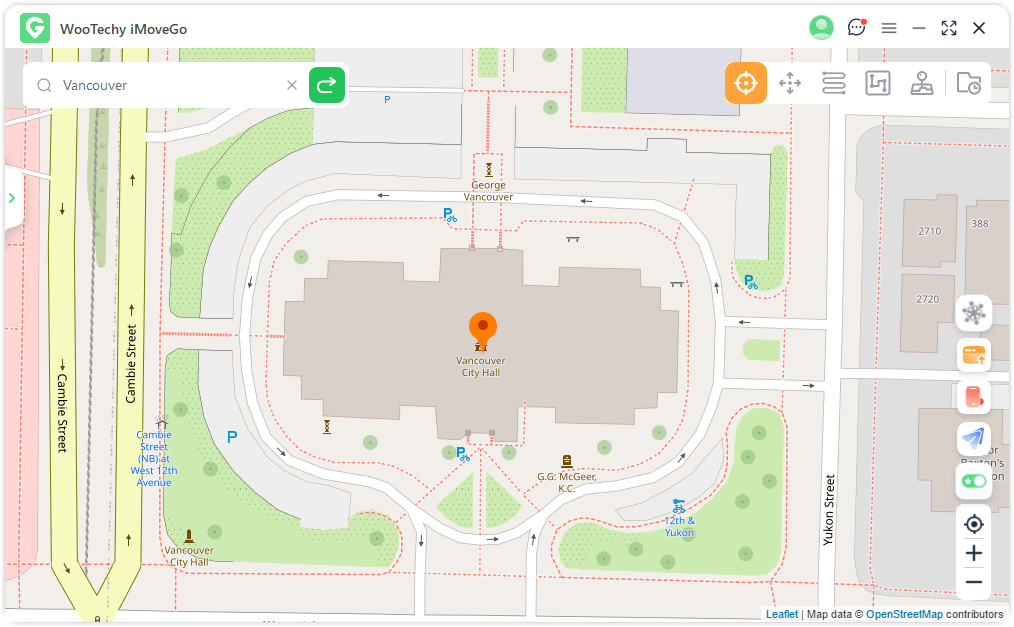
Below the map, you'll find a button displaying your device name and mode (Gaming or Universal). Use it to switch modes or change devices easily.
Part 2. One-Click to Change Your GPS Location with Teleport Mode
Step 1: Select a Destination
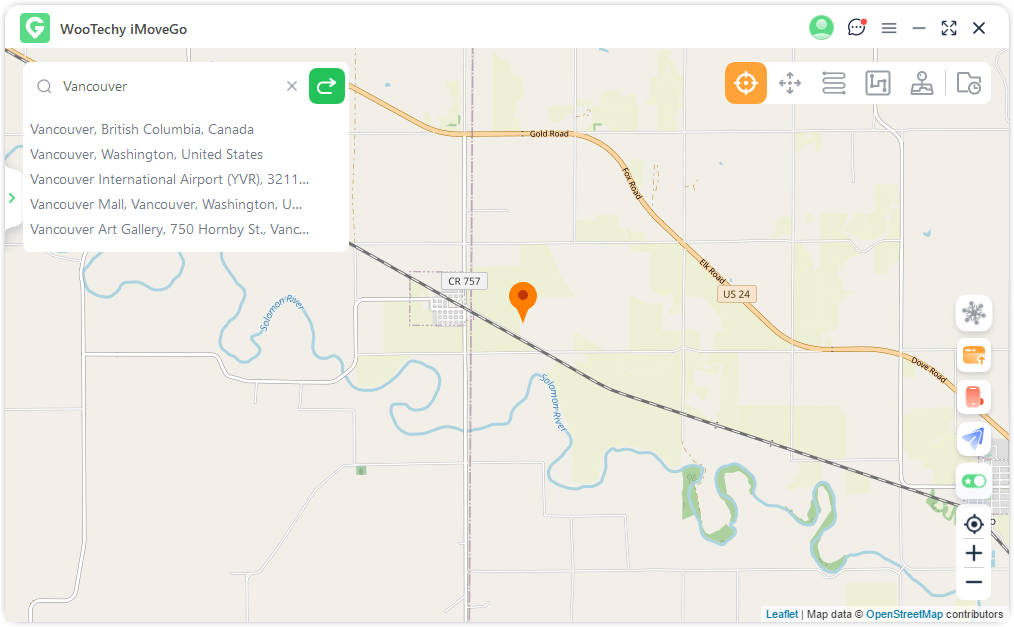
Click on the Teleport Mode option (the first one) in the upper-right corner.
Choose your destination by clicking on the map, zooming in/out to explore, or by entering an address or coordinates in the search bar.
Step 2: Change Location with One Click
Click "Move" to instantly teleport to the selected location.
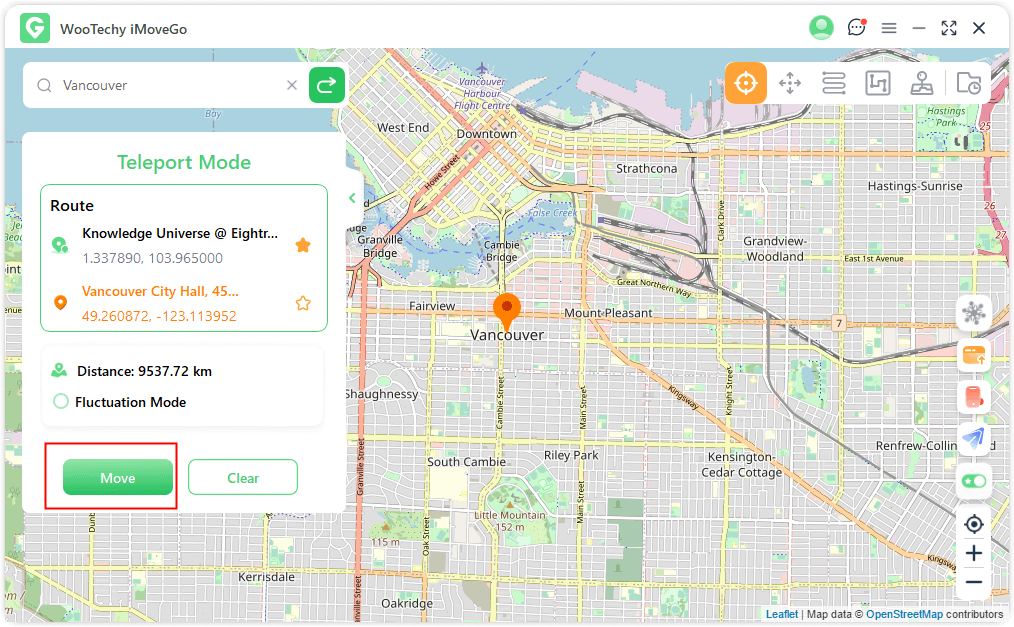
Now, all location-based apps on your device will reflect this change.
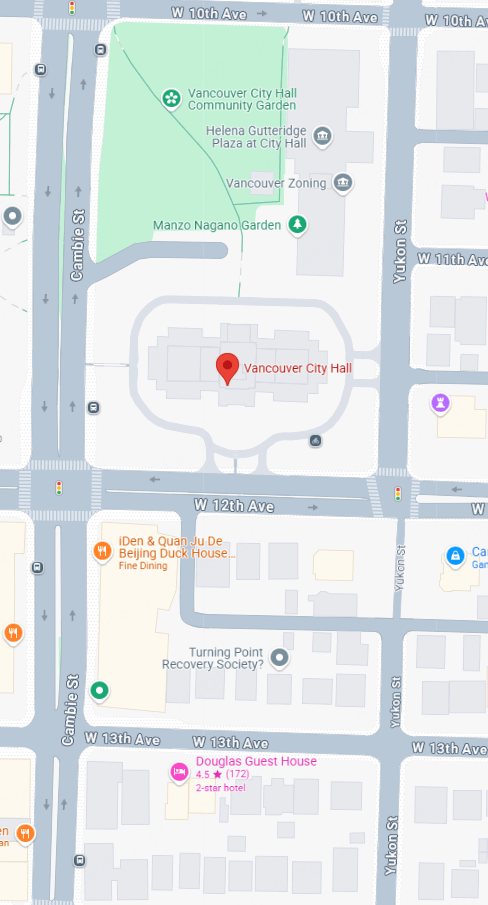
Note:
To return to your actual location, simply restart your Android device.
Part 3. Simulate GPS Movement with Jump Teleport Mode
Step 1: Choose Jump Teleport Mode
To customize the jumping teleport route, select Jump Teleport Mode (second option) in the upper-right corner.
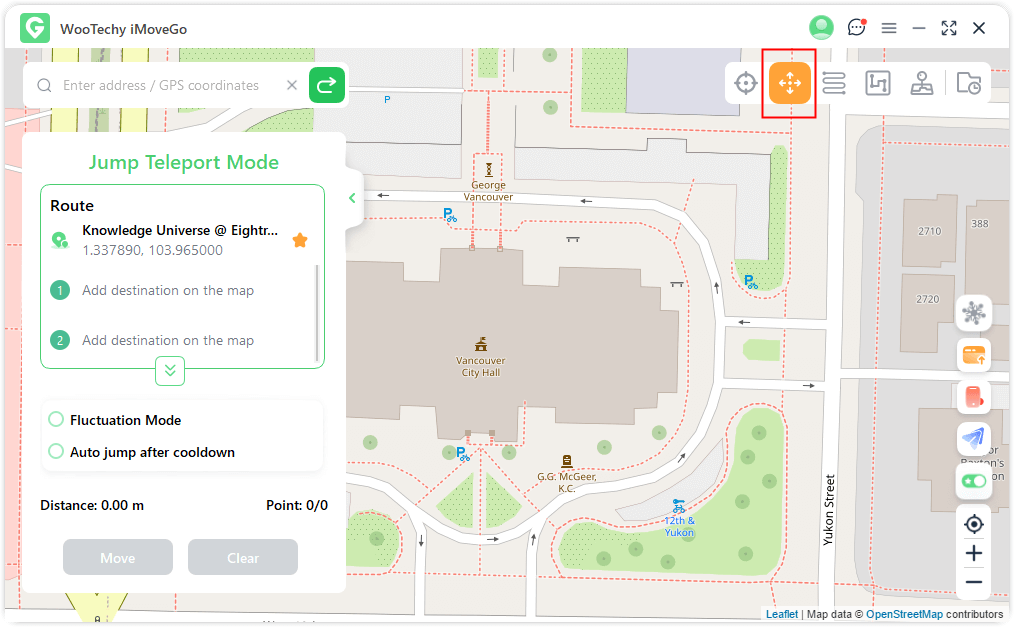
Step 2: Plan the Jump Teleport Route
Set multiple locations on the map or enter addresses/coordinates. Click "Move" to jump between spots.
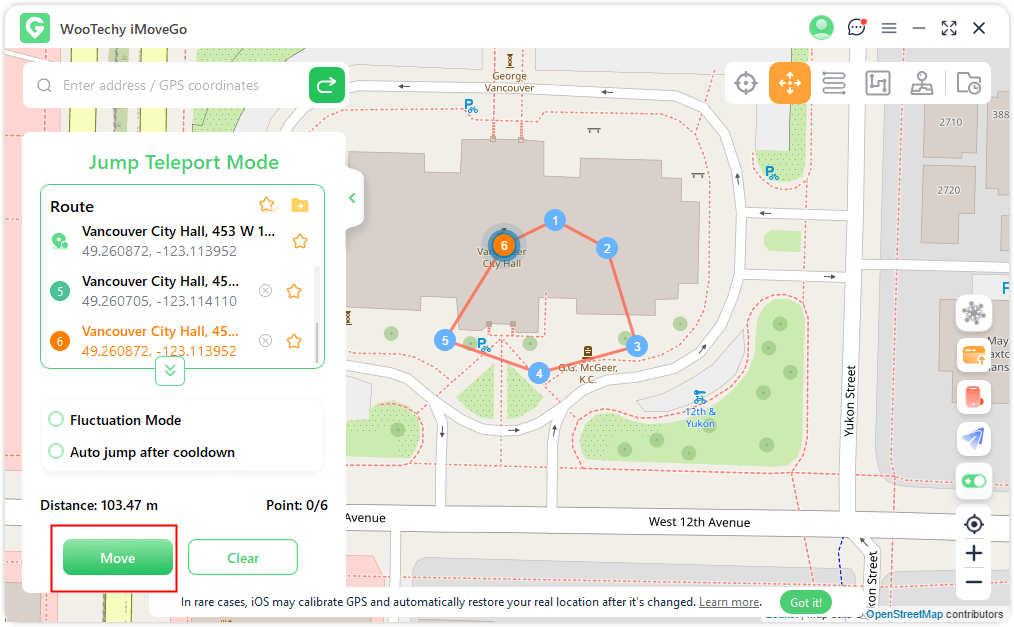
The previous and following points can be switched at any time.
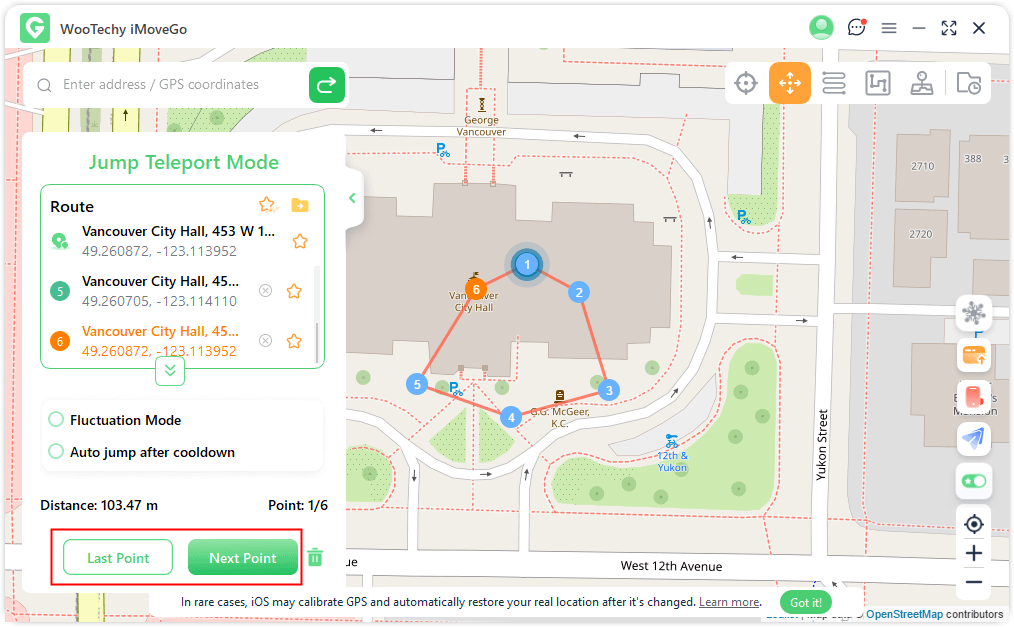
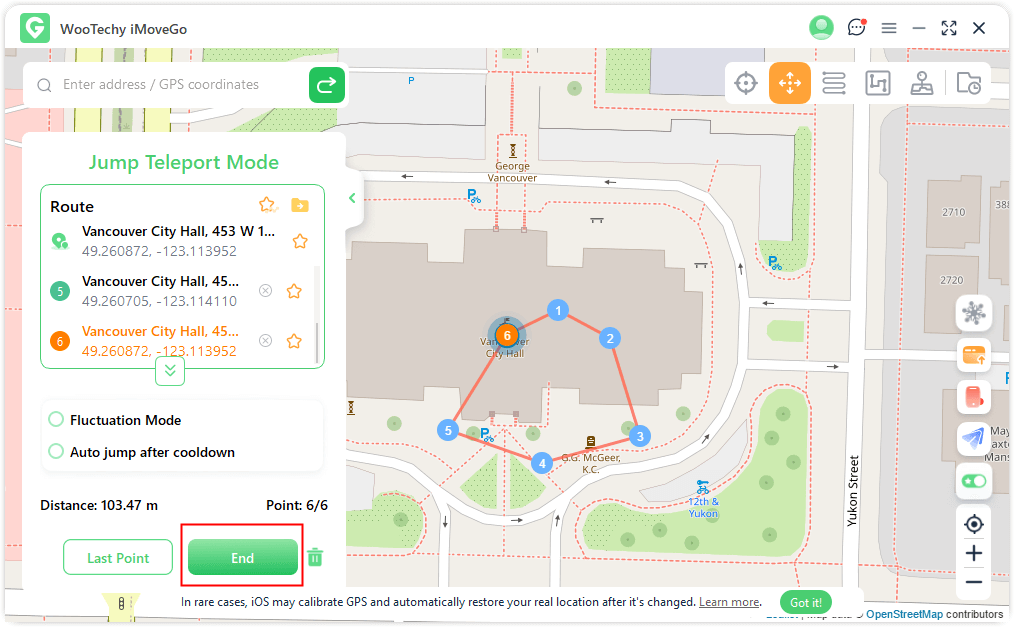
You can click “End” to freely end the route.
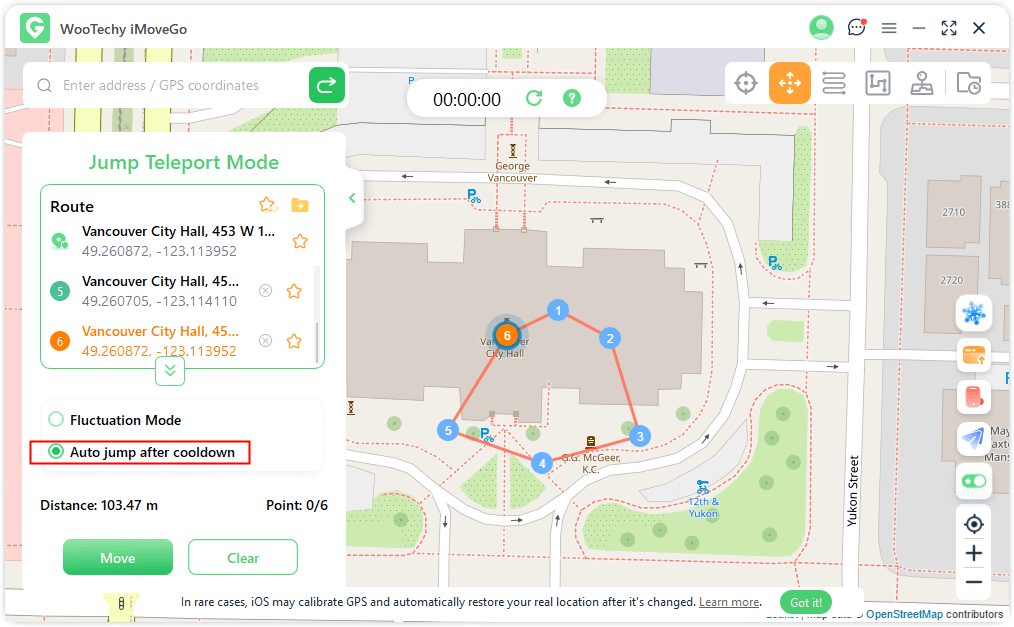
Auto Jump After Cooldown:
Enable the option of "Auto Jump after
cooldown" before starting, and your device will automatically jump between spots based on the cooldown timer.
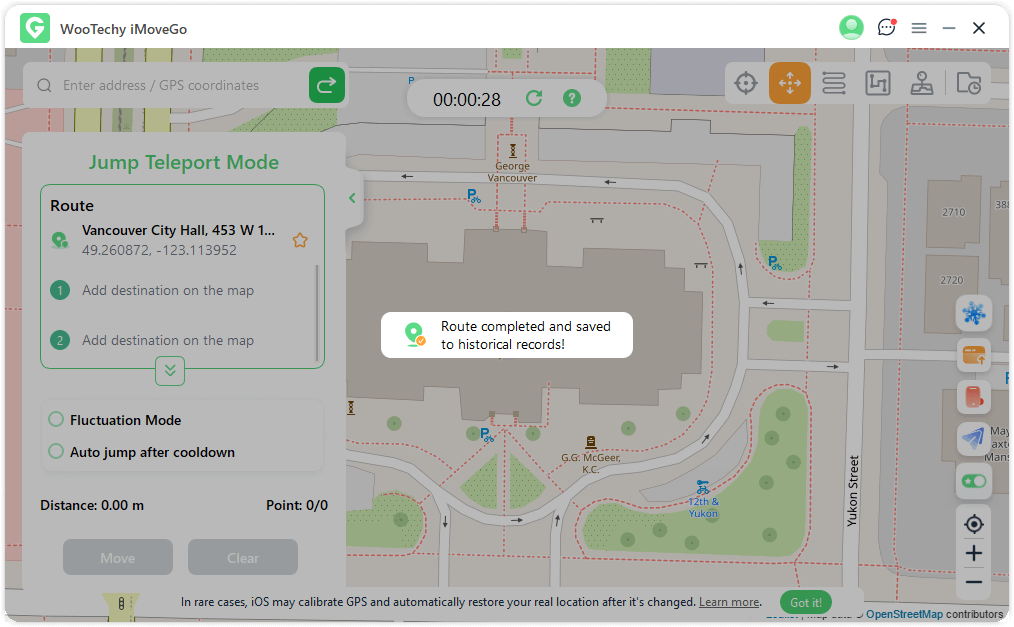
Now, the GPS on your Android devices will move without delay. Once completed, a prompt pop-up window will appear.
Part 4. Simulate GPS Movement with Two-Spot Mode
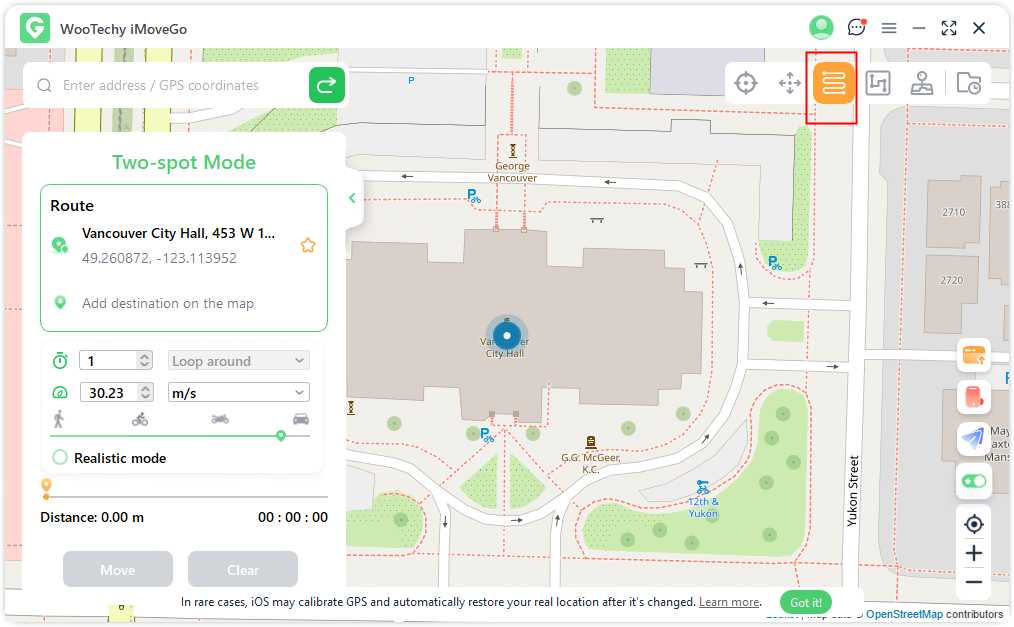
Step 1: Choose Two-Spot Mode
To customize a route, click Two-Spot Mode (third option) in the upper-right corner.
Step 2: Plan Route and Start GPS Simulation
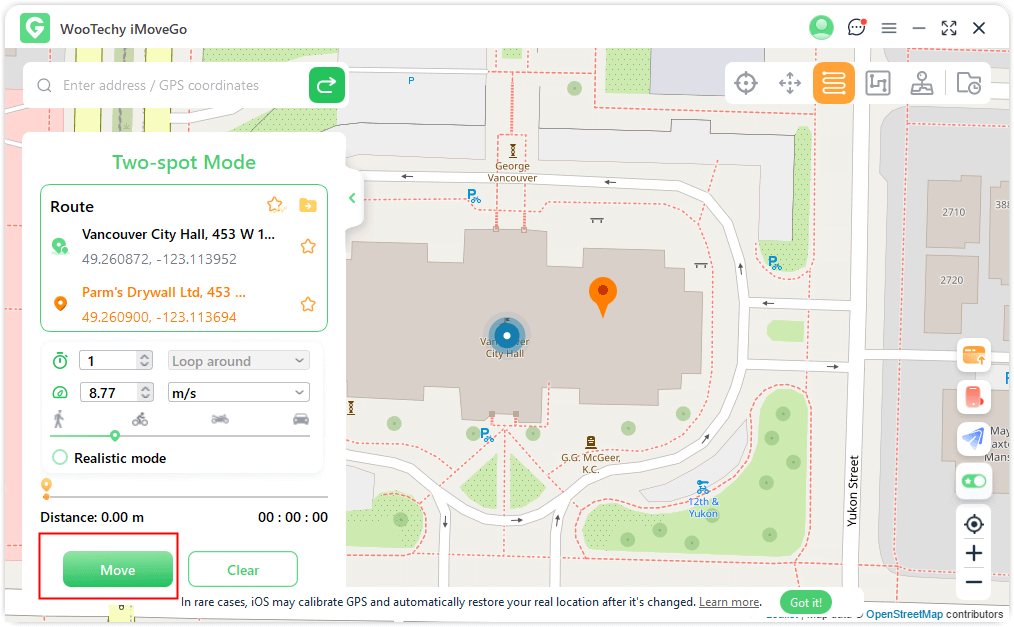
Pick a destination by clicking on the map or entering an address/GPS coordinates. The selected location will be added to the sidebar, along with your current position. Both locations will display their names and coordinates for reference.
Next, you can set how many times you want to travel back and forth between the two spots. Adjust the movement speed by dragging the Speed Bar.
Click "Move" to begin simulating movement between the two points.
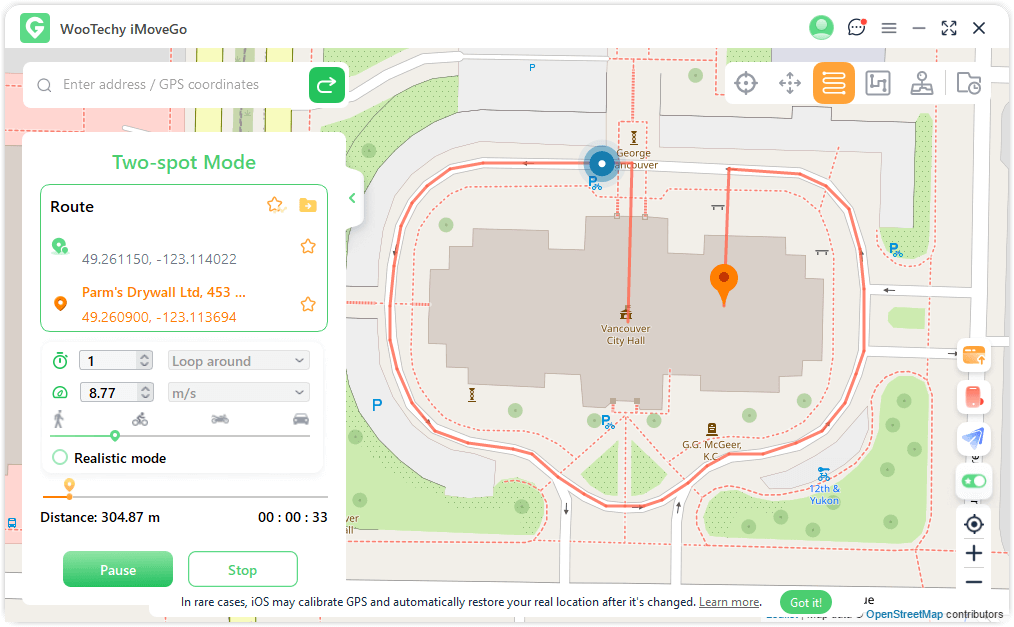
You can Pause or Stop the movement at any time.
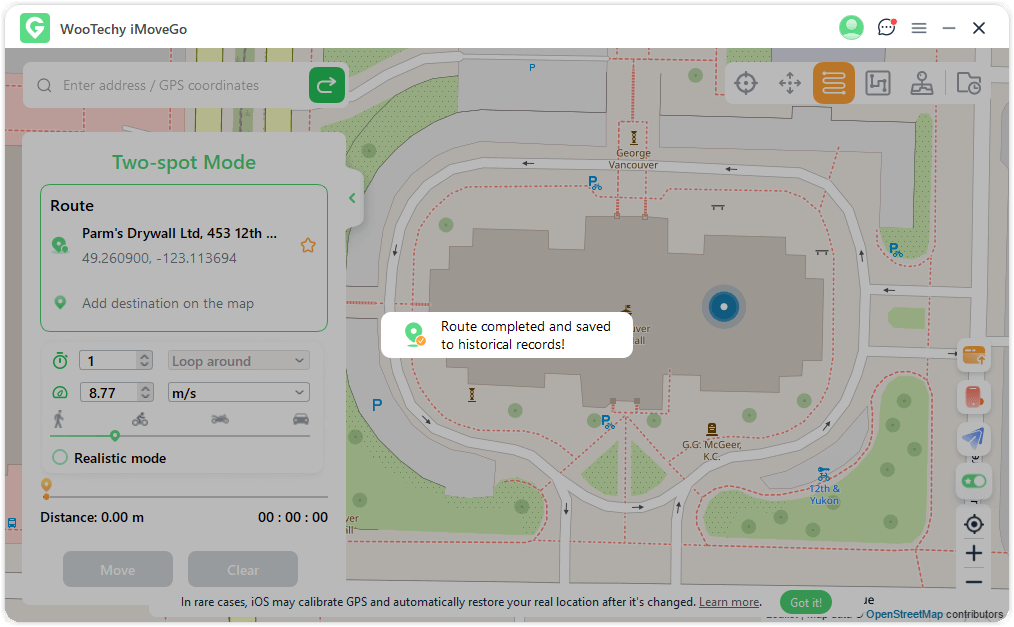
On Android devices, the GPS movement updates smoothly without lag. Once the simulation completes, you will see a “Completed” prompt.
Part 5. Simulate GPS Movement with Multi-Spot Mode
Step 1: Choose Multi-Spot Mode
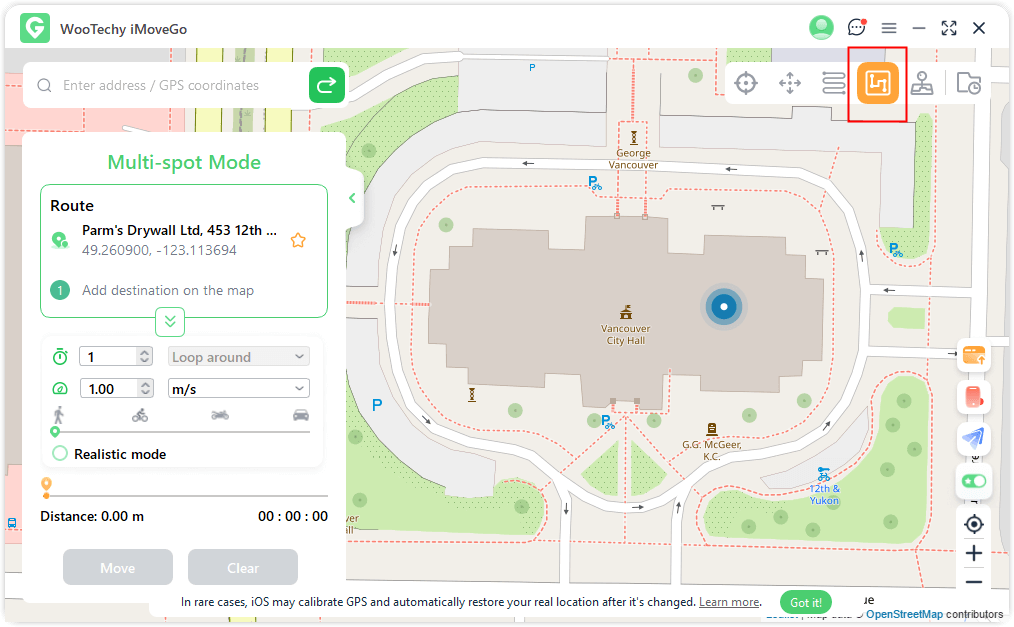
To create a route with multiple waypoints, choose Multi-Spot Mode (the fourth icon) from the top-right menu .
Step 2: Plan Multi-Spot Route
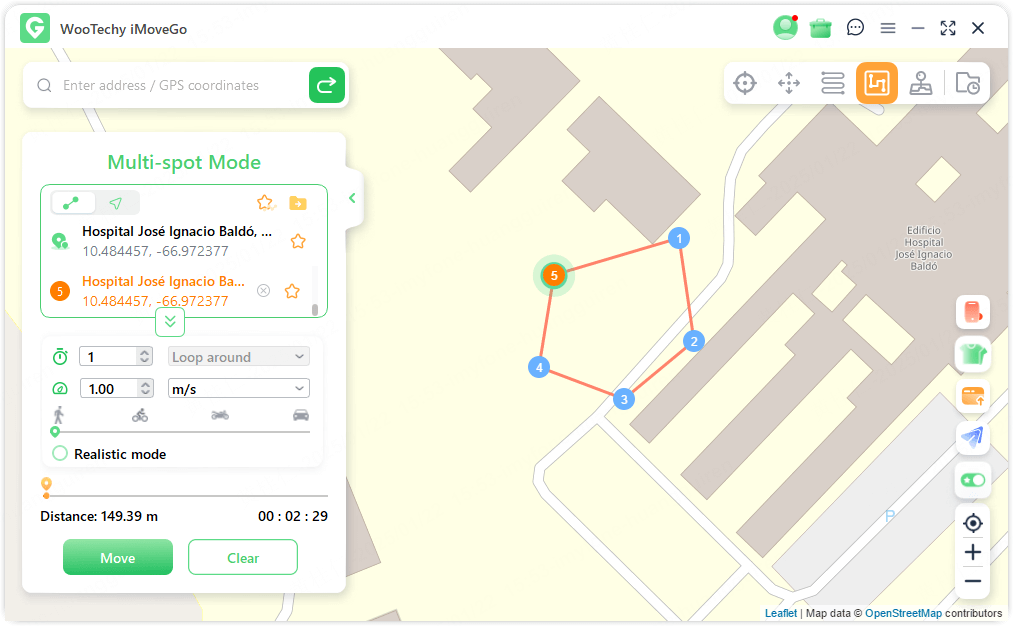
Select locations directly on the map, one by one. Or, enter an address or GPS coordinates to set your destination.
For movement preferences, enter the number of times you want to travel back and forth. Drag the speed bar to choose your desired movement speed. Once you’ve set your route and speed, click "Move" to begin.
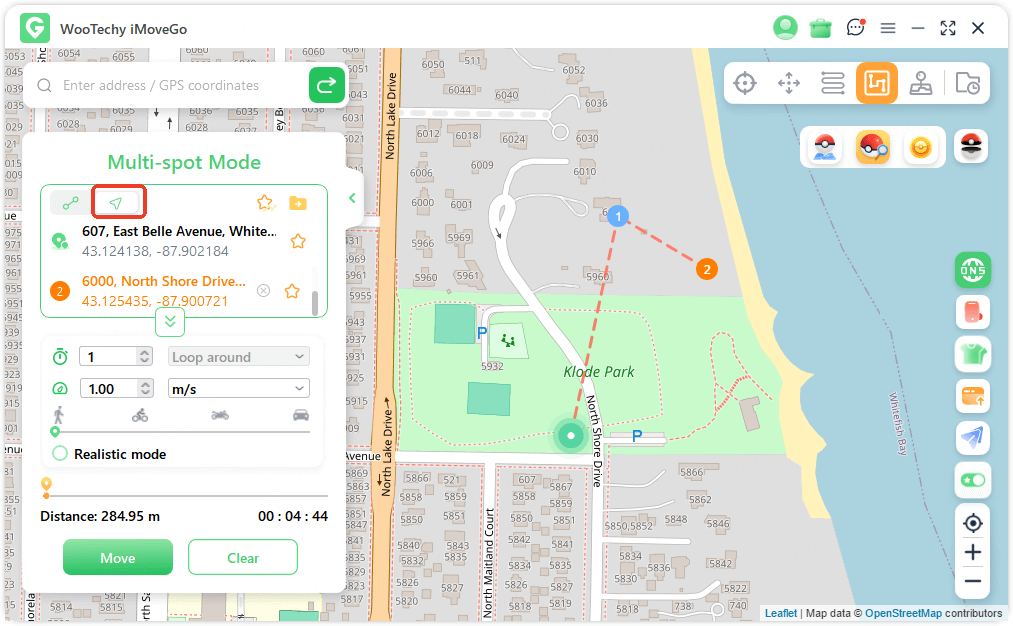
By default, WooTechy iMoveGo uses Linear Mode, , moving directly between selected points. When you switch to Navigation Mode, It will creates a more realistic route, adjusting the path based on roads and natural movement patterns.
For example, if you select walking speed, WooTechy iMoveGo generates a natural pedestrian route.
Note:
For game safety, select locations along real roads to reduce the risk of detection when playing AR games like Pokemon GO.
Part 6: Mock Location with Joystick Mode
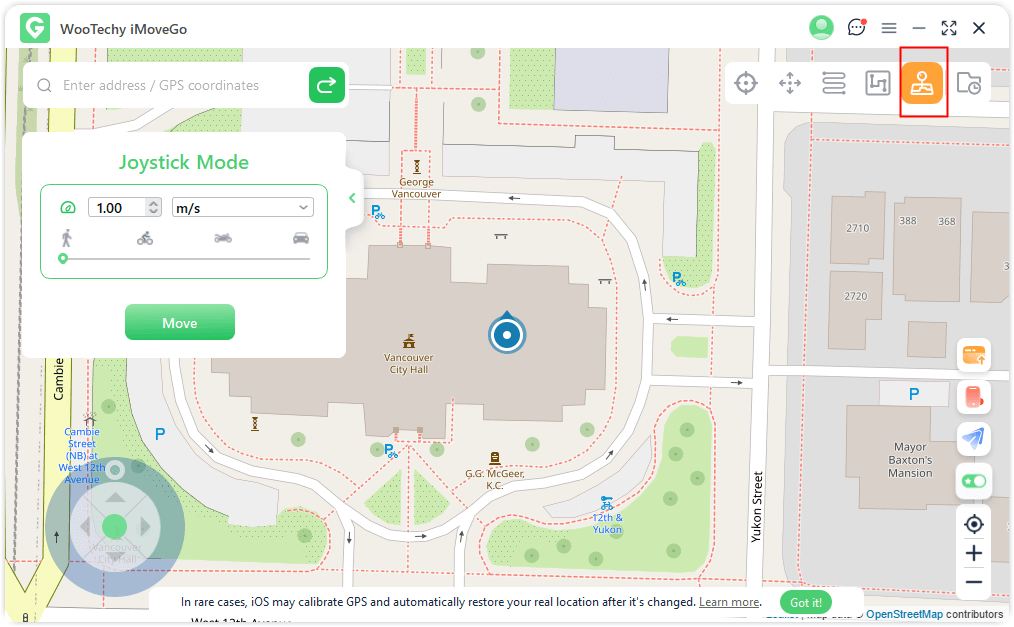
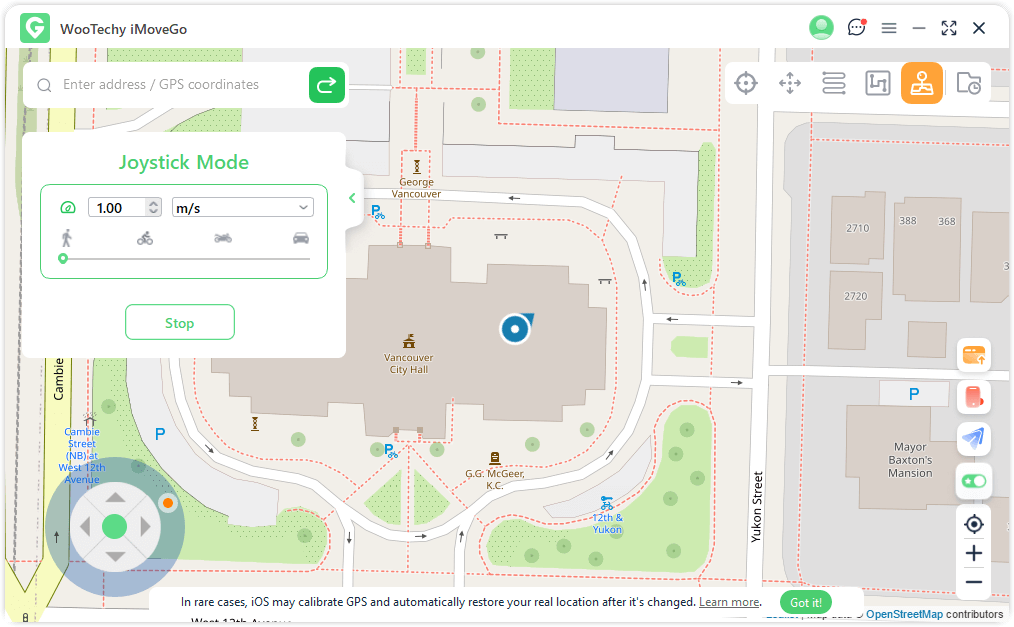
Whether you're using Multi-Spot or Two-Spot mode, the joystick lets you move between points easily. Plus, the joystick enables you to adjust directions in real-time.
To use Joystick Mode, select the fifth option. Then, click to Move automatically.
Joystick Control Methods:
-Screen Controls: Click the on-screen arrows ( Up/Down/Left/Right) to steer.
-Keyboard Controls: Use the A/D/W/S keys or the arrow keys (Up/Down/Left/Right) on your keyboard.
-Mouse Controls: Drag the pointer around the circle to steer.
Part 7: More Features of WooTechy iMoveGo
Feature 1: Import/Export GPX File
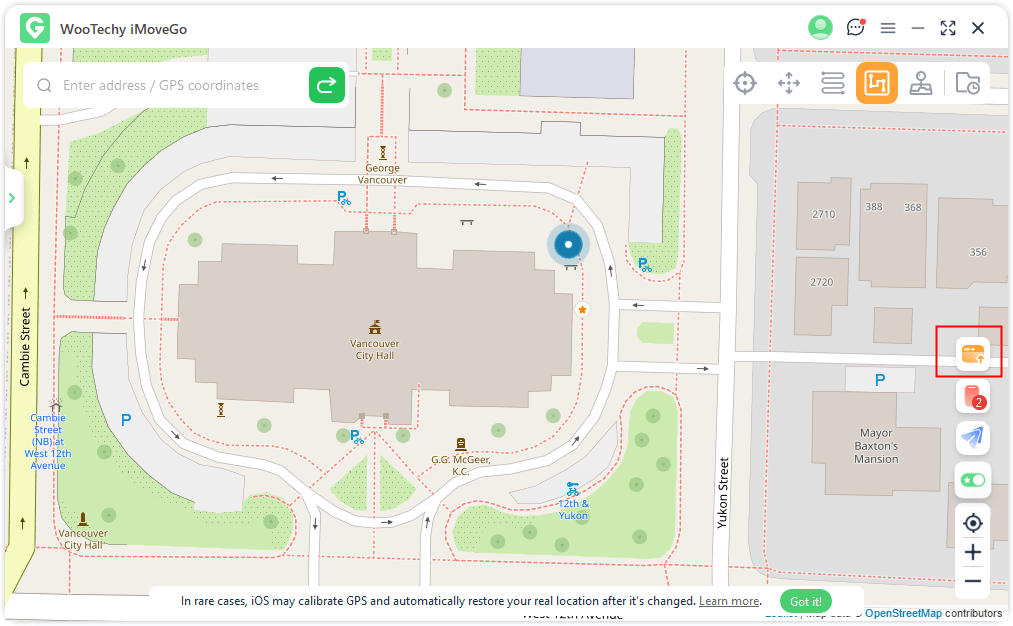
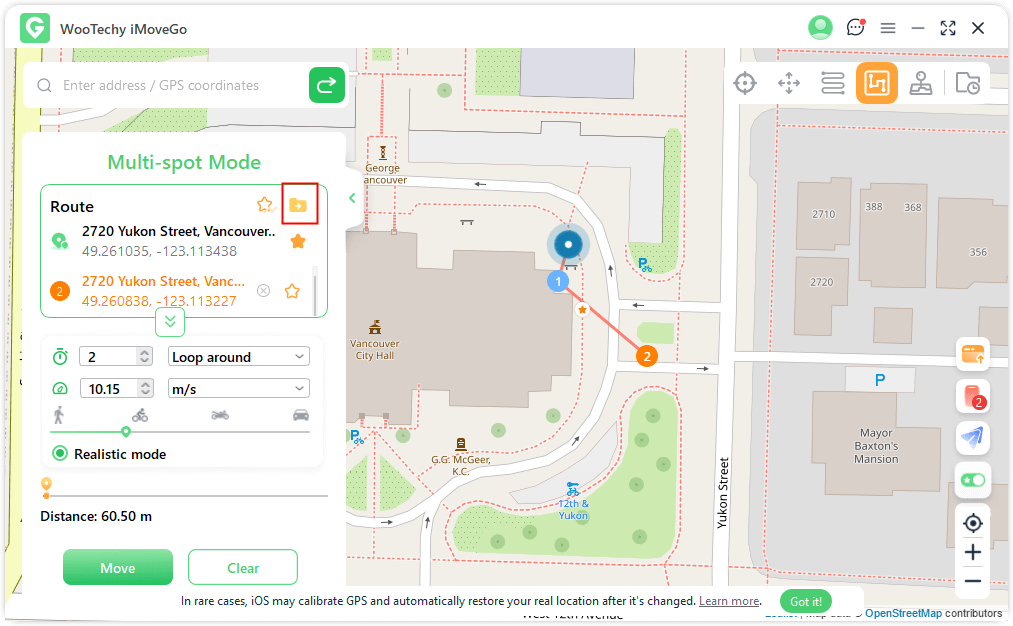
WooTechy iMoveGo allows you to easily exchange GPX location data by importing and exporting GPX files.
Import GPX files: If you have a GPX file from a friend or downloaded online, you can import it into WooTechy iMoveGo by clicking the "Import" button (bottom right corner). Wait for the import process to complete.
Export GPX files: After using Two-Spot Mode or Multi-Spot Mode, click the "Export" button (upper right corner). Your route will be saved as a GPX file for future use or sharing.
Feature 2: Circle Route
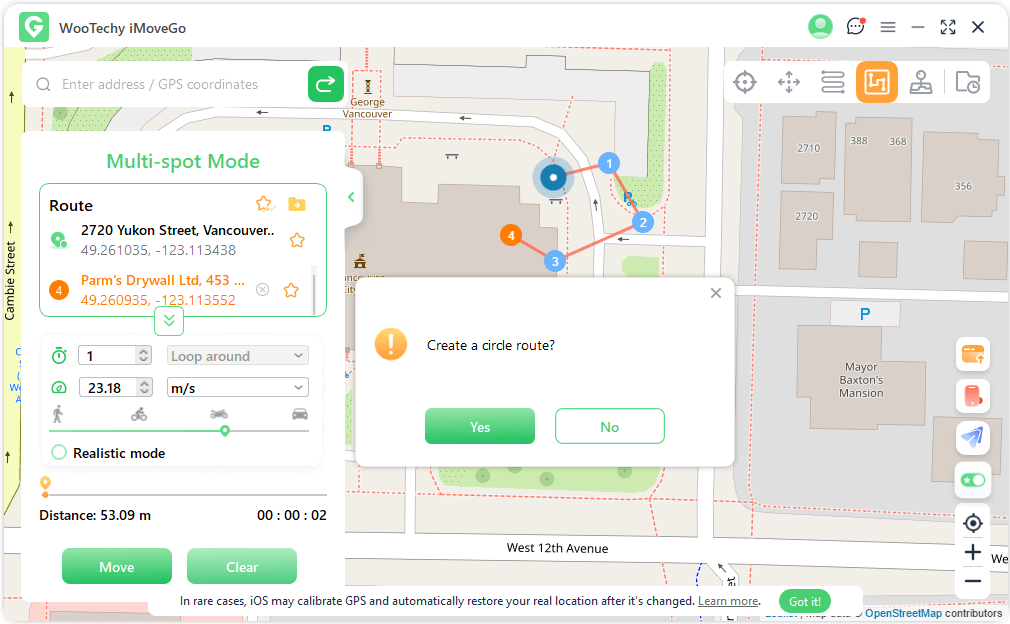
When using Multi-Spot Mode, if your starting point and endpoint are close, WooTechy iMoveGo will prompt you to create a Circle Route.
- Selecting "Yes" connects the start and endpoint seamlessly.
- Selecting "No" keeps the endpoint unchanged.
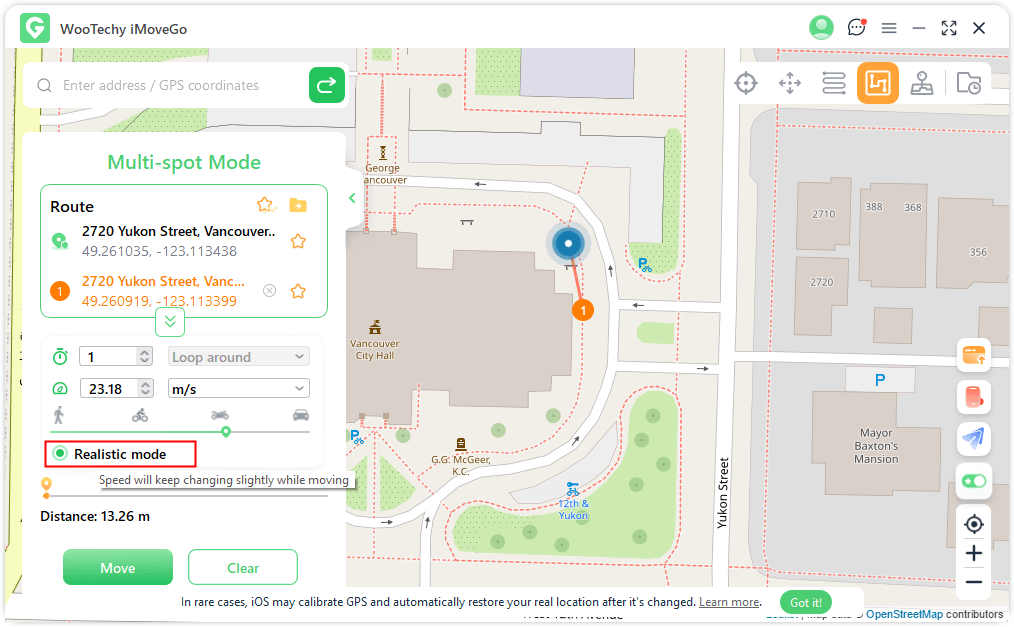
Feature 3: Realistic Mode
In Realistic Mode, the moving speed will randomly fluctuate between the upper and lower 30% of the selected speed range. The speed adjusts every 5 seconds, making movements appear more authentic.
Feature 4: Returns or Loops
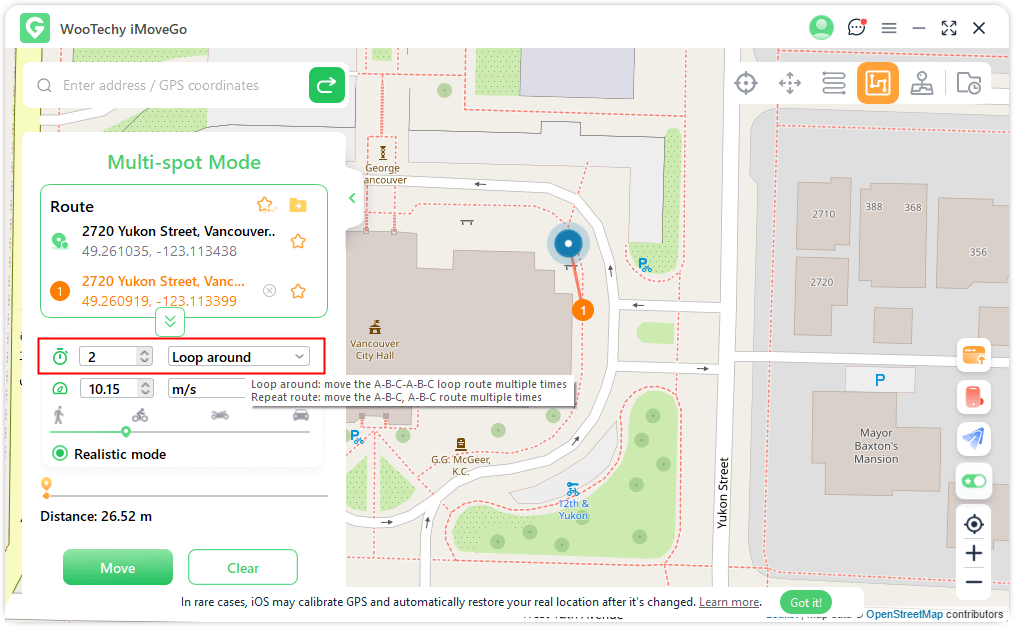
When setting a route with multiple repetitions, you can choose between two behaviors:
- Return Route: Moves from the start to the endpoint, then retraces back.
- Loop Route: Repeats the same path from start to endpoint continuously.
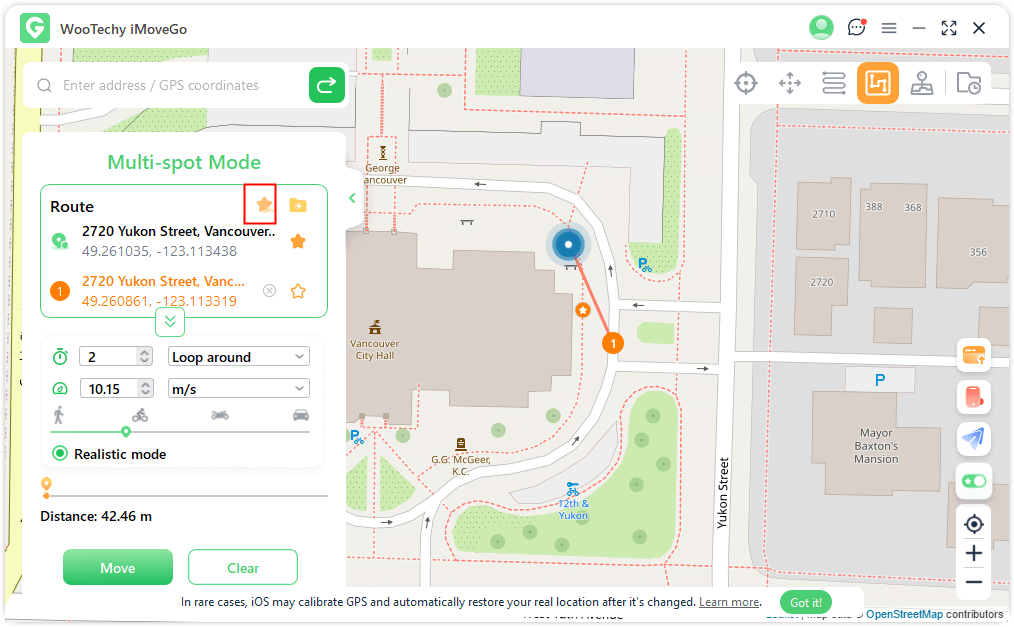
Feature 5: Collect Route
Click the "Star" icon after planning a route in Multi-Spot Mode or Two-Spot Mode. The route will be stored in the "Saved Routes" panel.
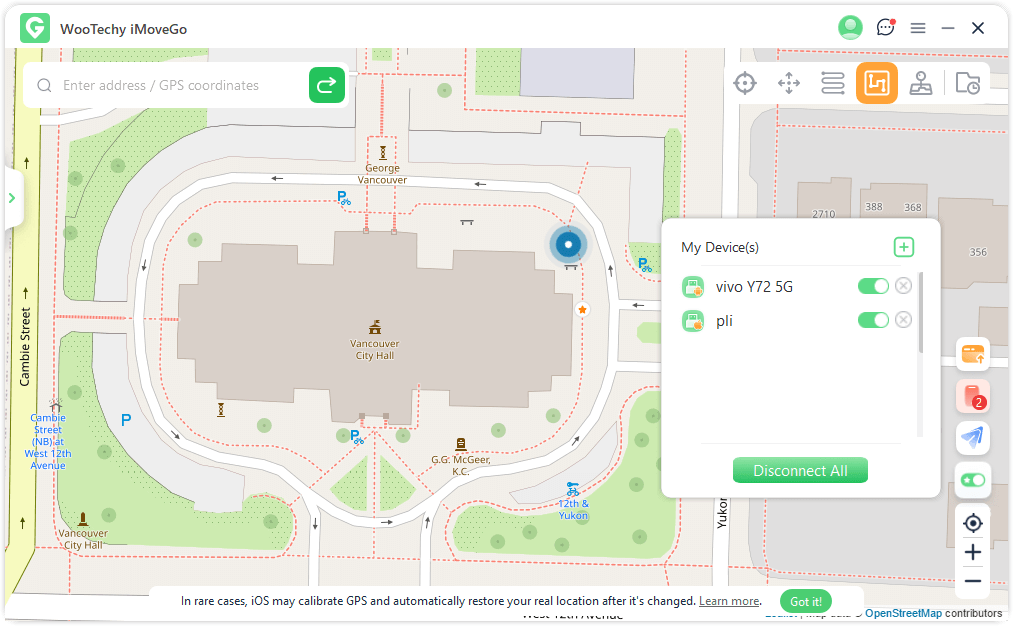
Feature 6: Supports 10 Android & iOS Devices
WooTechy iMoveGo allows you to change GPS locations on up to 10 iOS and Android devices simultaneously.
Click on the "phone" icon on the right. Then it will show the connected device. Click the "+" sign (upper right corner) to add a device.
Select the Android/iOS device to change its location.
Once trusted, you can disconnect individual devices or all at once using "Disconnect All."
Feature 7: Fluctuation Mode
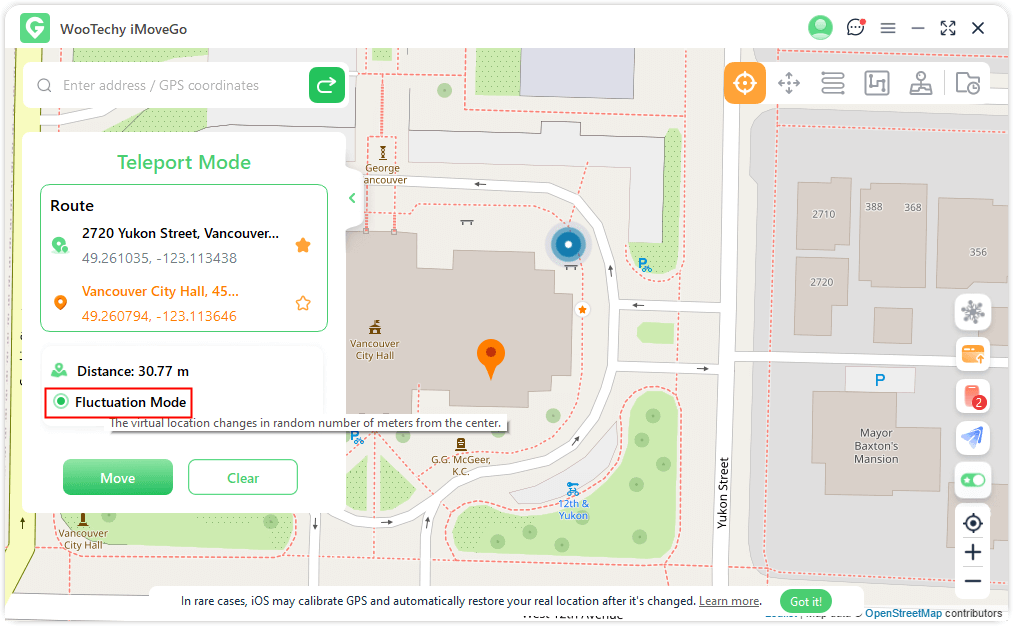
When using Teleport Mode, enabling Fluctuation Mode adds a slight random movement (a few meters back and forth) to avoid detection and enhance realism.
Feature 8: Cooling Timer Function
Enable the cooldown timer in the PoGo toolbar.
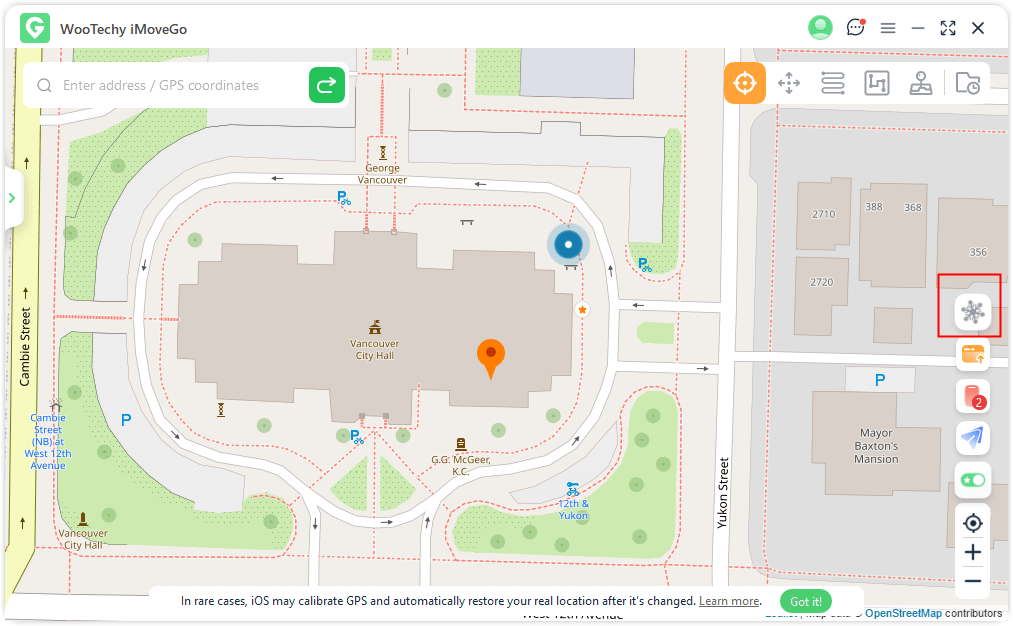
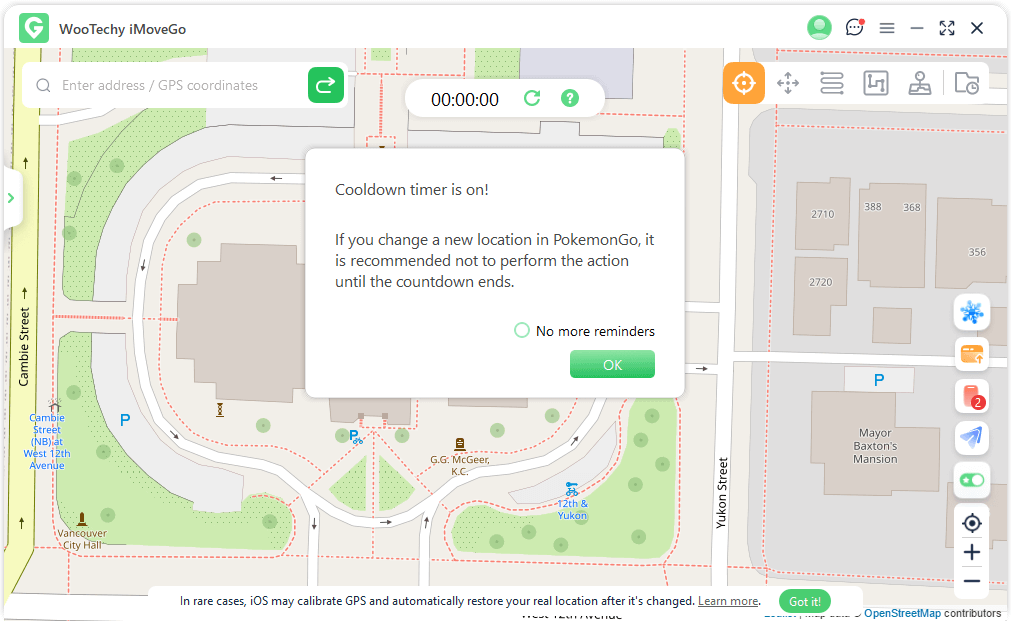
After selecting a location, the timer will calculate the required cooldown time based on distance. To avoid in-game penalties like softban, it's best not to perform other actions until the countdown finishes.
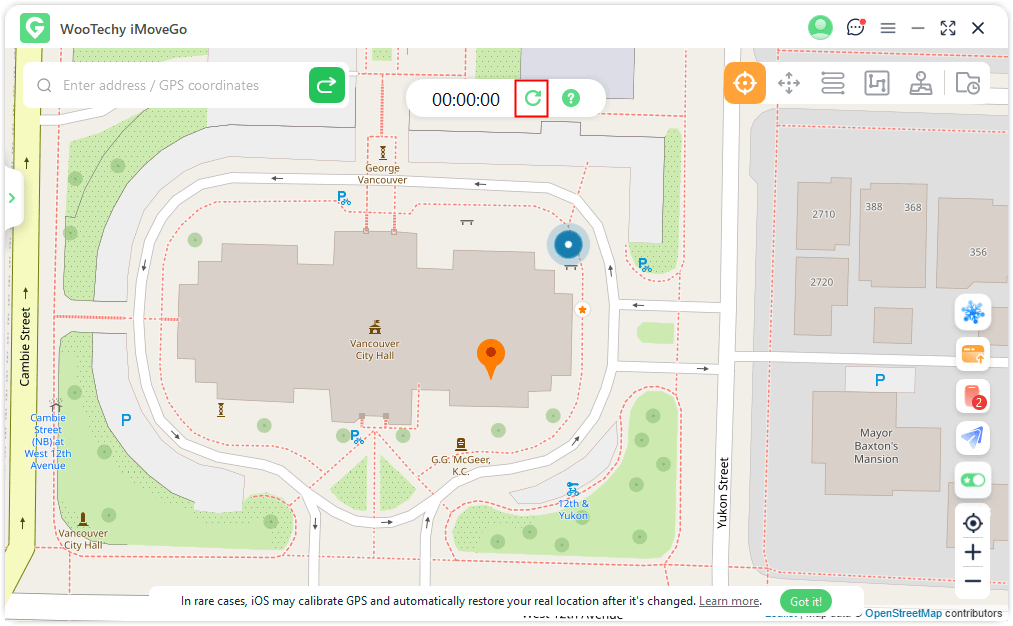
Click Reset, the countdown will be cleared, and the countdown will recalculate the time when you modify the positioning next time.
Learn More: Pokémon Go Cooldown Chart to Avoid Soft Ban
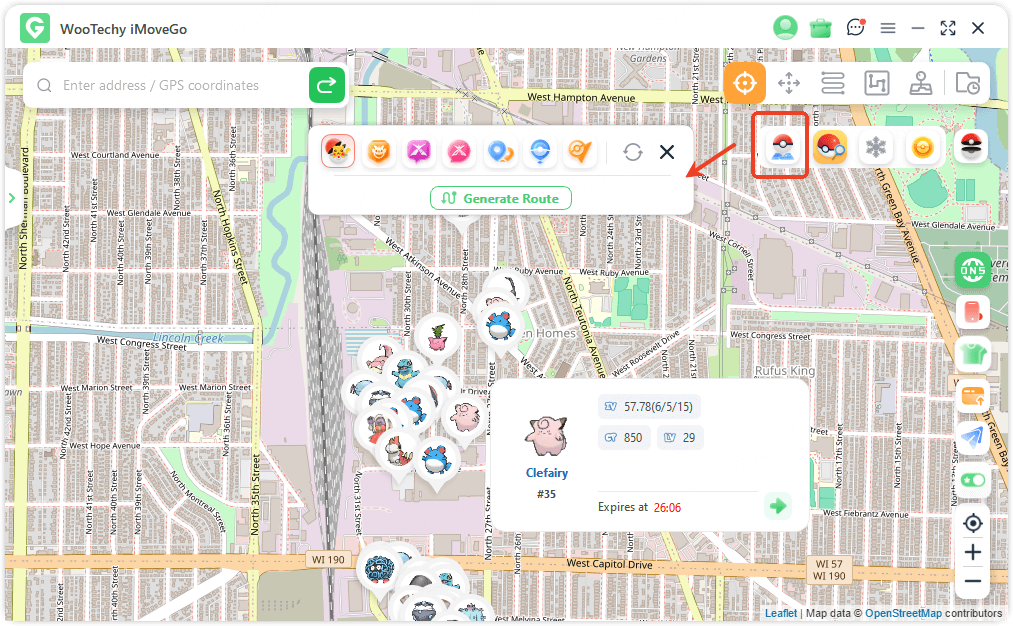
Feature 9: PoGo Map Atlas
WooTechy iMoveGo lets you explore Pokémons、Raids、G-Max、D-Max、Routes、Pokéstops、and Gyms near your current location with ease. Simply select the data you want and tap Go to move to your chosen point. You can then simulate movement to:
- Catch Pokémon in different locations.
- Participate in Raid Battles, Super Mega Battles, and Mega Battles.
- Complete Quest Routes.
- Collect items at PokéStops.
- Battle at Gyms.
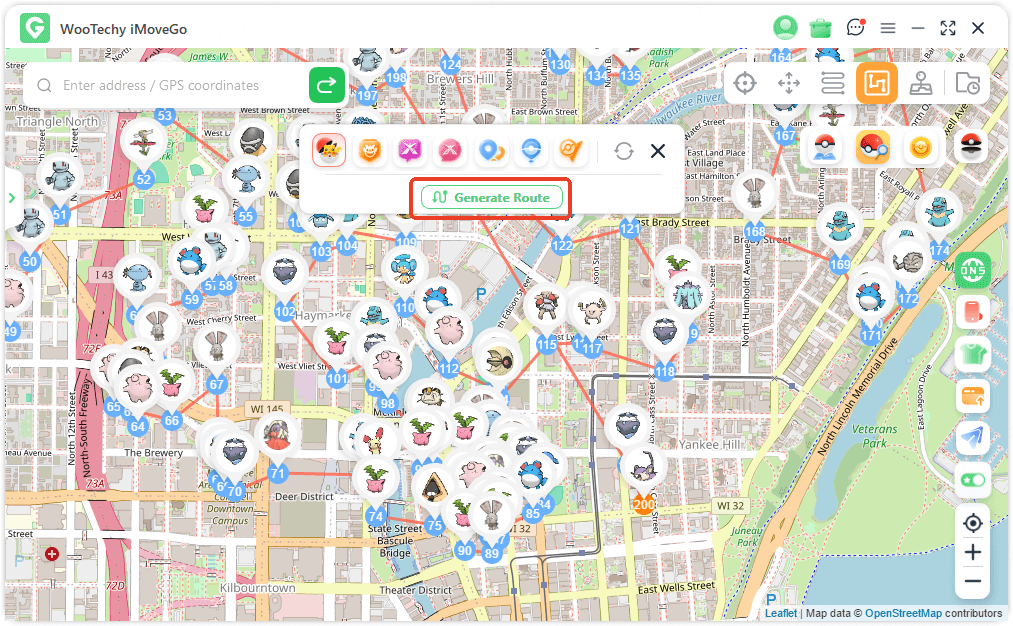
With the one-click route generation feature (excluding Quest Routes), you can automatically create a travel path and pause movement at any time.
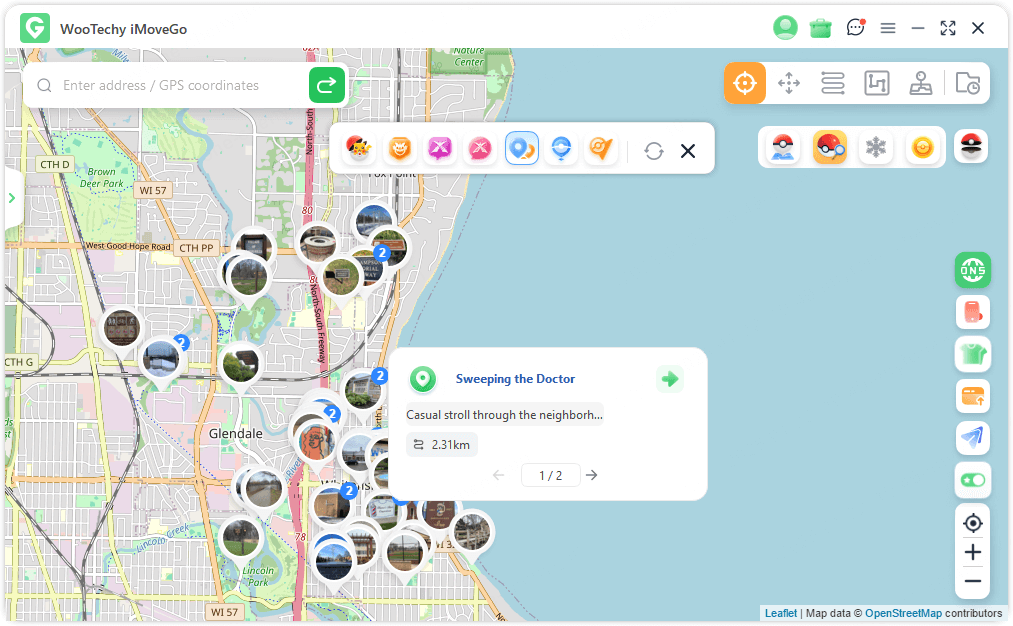
Enable the Route function to view available paths near your location. Hover over a route for more details, then click Go to start your simulated journey.
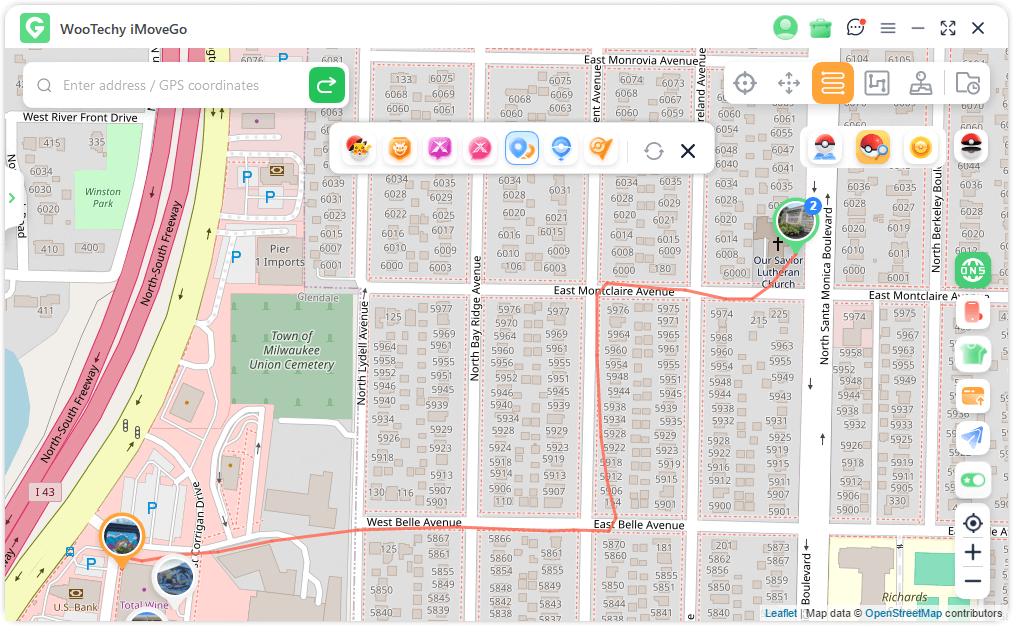
Your in-game route progress syncs with Pokémon GO, allowing you to earn Route Badges and other rewards. You may even encounter special Pokémon along the way!
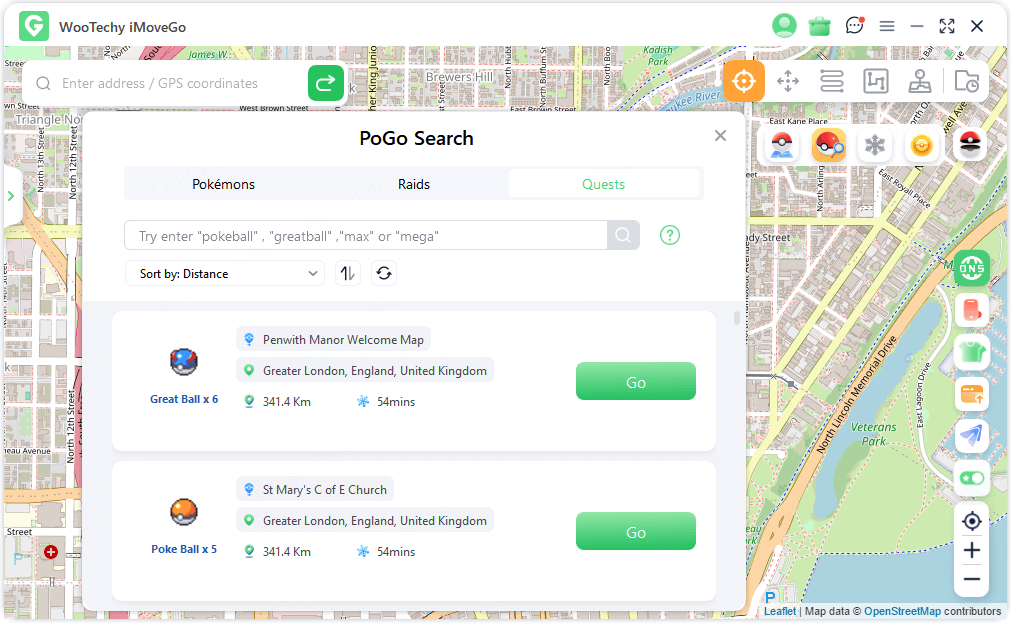
Feature 10: PoGo Search
1. Explore Nearby Pokémon, Raids, and Quests: In PoGo Tools, select PoGo Search to view data for Pokémon, Raids, and Field Research Quests near your current location. Travel to the coordinates to:
- Capture a Pokémon.
- Join Raids.
- Complete Field Research Quests and earn great rewards.
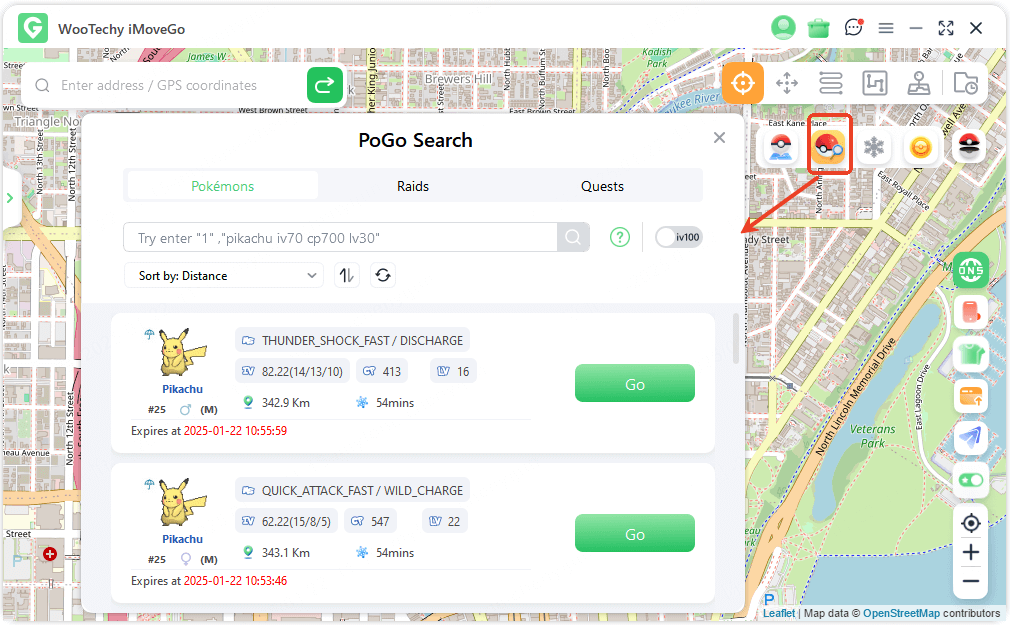
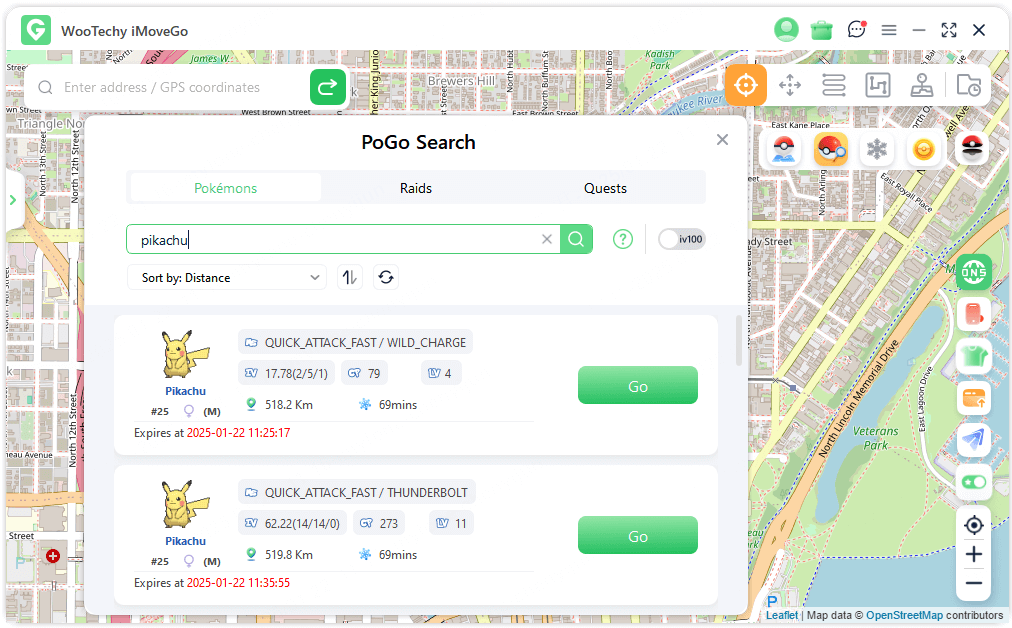
2. Locate Specific Pokémon: Type the Pokémon name (e.g., Pikachu) or Pokémon number into the Pokémons list for fast access to its data. When you find your target, simply tap the Go button to catch it!
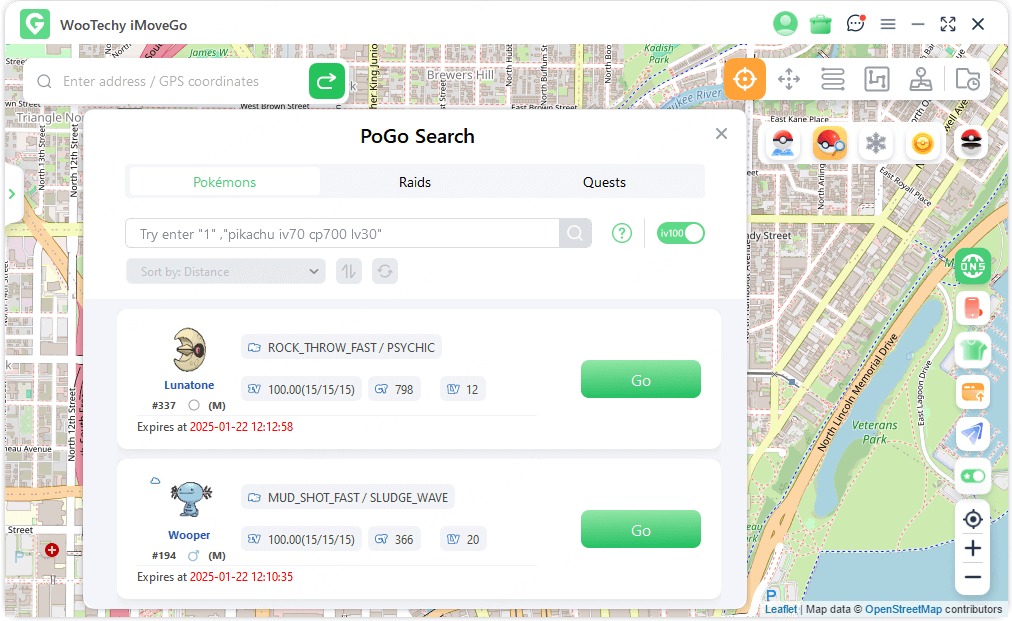
Tips: Want to find the latest IV100 Pokémon? Enable the IV100 switch, and you'll get real-time data on their locations!
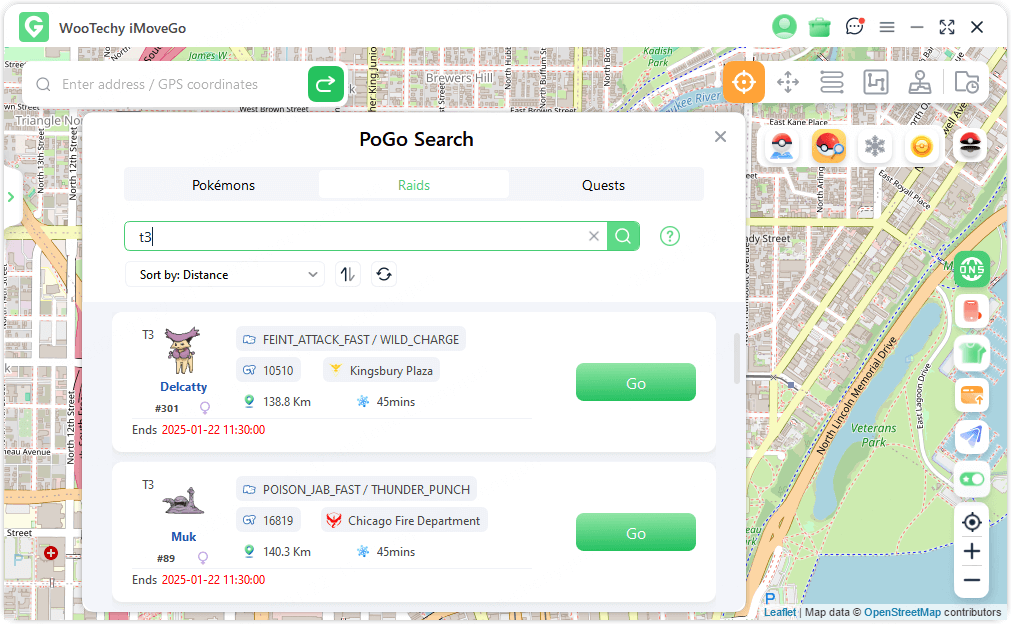
3. Search for Raids by Battle Level: Use the Raids list to filter by group battle level (e.g., T1, T3, T5) and find available Raids. Once you find the desired Raid, click the Go button to join the group battle.
4. Global Search for Specific Quests: 3.In the Quests list, enter the name of an item (e.g., Super Potion) to find the location of related bonus quests. Click the Go button to navigate to the coordinates. Once there, spin the Supply Depot dial to receive a Field Research Quest.
Open the telescope icon at the bottom-right of the game to view quest details, follow the instructions, and collect your rewards.
Tip: Tap the question mark button for additional Pokemon search tips and tricks!
