User Guide of iMoveGo iOS App
- WooTechy iMoveGo iOS App User Guide
- WooTechy iMoveGo Android App User Guide
- WooTechy iMoveGo PC User Guide (iOS System)
- WooTechy iMoveGo PC User Guide (Android System)
Depending on your operating system, you can choose:
Pre-installation Instructions
Note 1:Direct installation on iPhone is not available
iMoveGo iOS app cannot be directly installed on your iPhone. You need to install the iMoveGo Assistant program on your computer first, which will then help you install the iMoveGo iOS app on your iPhone. Then, you can change your location on iPhone without a PC.
Note 2:System Requirements
- iMoveGo iOS Assistant for Win: Windows 7 - Windows 11
- iMoveGo iOS Assistant for Mac: Mac OS 10.15 - Mac OS 15
- iMoveGo iOS App: iOS 14 - iOS 16.X; iOS 17.4 and above
Part 1. Install the iMoveGo iOS App
Step 1: Click on the link below according to your system to download the iMoveGo iOS Assistant on your computer.
Step 2: Launch the iMoveGo iOS Assistant on your computer and log in with your Apple ID.
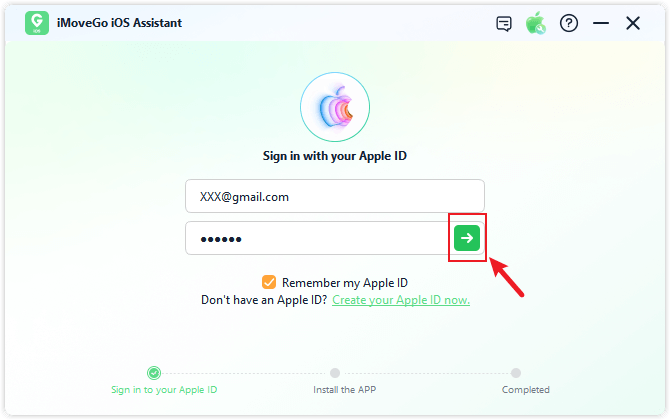
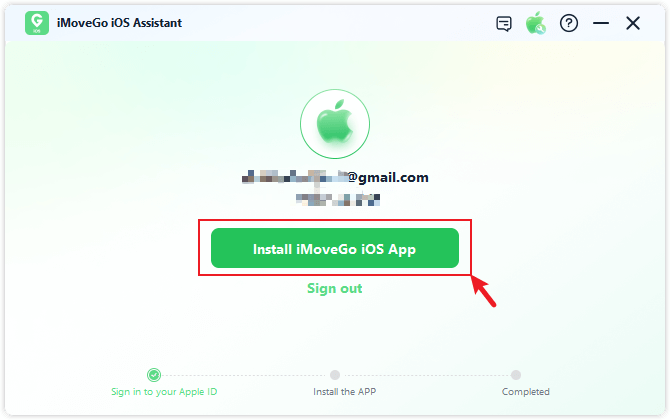
Step 3: Connect your iOS device to the computer using a USB cable, and click "Trust" on your iPhone to trust the computer. Once connected, click the "Install iMoveGo iOS App" button.
Note:
- Devices running iOS 17 and above need to enable Developer Mode on the iPhone following the prompts.
- Windows users might need to install Apple driver. Mac users might need to enter the computer password to grant permission.
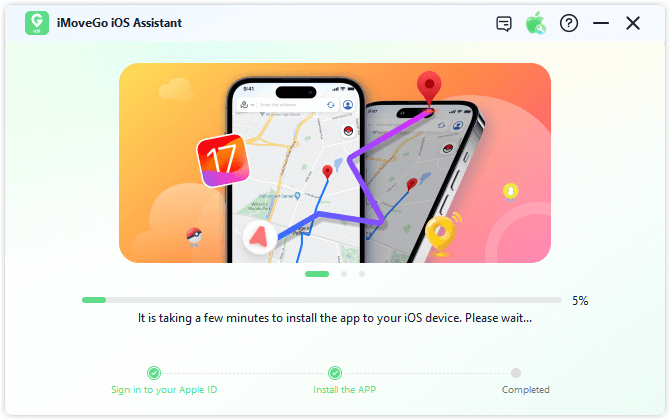
Step 4: Wait for the iMoveGo iOS app to install on your device. Ensure a stable connection between your device and the network during the installation.
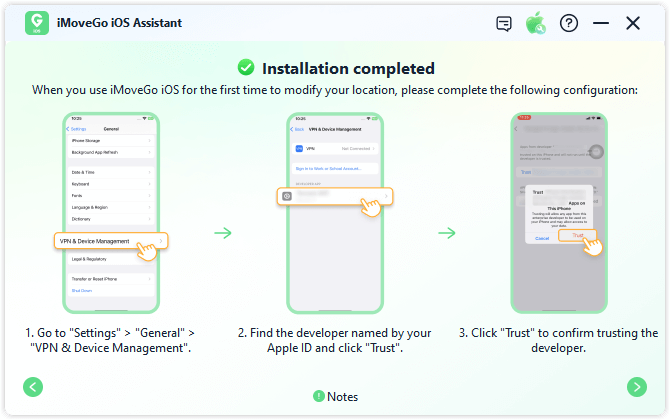
Step 5: Once the iMoveGo iOS app is successfully installed, follow the on-screen instructions to trust the app. Go to "Settings" > "General" > "VPN & Device Management," find the developer named after your Apple ID, and click "Trust."
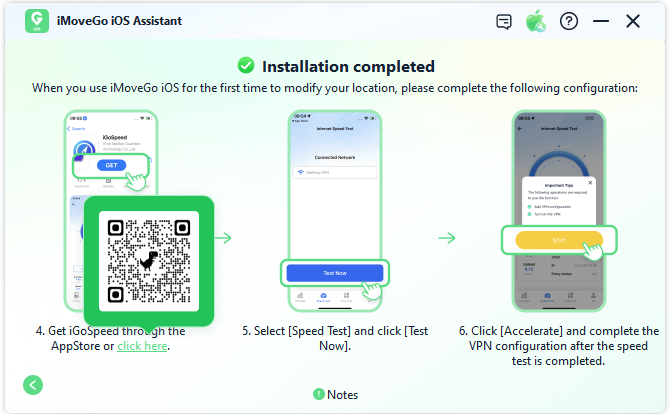
Part 2. Configure VPN with iGoSpeed App
Step 1: Scan the QR code or install the iGoSpeed app from the App Store. Then, select "Speed Test" and click "Test Now."
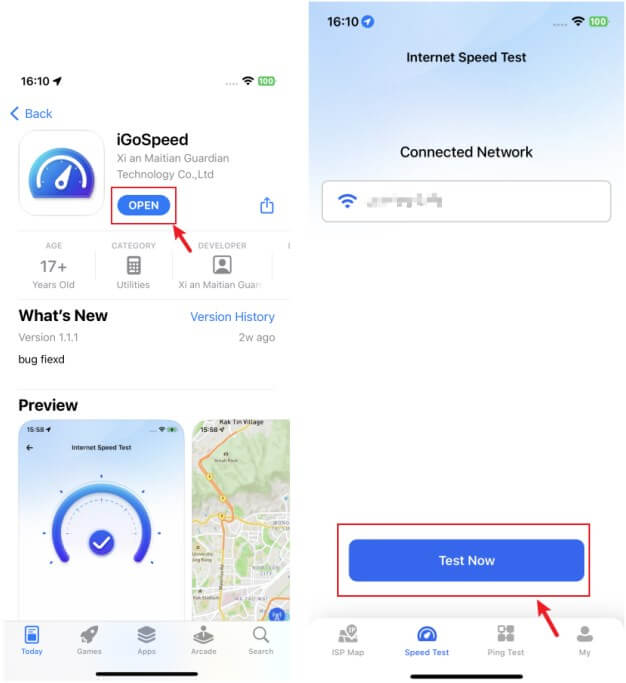
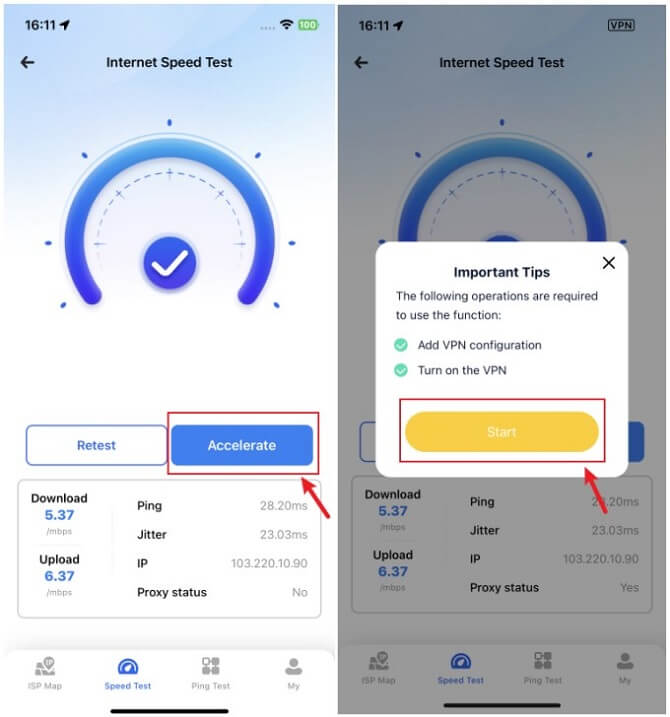
Step 2: After the speed test, select "Boost" and complete the VPN configuration.
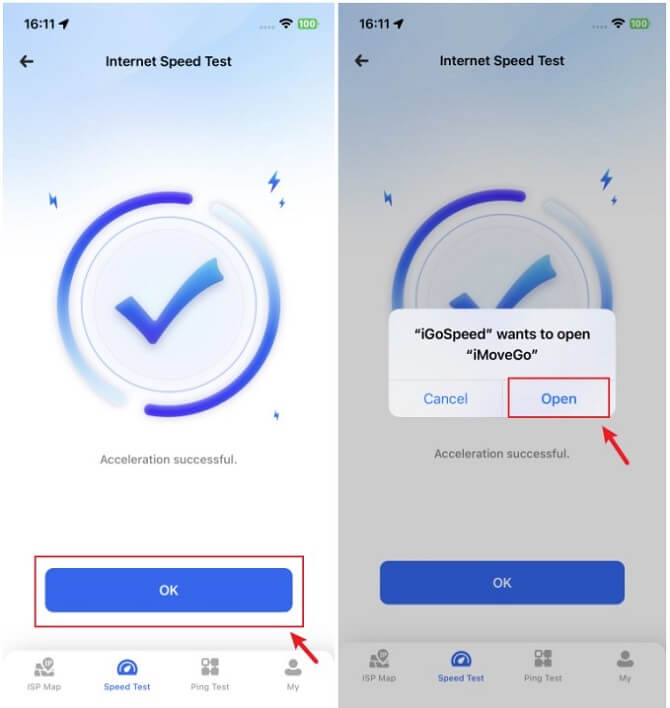
Step 3: Wait patiently. Once the boost is complete, the iMoveGo iOS app will automatically launch.
Part 3. Change Location with the iMoveGo App
Step 1: Install the Profile
1. Open the iMoveGo iOS app, select your preferred method of changing location, and click "Move."
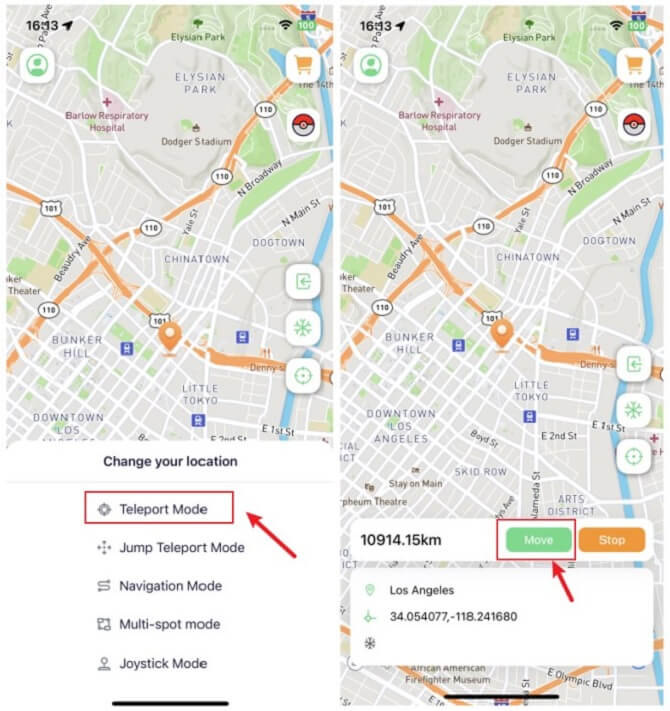
2. Follow the instructions to click the "Download Profile" button.
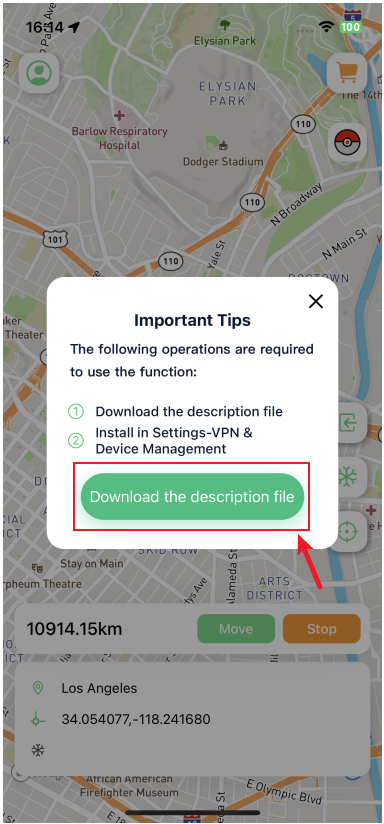
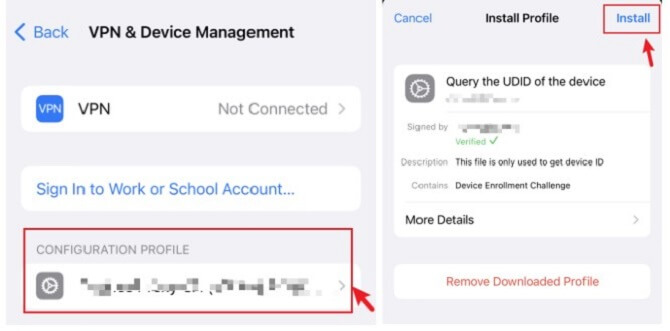
3. Go to iPhone Settings > General > VPN & Device Management > find the downloaded profile > click "Install." After installation, you will automatically return to the iMoveGo iOS app.
Step 2: Change Location
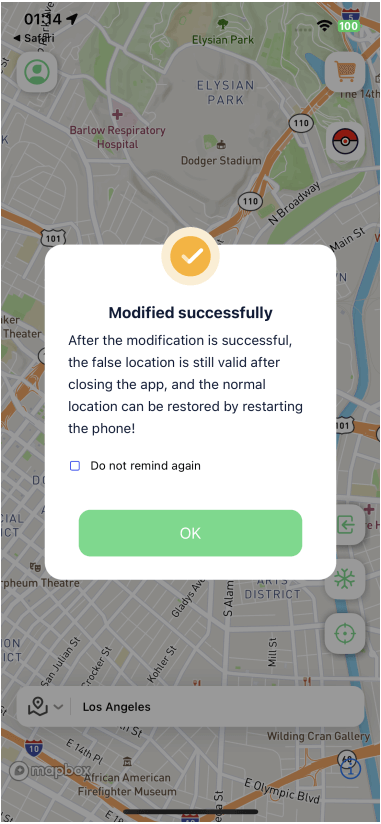
Choose your desired method of changing location, click "Move" and your location will be modified accordingly.

Now, your location has been modified successfully.
Important Notes:
- The iMoveGo iOS app is valid for 7 days. To ensure uninterrupted use, reinstall the app before it expires.
- You can check the remaining validity of the app through "Personal Center" > "Expiration Date."


