User Guide Of SoundBot
SoundBot is a powerful AI voice changer, designed for gamers, streamers, podcasters, and content creators. This guide will help you master SoundBot with ease, letting you enjoy the fun of voice changing!
Part 1. Quick Setup
Step 1 Download and Install SoundBot
Download WooTechy SoundBot. Follow the installation prompts to complete the setup.
Step 2 Initial Device Configuration
Launch WooTechy SoundBot. The software will automatically detect your microphone and speakers/headphones. Use the dropdown menu to select the appropriate devices. For instance:
1. Set your headphones as the output device.
2. Set your real microphone as the input device.

Click “Continue” > “Finish All” to complete the setup. You’re now ready to start changing your voice on PC.

If your microphone is not detected, click “Can’t get to the next step?” for troubleshooting tips (e.g., checking connections and permissions).

Part 2. Real-Time Voice Changing
Step 1 Choose Voice Effect
In the VoiceBox section of the WooTechy SoundBot interface, you can browse and preview a variety of voice filters, including male and female voices, popular character voices, , robotic tones, game voices, feature voices, and more.

Step 2 Start Changing Your Voice
Click a voice effect to activate it. Speak into your microphone—your voice will instantly transform in real time.

Step 3 Set Up Shortcut Keys (Optional)
WooTechy SoundBot supports customizable keybindings for quick voice switching. Click “Add Keybind” and press your desired shortcut key (e.g., Shift + Q). Release the key to confirm.
You can edit, delete, or change shortcuts anytime.

Step 4 Use SoundBot on Different Platforms
WooTechy SoundBot is perfect for online chatting, gaming, live meetings, and more, seamlessly integrating with most of platforms like Fortnite, PUBG, Discord, Skype, Twitch, etc. To use SoundBot for real-time voice changes on these platforms, simply follow these steps.
(Example: Discord)
- Open Discord and go to Settings > Voice & Video.
- Under Input Device, select Microphone (Voice Changer Virtual Audio Device WDM).
- Now, your real-time voice changes will be heard by others.

For other platforms, follow a similar process by selecting SoundBot’s virtual microphone as the input device.
Part 3. Sound Effects (Soundboard)
Step 1 Apply Sound Effects
Navigate to SoundBoard > Sounds, where you’ll find over 1,000 sound effects, including Super Mario, Christmas sounds, trending effects, and more. Simply click an icon to use or switch between different effects.

Step 2 Upload Custom Sound Effects (Optional)
Want more sound effects or personalized ones? Head to SoundBoard and upload your own custom sounds.
Just like real-time voice changes, sound effects can be switched instantly using shortcuts and applied across different platforms in real time.

Part 4. Create Voice
This module includes 2 functions: Voice Training and Voice Studio.
Mode 1 Voice Training
Click "Voice Training" to create any sound you want. This feature offers three modes: Quick Training Mode, Advanced Training Mode, and Voice Customization. Select one based on your needs or preference.

Simply upload the corresponding audio file, and SoundBot will generate a voice model after a short training period. Once it's ready, you can start using your custom voice.
You can also provide feedback to WooTechy for further improvements, and we will refine the model based on your input.

Mode 2Voice Studio
In Voice Studio, you can fine-tune your voice and save the adjusted sound as a preset. The real-time voice-changing function also allows for customized voice modulation during use.

Part 5. Record Mode
Record Mode offers 2 options: Record Voice Changing and Audio Voice Changing. Once the voice change is complete, you can play, download, or delete the modified audio.
Mode 1 Record Voice Changing
Go to [Record Mode] > [Record]. Click [Start Recording] to begin. When finished, click the button again to stop recording. For the best voice-changing results, keep the recording between 3 to 60 mins.

Next, click [Select a Voice] to choose your desired target voice, then click [Change Voice Now] to apply the transformation.

Mode 2 Audio Voice Changing
Click [Upload] to choose an audio file. In the pop-up window, select the file you want to modify (MP3, WAV, and OGG formats are supported).

Once the file is uploaded, click [Select a Voice] to choose your target voice, then click [Change Voice Now] to apply the changes.

Part 6. FAQs About SoundBot
If SoundBot voice changer doesn't work, here are ways to troubleshoot the problems.
Problem 1: Sound Issues on SoundBot
For No Sound: Check SoundBot Settings, click the drop-down button and check the microphone and headphone device you are using.
For Low Sound: Increase the microphone and headphones volume bar.
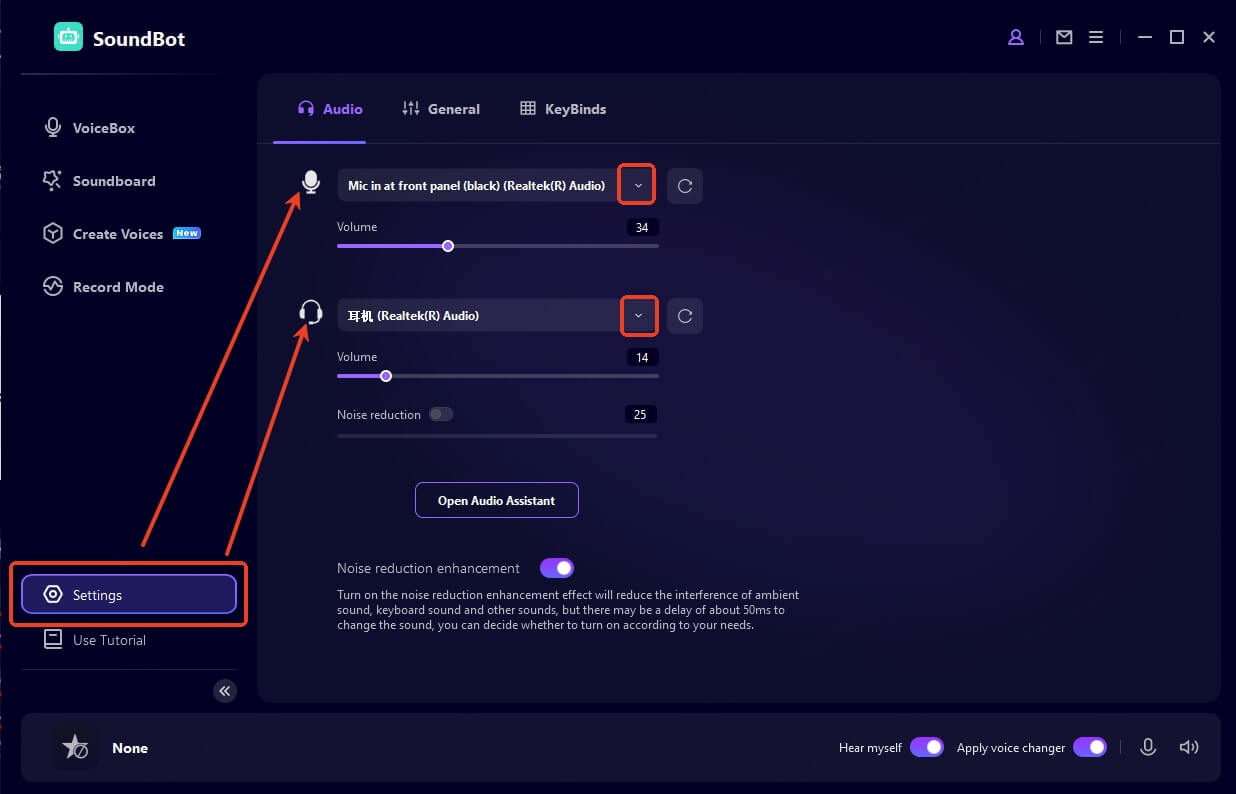
If there is no sound when you speak, make sure Mircrophone button and Hear myself button are turned on.

If the noise and echo are very strong, turn on the Noise reduction button in the Speaker button and increase the noise reduction level.
If the voice changer effects don’t work, turn on the Apply voice changer button.
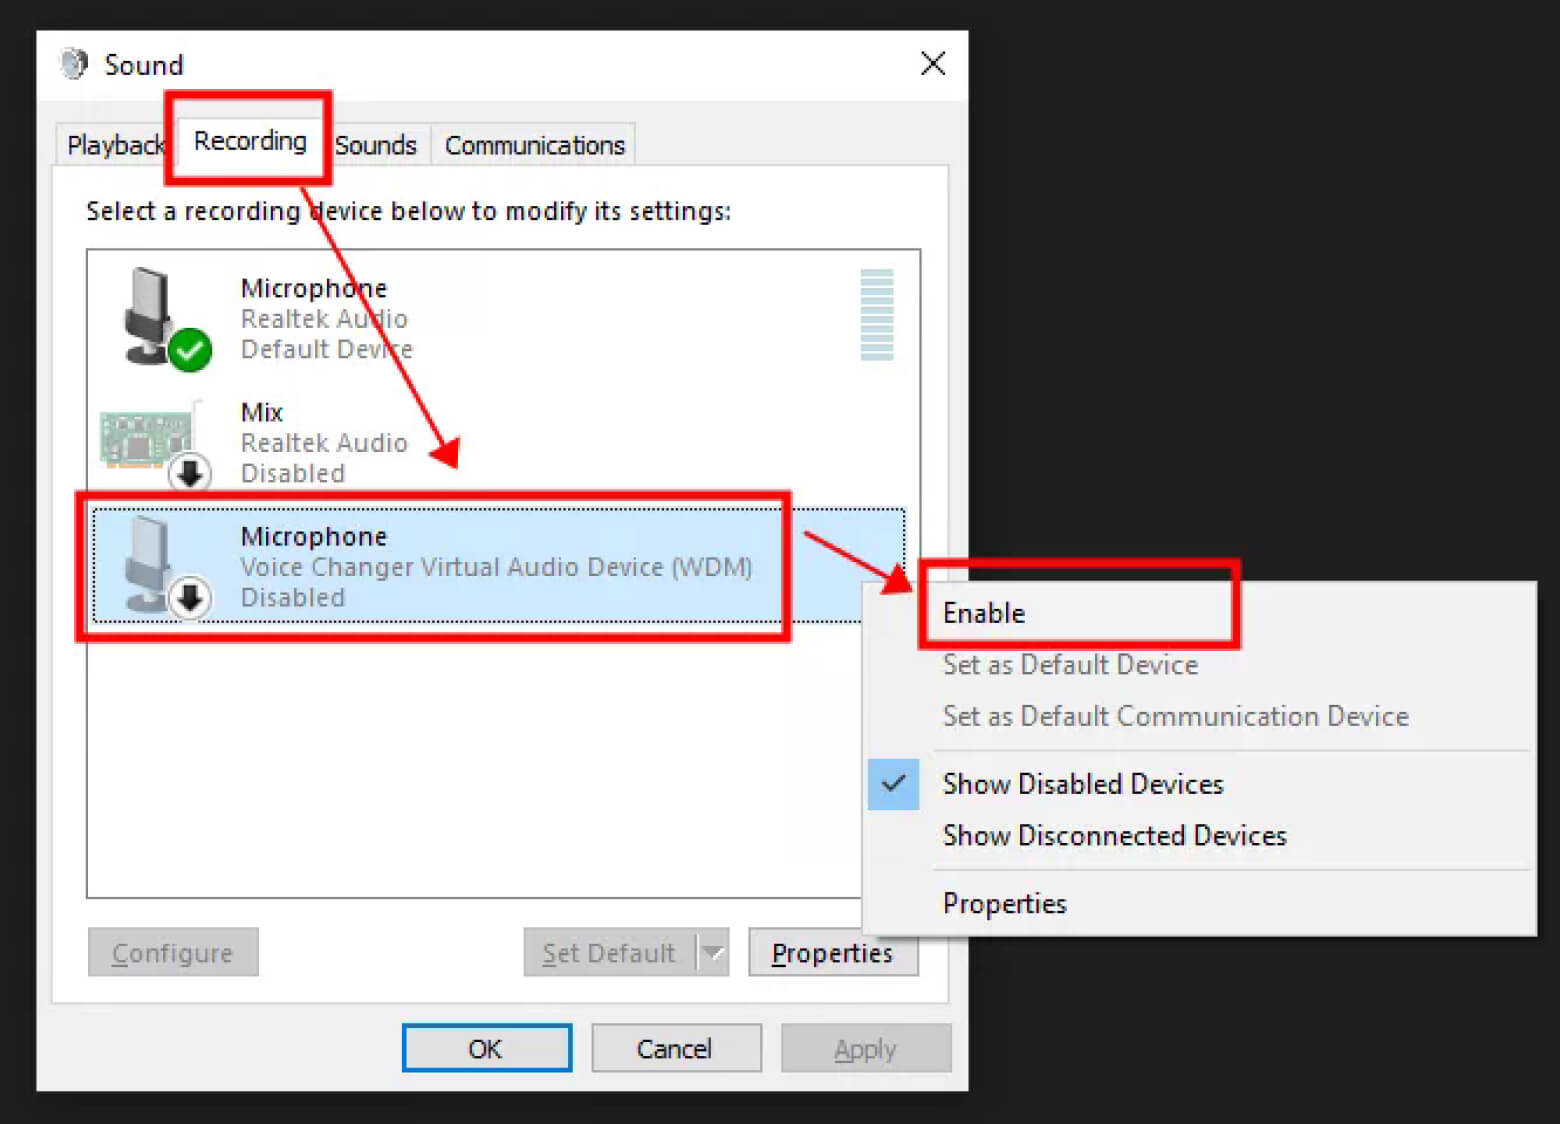
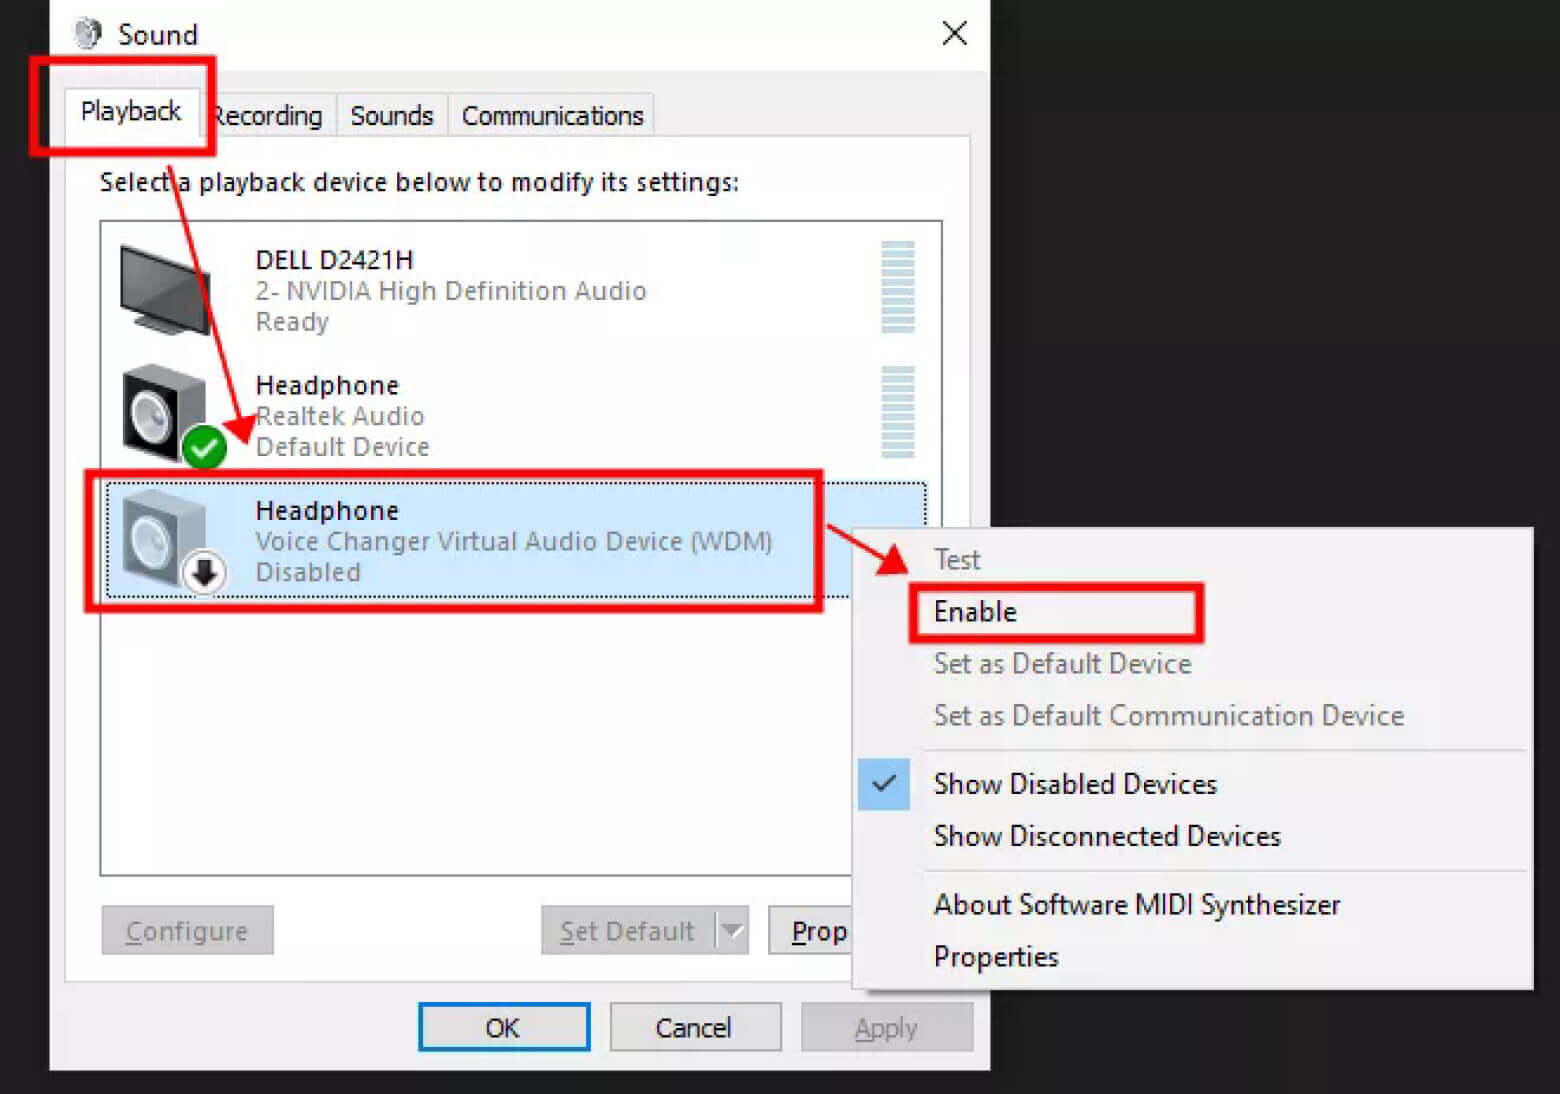
Problem 2: Microphone or Headphones Can’t Be Detected
On your computer, go to Control Panel > Hardware and Sound > Sound. Make sure your Microphone (on Recording option) and Headphones (on Playback option) are enabled.